Showing posts with label greeting cards. Show all posts

Wednesday, 13 September 2017

Simple Cards with Beautiful Papers

Make some super simple greeting cards using beautiful papers.
Make Simple cards with  Beautiful papers
I love making handmade greeting cards for family & friends. Sometimes I spend ages thinking about creating layers, textures, finding just the right embellishments from my stash, but sometimes it's nice to keep things really simple.
The other day I had a card making session and made some really simple cards which I think show off some beautiful papers to the max. I had a selection of lovely papers that had come in some recent Mollie Makes magazines and wanted to put them to good use.
The papers I used were from these designers:
The Printed Peanut
Mia Dunton Illustration
Jess Phoenix
Chloe Hall
I pulled them all out so I'm not entirely sure who did which design now - they are all lovely though! 

Because the papers are so gorgeous I just added a sentiment (I either print them on the computer or rescue them from old cards) and a button/thread or two. That was all I felt they needed, sometimes simple is better. 
Simple cards with  Beautiful papers
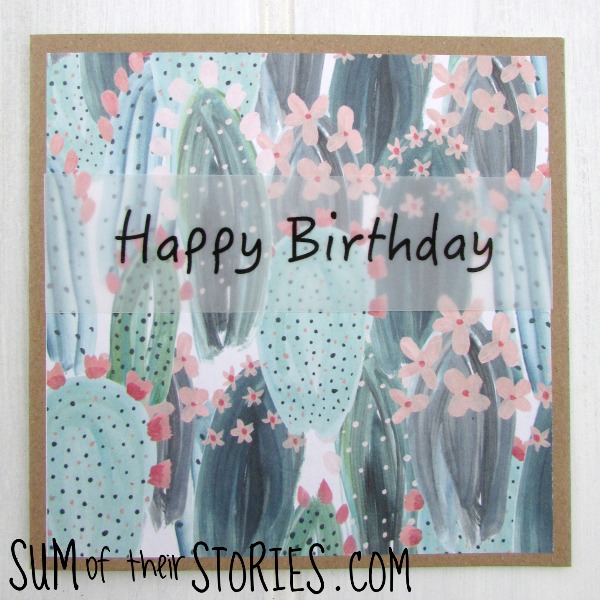
This one has a greeting printed onto velum which just tucks round the paper before being stuck down.

Simple cards with  Beautiful papers
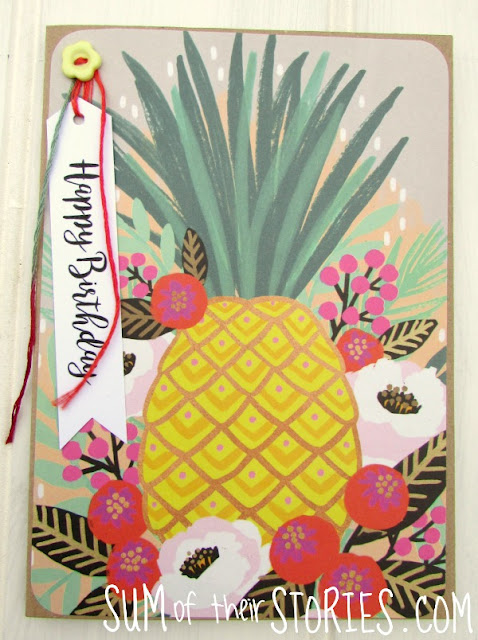
Here I've used a pretty flower button (also a Mollie Makes freebie) and some embroidery thread.

Simple cards with  Beautiful papers
Super easy, this "Thank you" was cut from an old card I'd received.

Simple cards with  Beautiful papers
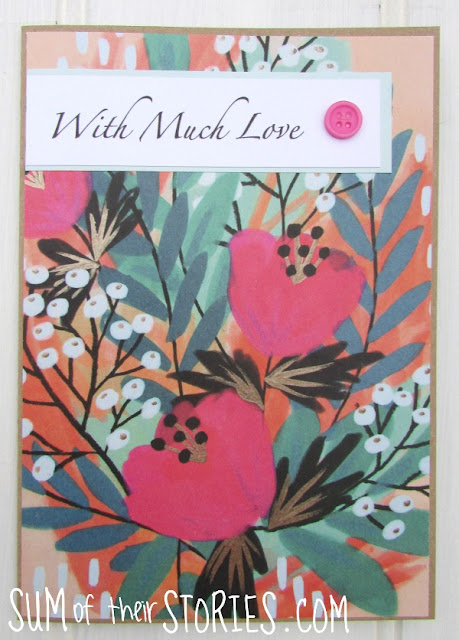
Not much needed on these beautiful papers, just a message and a button!

Simple cards with  Beautiful papers
Ooo, I went a bit mad here and added a message, button AND thread! 

Simple cards with  Beautiful papers
There's a little but of glitter round this greeting, just to mix things up a bit.

Simple cards with  Beautiful papers
This paper is too cute to need anything else!

Simple cards with  Beautiful papers
Here I used the leftover bits of paper just to make sure I wasted nothing.

Simple cards with  Beautiful papers
This sentiment is another one which came from an old card, with thread and a button it's dangling down. 
Simple cards with  Beautiful papers
Here's another with a dangly sentiment, button and thread.
You could use gorgeous scrapbook papers or good quality wrapping papers (cheap thin stuff just doesn't work) I used Pritt Stick glue to stick down the papers and Anita's Tacky Glue to secure the buttons.

Shop this post:(these are affiliate links so if you do click through and make a purchase the cost to you is the same but Sum of their Stories receives a small commission payment) 


Hopefully you've enjoyed looking through these simple card ideas to use any beautiful papers you might have knocking around waiting to fulfil there destiny to be used to make something lovely! 

read more

Wednesday, 2 August 2017

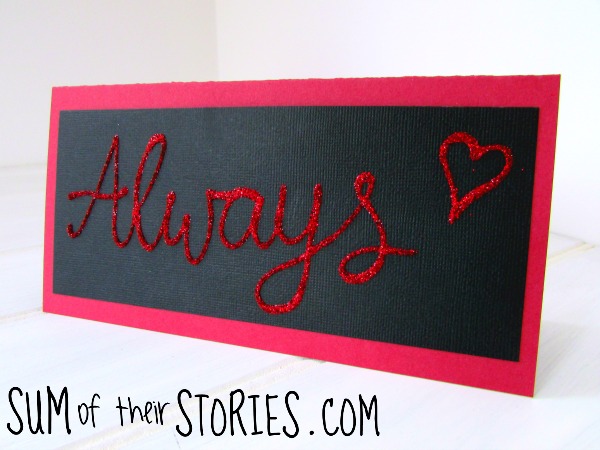
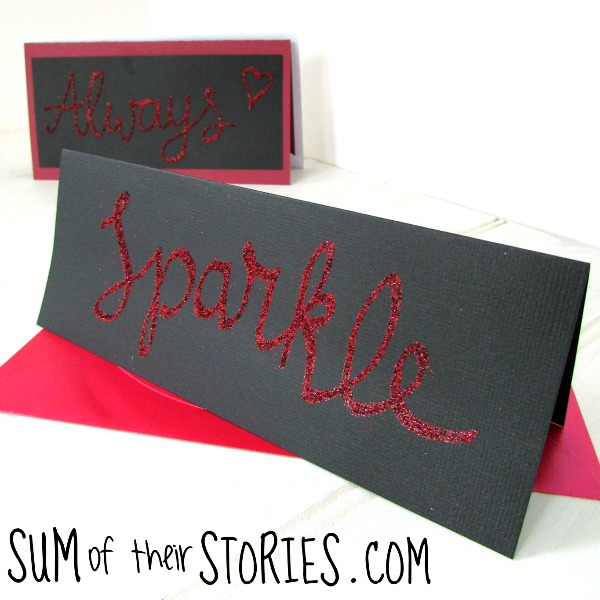
Glitter Hand Lettered Greetings

Make easy sparkly greeting cards for family & friends with simple hand lettering.
Glitter Hand lettered Greeting Cards
This post contains a review of products I received free of charge and contains my honest review.

As I've mentioned before, back in July when I attended the Stitching, Sewing & Hobbycrafts Show and the bloggers workshop I was given a goody bag with some lovely crafty goodies in it.
Tonic Studios products
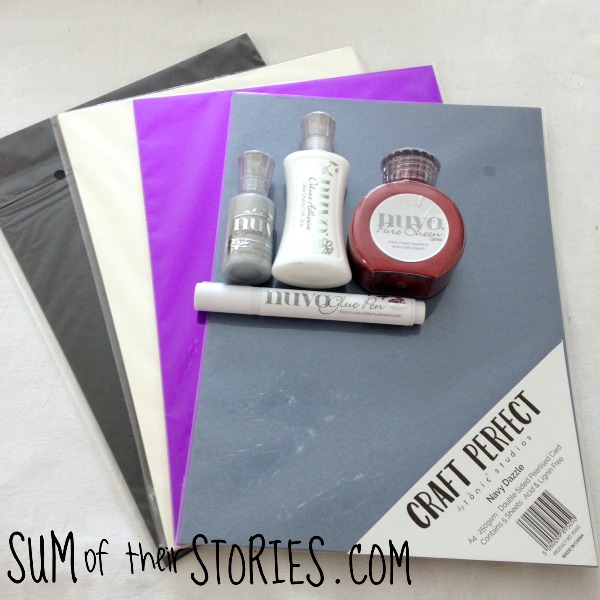
In the bag was a great selection of products from Tonic Studios, several packs of cards, glitter, glues and Crystal Drops.
Jewel Tonic Studio product lids
First can we just talk about how pretty these products are? The lids are jewels - isn't that lovely? I think they would make great gifts for a craft loving friend.
I've been practicing hand letter again recently, not anywhere near as much as I should but still, practice makes progress. So I thought it might be fun to try making some simple hand lettered greeting cards.

The NUVO Deluxe Adhesive glue and the NUVO Crystal Drops both have a fine nozzle so it was fairly easy to just write with them.
  • Write a word lightly in pencil on the Craft Perfect Jet Black card and then go over it with the NUVO Deluxe Adhesive.
  • Sprinkle liberally with the NUVO Pure Sheen Glitter and then tap the excess away onto scrap paper.
Glitter Hand lettered Greeting Cards
The spare glitter can be tipped back into the pot ready to use again.
The glue needs 24 hours to dry throughly then it can be mounted onto a card blank.
Glitter Hand lettered Greeting Cards
The glitter sheds a little bit once the glue is dry but not too much at all. 

As my hand letter is still quite beginner-y I tried using a lovely font printed on the computer next.
I printed a selection of words in Bromello font (downloaded from DaFont) at font size 100.
  • Lay the printed word over a piece of Craft Perfect Electric Purple High Gloss card, positioning it centrally.
  • Trace over the word with pencil, pressing quite hard.
  • You'll be left with an indent which is fairly easy to see on the shiny surface. Easier to see in real life than on these photographs that's for sure!
  • Go over the word with the NUVO Crystal Drops and then set aside to dry for 24 hours.
Glitter Hand lettered Greeting Cards

I also had a NUVO Glue Pen in my goody bag and as it has a chisel nib I thought it might work for hand lettering too.
Glitter Hand lettered Greeting Cards
I made this card in exactly the same way as the ones using other adhesive glue. It's easier to write with the glue pen but the glitter sheds from this one A LOT more. Picture that trail of glitter everywhere....
The glue pen was perfect for mounting the card to the card blanks. I think I'll keep it for that from now on.

Lastly I tried using a cute hello stamp from papermania. I stamped it onto patterned paper, went over the stamped image with the NUVO Deluxe Adhesive then sprinkled then with glitter as before.
Glitter Hand lettered Greeting Cards
Glitter Hand lettered Greeting Card
So in summary, these products are high quality and the packaging is lovely.
Glitter in a loose format like this does end up spreading itself around the house, that's just how it is! The Deluxe Adhesive holds it in place pretty well though.
The Crystal Drop product is meant for making tiny little jewel like drops on papercraft projects. This means when you write with it, the letters have a lovely depth to them. They really stand up from the card. I'm not sure if the photos here really show that off properly, or if they show just how glittery the glitter is. I did a little video on Instagram to try to show that shimmer.
Glitter Hand lettered Greeting Cards
You don't have to just use this idea for cards either. I used the 'thank you' on black card with the adhesive and glitter as a postcard and just wrote a message on the back. It might be nice to make gift tags too or even write straight onto gift wrap with the adhesive or crystal drop. Just allow time for it to dry before handing it over! 

read more

Wednesday, 19 July 2017

Block Craft Printed Cards

It's simple and fun to make an assortment of greeting cards using carved wooden printing blocks.
using block craft blocks to make greeting cards
This post is a review of products I received free of charge and contains my honest review.
A few weeks ago, I talked about the bloggers workshop I attended at the Stitching, Sewing and Hobbycraft Show at the NEC Birmingham. I mentioned the fab goody bag we bloggers were given and how many exciting goodies were in there. 
The lovely people at The Arty Craft Place had popped a wooden block printing starter kit into the goody bag. It contained a flower (or is it a sun?) carved wooden block, orange fabric paint, a piece of cotton fabric to practice on, a sponge, a foam mat and instructions.
Block craft starter kit
Well, I've been playing and today I have a few fun greeting cards ideas to share that I been able to make.
I tried the block printing on the fabric and onto card (the folks at the Arty Crafty Place say it works on either) I used textured card as well as smooth, which gave some interesting results.
I think I like the results on the fabric best, it was really easy to get a good print every time.
block craft printing
To make it washable you just iron it on the reverse, which I did do even though of course I'm not expecting anyone to wash these cards!  
The instruction advise you to always use the foam mat under whatever you are printing on. I found when I printed onto card the first time I pressed too hard and the card creased a little. So I tried without the foam.
No - don't do that! Just don't press too hard and the wooden blocks actually print beautifully. 
The prints onto the textured card were a little mottled as I would expect, I kind of like that look.

I trimmed the prints on the card and turned them into a selection of simple cards, just by stamping a greeting on some and mounting them using foam pads onto mini card blanks.
Block Craft Printed Cards
I experimented a bit with embellishing onto the prints, one with a few dots and doodles:
printed card with doodle
And one with some sequins, which I just glued on with PVA tacky glue:
print with sequins

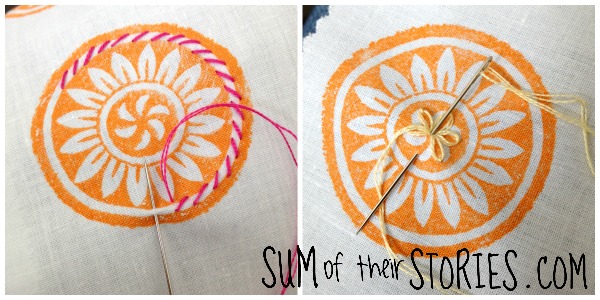
After that I thought it might be fun to add some embroidery embellishment to the fabric prints.
embroidering onto prints
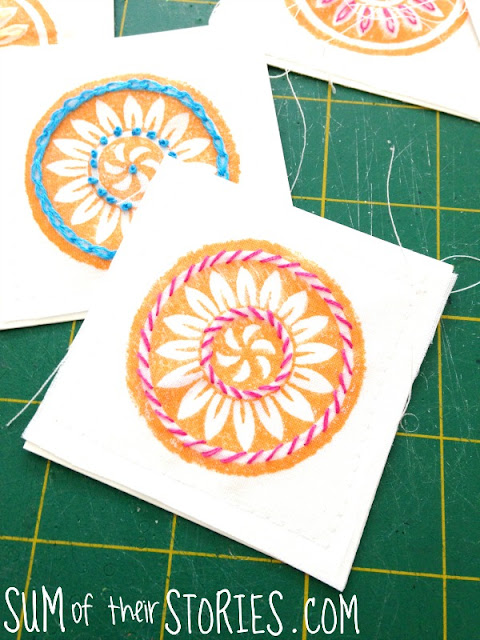
I tried a few different ideas, all very simple stitches, it didn't seem to need anything complicated. I just used regular DMC stranded embroidery thread and experimented with using 1 and 2 strands.
embroidery on prints
Then I just cut the fabric into squares with the fabric prints centrally and stitched them onto scraps of card the same size on the sewing machine. That way it was easy to mount the prints onto the card blanks as before. 
embroidery on block prints
embroidery on prints
Ta Dah!
Block Craft Printed Cards
This little matching gift tag was so easy. I just cut a basic tag shape, printed the design using the wooden printing block, punched a hole and added a little matching pom pom trim. 
Block Craft Printed gift tag
This gift tag is on the textured card, you can see what I meant earlier about that giving a more mottled look.

wooden Block  Printed Cards
I've loved playing with this carved wooden printing block, even with just one block and one colour of paint you can get different looks. I've got some more ideas of how I'm going to use this block next - it's not the last you've seen of it I'm sure! The Arty Craft Place have a blog with more ideas too if you want to check it out.

read more

Thursday, 22 June 2017

Watercolour and doodle cards

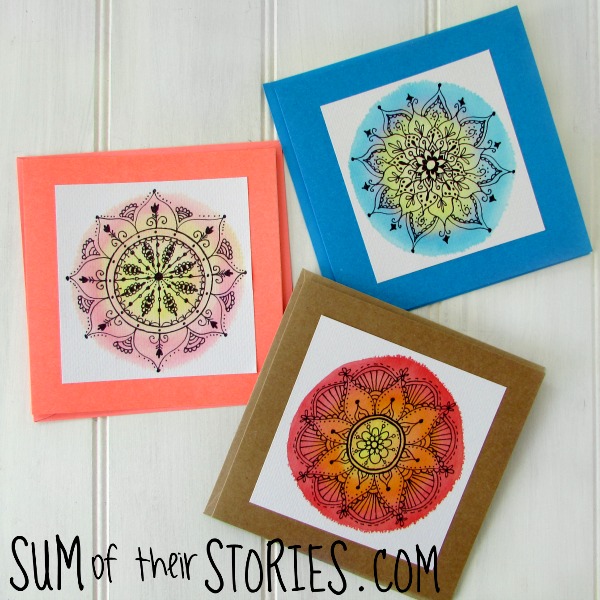
I have had so much fun recently getting a watercolour effect just using regular kids colouring pens then doodling over the top when they were dry.
Watercolour and doodle mandala cards
I'd seen on Instagram a few people using Tombow pens as watercolours and it got me to wondering if those regular, inexpensive felt pens the kids had loads of over the years for colouring would work to. What I discovered is, that if they are the ones that say they wash out of clothes, then yes, they do - huzzah! 
I do have a pack pf pastel coloured Tombow's as well and I can confirm they work really nicely too. 
fake watercolour and doodled mandala cards

To make your own watercolour and doodle cards you need:
Washable felt pens
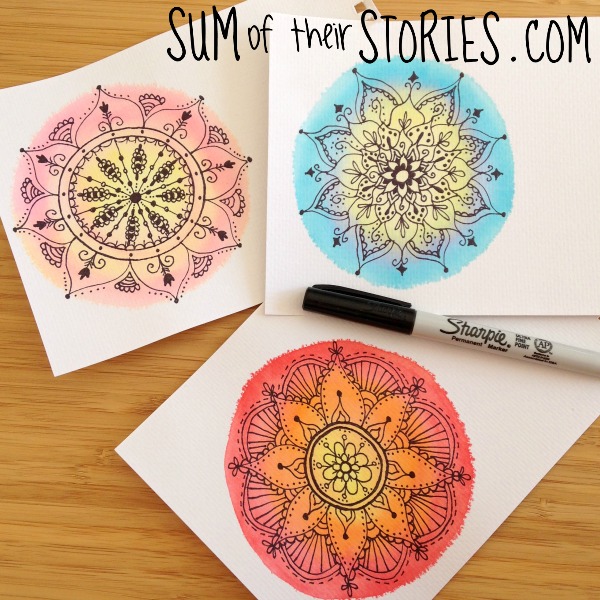
A fine line permanent pen - mine is a sharpie
Paint brush
Watercolour paper
A card blank & envelope
Watercolour and doodle cards

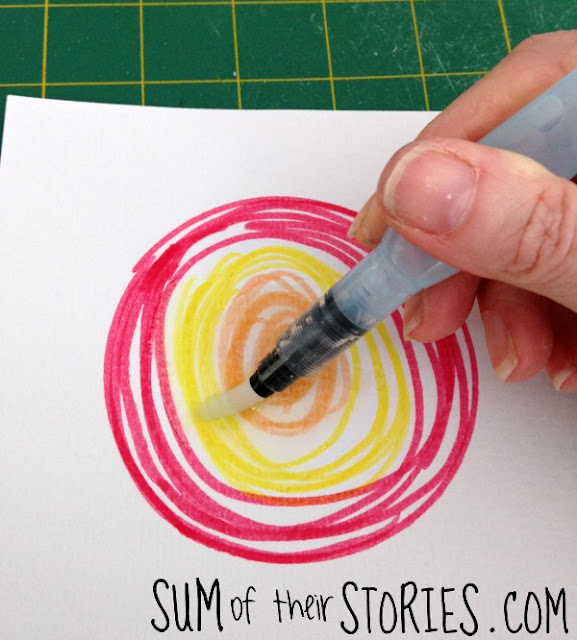
For the mandala cards I started by drawing round a tin lid, then filling in concentric circles with colours of your choice.
Watercolour and doodle cards
Then wet it with your paint brush until it's all smudged, the colour will start to spread immediately but your circle will still be pretty "line-y"
DIY fake watercolour and doodle cards
Leave it to dry, after about an hour mine looked like this:
water colour effect with felt pens
Nice, but still a bit lined. At this point I thought it wasn't going to work with the cheaper pens.
fake watercolour
Next morning when it had completely dried I was super pleased to see the lines had almost disappeared.
Now you are ready to doodle with your fine pen. Mine is a sharpie but i think other fine liners would work too.
These ones I did freehand, you can see they are a little wonky but I'm not unhappy with that look. 
Watercolour and doodle cards
You can see my tutorial about drawing more symmetrical mandalas here if you want some more ideas. 
Next I simple cut them out and glued them onto card blanks.
fake Watercolour and doodle mandala cards

Next I tried a more rectangular shape of felt pen 'watercolour' and drew feathers on top.
fake Watercolour and zentangle cards
I added the greetings with stamps.
fake Watercolour and zentangle cards
There are no step by step photos here but they are done in exactly the same as the mandala ones. Scribble with the water soluble felt pens, wet with the paint brush and then leave to dry completely.
Then doodle whatever you fancy. I did feathers filled with doodle but I'm thinking they could easily be tweaked into leaves.
fake Watercolour and zentangle feather cards
fake Watercolour and zentangle cards
The colours don't blend quite perfectly but I love that you can get this effect with something as simple as a kids felt pen or two.
I do have some bits and pieces of actual water colour and some water soluble colouring pencils that I had as a teenager (never throw anything away that might be useful!) so I'm going to do some more experimenting soon. 
There are millions of ideas online for zentagling and doodling (I have a board on pinterest if you want some more inspiration). If you are not feeling very artistic then you could use stamps, but honestly the doodling doesn't have to be complicated to look pretty. It's all about overall effect rather than expert drawing - have fun! 

read more