Showing posts with label cooking. Show all posts

Thursday, 3 March 2016

Fun Face Easter Eggs

When my kids were little they enjoyed decorating plain Easter eggs as faces to give to all their cousins.
Easter egg kids activity idea
Here in the UK all the supermarkets have shelves full of hollow chocolate eggs in boxes, usually with a mini bar of chocolate or a teeny packet of buttons/smarties etc. The eggs are usually about 6" high and are pretty inexpensive. It was these kind of eggs that our kids decorated.
Today I'm over the The Pining Mama sharing this idea but as those larger eggs are not so easily available in the US I've been trying out the idea with smaller eggs, which I understand you can get in most countries. 
Easter egg kids activity idea
Whatever sweets you can get in your local shop, some icing in a tube, maybe some sprinkles and set the kids to work!
Easter egg kids activity idea
You'll find a little more guidance over at The Pinning Mama here. I've had lots of fun preparing this post and have to confess these little samples didn't last long, I do like a creme egg with a cup of tea!

You might also be interested in:
Personalised Wedding Picture
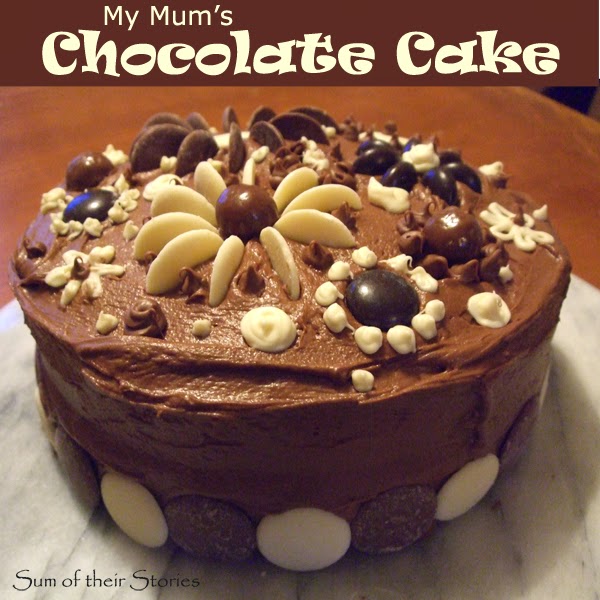
My Mum's Chocolate Cake
My Mum's chocolate cake
Washi Tape Berry Boxes
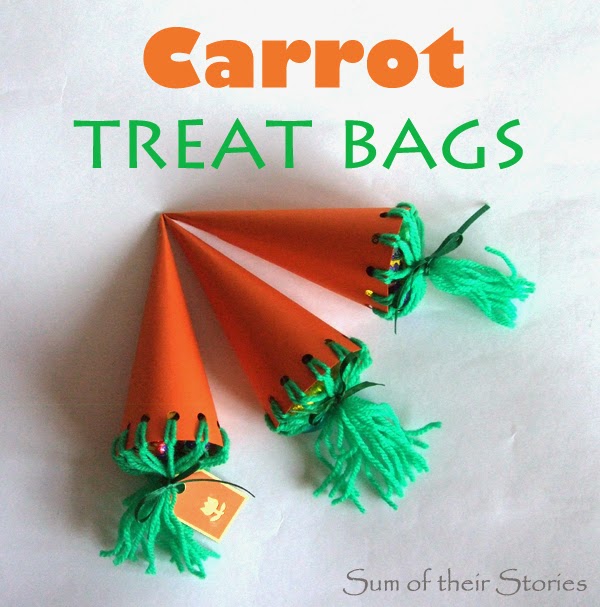
CArrot Treat Bags
Carrot Treat Bags
I'll be linking up this project at some of these lovely link parties

read more

Friday, 29 January 2016

Pancake Day recipe and tips

Shrove Tuesday, or Pancake Day is on the 9th February in 2016. 

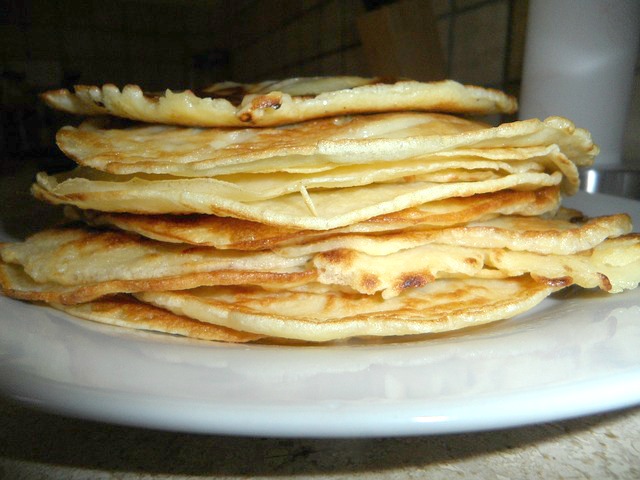
Pancake day traditional recipe and tips
I gather this is a UK, Ireland, Canada and Australia thing - do you have Pancake day where you are?

The pancakes that we have here in the UK on Pancake day are similar to French crepes, just not quite so thin and delicate and they are traditionally served with lemon juice and sugar. They are SO simple to make, SO cheap and SO delicious I invite you to give them a go - wherever you are in the world.

Just in case this whole Pancake day thing is new to you, here's the basic recipe I've always used. We usually make double mix or more.

Pancake Batter - makes 12
8oz (225g, 1 3/4 cups) Plain Flour
2 x Eggs
1 pt Milk (any kind is fine)

You will also need:
Cooking oil - I use sunflower, I guess a spray would be fine
A frying pan or 2 (see tips below)
Toppings - lemon juice, sugar, honey, syrup, jam, fresh or dried fruit, chocolate spread, chocolate sauce...

  • Put the flour in a big bowl, add the eggs and half the milk. Mix well with a whisk. Add the rest of the milk and whisk again.
  • Put the batter in a jug and leave it in the fridge for a bit if possible (1/2 hour minimum, 2 days maximum) but if you are in a hurry and can't wait then don't worry too much, they will still work.
  • Heat a teaspoon of cooking oil in a frying pan and when it is really piping hot pour in enough batter to just cover the base of the pan. It should sizzle straight away. You have to swirl the pan with one hand as your pour with the other. You want them thin, just a couple of millimetres of mix. 
  • Somewhere between 30 seconds and a minute, lift the edge of the pancake with a spatula and peek at the underneath. If it's brown then your pancake is ready to toss. 
  • Give it a shake to make sure it's loose then hold it a little away from your body with your elbow slightly bent and flick the pan up slightly so the pancake flips over. (then pick the pancake up off the floor or unfold it in the pan, call that one practice and try again!)
  • It will only need another 30 seconds to 1 minute to brown the other side and it's ready to slide onto a plate and start again with the next one
  • You need to add the teaspoon of oil for each pancake, give a few seconds to get hot then pour, swirl etc as before.
    Tossing pancakes is very traditional and kind of fun but if you just want to eat them it can slow you down. You might well want to just flip them over with a spatula after a while. It's perfectly alright and not cheating at all!
    Here are a few hints that you might find helpful whilst we are on the subject.
    • Get 2 pans on the go, each pancake may only take a few minutes but when you are making a heap you really do what 2 pans, unsurprisingly it then takes half the time! If you have enough space, frying pans and people helping have more than 2!
    • Put your jug on a small plate so the worktop doesn't get in a mess
    • You want your pan really hot before you start, but even then the first pancake will take WAY longer than the rest. You only need to adjust the heat if they start to burn. My hob is gas and I generally have it on about 3/4 of the way
    • As they are ready pile the pancakes up on a plate. You don't need to put greaseproof paper between the layers, you don't need to keep them in the oven. With 2 pans going you have another pancake ready every 60 seconds or so - they keep each other hot
    • Serve them as soon as the last one slides out of the pan, you can warm them up but they are nicer when fresh
    • Count them before you start so you know how many there are each!
    Personally I don't feel a proper meal is necessary before the pancakes. We have cheese and ham or chicken to make some savoury ones and fruit options as well as chocolate spread, syrup and the traditional sugar and lemon. It's once a year and we do make A LOT of pancakes.

    If you want to have your Shrove Tuesday pancake the proper traditional way pop your pancake on your plate, sprinkle about a teaspoon of sugar (granulated or caster is fine) evenly over and then add a good splash of lemon juice. We use the ready to go stuff in a bottle. Roll it up then eat with your fingers or cut up with a knife and use a fork. Make sure you hold it and your mouth over the plate as it WILL drip - it's supposed to!

    I found a few photos I'd shared on facebook of Pancake days gone by, taken on my phone.
    Not great photos but at least you know if yours look like this then you've done it right. 

    Are you tempted to have a go and join us for Pancake day?

    read more

    Sunday, 9 November 2014

    Chocolate Fudge Dip

    Chocolate fudge sauce recipe
    This is such a nice, easy, healthy(ish) dessert for a special occasion.

    My kids don't like Christmas pudding so every Christmas I would try to find them an alternative, something a bit fancy but fairly light after all that dinner.
    We tried a few different things but then one year had Chocolate fondue and haven't looked back.
    For basic Chocolate fondue you just melt some cheap and cheerful chocolate in a bowl in the microwave with a splash of milk. Add the milk before you start warming or it goes all funny. Stir till it's all smooth and Voilà! Easy Peasy, serve with cut up fruit so you feel like a good parent, giving your kids healthy food.

    We've had this basic "just chocolate" version for special occasions for years, the fruit varies according to what's available but the melted chocolate bit has always been the same. Nothing wrong with melted Chocolate but I fancied a change.
    I found this recipe for Hot Fudge Sauce on 2 Kids and Tired Cooks I thought I might have found a tasty alternative.

    I'm in the UK and so sometimes have a little confusion with quantities. I have a set of cups so that's all fine and dandy but what is a cube of butter? The internet gives different answers depending on who you ask! How big are cans over there? They come in all different sizes here! All very confusing. 
    Anyhow, I had a go, added what I had/what I thought, tweaked it a little here and there and made this:
    Chocolate fudge sauce recipe
    Chocolate Fudge Dip/Sauce. Oh my giddy aunt, it is delicious! 

    Chocolate Fudge Dip

    Makes 2 dessert sizes bowls for sharing in the middle of a fruit platter or 6 little ramekin sizes individual portions as photographed.

    4 oz Butter
    12 oz or 1.5 cups Sugar (I used caster sugar which is somewhere between granulated and icing)
    1 small tin evaporated milk (170g which is just over 1/2 cup)
    4 oz inexpensive chocolate

    Melt all the ingredients in a microwave (don't overheat or the chocolate goes weird) and stir well till smooth.

    Easy as that! You can serve it hot or cold with fresh fruit like we did here, or pour it like a sauce over a sponge pudding (not quite so healthy)

    Holly from 2 Kids and Tired Cooks has updated her recipe to show the quantities more clearly for us "across the pond", turns out her version is more evaporated milk and sugar and less chocolate.

    I think you should try both and see which you prefer! Or try your own version, imagine this with a slosh of liquor (for the grown ups only) or maybe a little coffee essence, or mint? Not both obviously, I'm thinking one or the other! 
    Chocolate fudge Sauce recipe

    You might also be interested in:
    My Mum's Chocolate Cake Recipe
    My Mum's Chocolate Cake Recipe
    Easy Peasy Banana Muffins
    Easy Peasy Banana Muffins
    Easy Cake Decorating Ideas
    Easy Cake Decorating Ideas
    My Nan's Shortbread Recipe
    My Nan's Shortbread Recipe
    I'll be linking up at all these great link parties, check them out!

    read more

    Tuesday, 22 July 2014

    My Mum's Chocolate Cake Recipe

    My Mums chocolate cake recipe
    When I was growing up my brother's favourite cake was Chocolate Cake, so pretty much every year, on his birthday my mum would make Chocolate Cake using this recipe. It's really delicious and moist, not a bit dry like chocolate cake can be.
    She never decorated it like I have here, that was for our daughter's birthday last year, but the icing is the one she always used to. (This decorating was inspired by this beauty that I found online and pinned. Actually this is a bit embarrassing because if you check out the inspiration you can see how woefully short I have fallen from it. I had a few technical difficulties cutting the Minstrels in half. Still if you don't peek at that one mine looks ok - it's all relative!)


    My Mum's Chocolate Cake Recipe
    Makes 1 x 8" cake (with 2 layers)

    You can get a simple version of the recipe (cake & icing) to print here


    7oz Self Raising Flour (200g or 1¾ cup)
    2 tbsp Cocoa Powder
    7oz Caster Sugar (200g or 1 cup)
    4 oz Margarine or Butter (115g or ½ cup)
    1 teasp Vanilla Essence
    2 Eggs
    5 tbsps Evaporated Milk
    5 tbsps Water

    You also need: A mixing bowl, a jug, a wooden spoon, 2x 8” round cake tins
    oven: 160 c/320 f/gas 3
    First you need to get your oven on to heat up, wash your hands and then grease and flour/line your tins.
    My Mum's cake tins
    I am super lucky as I have inherited these awesome cake tins from my mum. You don't have to line them with baking paper as they have that clever little swively bit that stops the cake from getting stuck in the tin. I cannot describe how much I love these tins and how much pleasure I get from using them. My mum always greased and floured them so that's what I do. If you are not so lucky then I'd recommend lining the bottom of the tin with baking paper so it doesn't all stick.
    Next pop the flour, cocoa powder and sugar in a bowl. 
    My Mum's chocolate cake recipe
    Chop the marg/butter into chunks and add to the flour mix.
    My Mum's chocolate cake recipe
    Now this is where the method is so different from the regular sponge recipe. You rub the fat into the flour mix, like you would if you were making pastry.
    My Mum's chocolate cake recipe
    If you've not done this before, you just sort of lift the fat up and rub it with your finger tips, letting it drop back into the flour. You just keep going till it looks like this.
    My Mum's chocolate cake recipe
    When you think it's done, give the bowl a good shake and all the lumps will rise to the top.
    My Mum's chocolate cake recipe
    How does that work then? I think it's magic, my son says it's science! Just rub the lumps in too.

    Next mix the eggs with the evaporated milk and water in a jug, just combine them with a fork,
    My Mum's chocolate cake recipe
    then pour in to your flour/fat mix.
    My Mum's chocolate cake recipe

    Give it a mix with the fork till it's combined.
    My Mum's chocolate cake recipe
    Then pour it into your prepared tins.
    Bake for  30 - 40 minutes until it looks like this.
    chocolate cake
    To tell it's done you just open the oven door and carefully reach in an press lightly in the middle of the cake. If it leaves a dent like this...
    chocolate cake
    ...carefully close the oven door and give the cake another 5 minutes, then test again.
    Cool on a wire rack then get ready to decorate. My mum always used this fudge icing recipe.
    Fudge Icing
     Makes enough to cover the inside and top of your 8" round cake
    Printable version here
    2½ oz Margarine or Butter (70g or 1/3 cup)
    4 tbsps Cocoa Powder
    8oz Icing Sugar (225g or 1¾ cup)
    3 tbsps Milk
    1 teasp Vanilla Essence

    You will also need: a mixing bowl, a mug, a wooden spoon and a sieve

    • Melt the marg and add the cocoa powder
    • Heat the milk in a mug in the microwave till hot but not boiling
    • Add the milk and vanilla essence to the marg
    • Sieve in the icing sugar and beat till thick and smooth
    No photos of the Icing making process sorry, don't know what happened there. I'll photograph and add them next time I'm making this one. It's pretty straightforward anyway, I'm sure you'll be fine!

    Use half the icing to sandwich the layers together and the other half on the top. Swirl it round a bit, and add what ever else you like. 

    Here I used White and Milk Chocolate Buttons, Minstrels, Maltesers and piped a bit of melted white and milk chocolate.
    chocolate cake simple decoration


    This is the same cake from a few years back, funnily enough decorated with exactly the same sweets!
    Easy moist chocolate cake recipe

    This is the version my 2 teenage sons made for my Birthday earlier this year. Shoot, now you can all guess how old I am (and see how we like to reuse candles in our house!)
    Chocolate cake teenage boys can make
    Of course you don't have to add anything extra, it's perfectly nice with just a swooch of icing!
    You might also be interest in:
    My Nan's Shortbread Biscuits
    My Nan's Shortbread Biscuits
    Easy Peasy Banana Muffins
    Easy Peasy Banana Muffins
    Easy Cake Decorating Ideas
    Easy Cake Decorating Ideas
    Cake Making for Absolute Beginners
    Cake Making for Absolute Beginners
    I'll be linking up at these great link parties

    read more

    Tuesday, 18 February 2014

    Cake Making for absolute beginners Part 1

    How to make sponge cakes for complete beginners
    Making cakes is easy. Honestly!
    Since I posted my cake decorating ideas I've been promising to produce a simple, step by step guide to making cakes.

    My Mum taught me how to bake, she would let me sit up on the counter and "help" when I was really tiny. She liked instructions and doing things properly so from her I learnt the "right way" to do things. I have to confess to being a bit more happy-go-lucky about things so use a few short cuts. 

    I know a lot of people use packet cake mix. My Nan, Pearl, would quite literally spin in her grave if I ever used cake mix (also if I bought ready prepared bagged salad, but that's another story!) To be fair, I've never used them but from what I understand you have to add 3 ingredients to the mix. You only need 4 ingredients to make basic cake anyway and this way you know exactly what's in it.

    When your baking, some things matter and will make the difference between a delicious spongy cake and a rock hard biscuit. Some things don't seem to matter at all - so I don't do them. Here the recipe is in bold and in red is me, standing next to you giving a helping hand - just like my Mum did for me.

    So here we go: (you can view a "no frills" version for printing here)
    Part 1 - Basic Sponge Cake Mixture
    (Also called Victoria Sponge I believe)
    We are going to start with fairy cakes (or cup cakes if you like)

    The basic recipe is 4 4 4 2 so it's easy to remember
    (my scales are imperial so that's how I work, but I've looked up some conversions for you all)

    Makes 12 small cakes (use little paper cases, not big muffin ones, you get more cakes and people can always have a second one)

    4oz butter or baking margarine (115g or 1/2 cup)
    4oz caster sugar (115g or 1/2 cup) 
    4oz self raising flour (115g or 1 cup)
    2 eggs

    You also need: A mixing bowl, a mixer or hand mixer or wooden spoon, a large metal spoon, paper cases and a patty tin - some people call them cup cake tins/muffins tins)

    1) Take the butter/margarine and the eggs out of the fridge, try to do this 15 minutes or so before you start so the fat can soften up a bit and the eggs are not too cold.

    2) Wash your hands, put on an apron, remove any baking trays and roasting dishes from the oven, put the oven on to 180 c/350 f/gas 4

    3) Prepare your tin now so put your paper cases in the little sections. This is because once the flour gets wet you want it in the oven as quickly as possible.

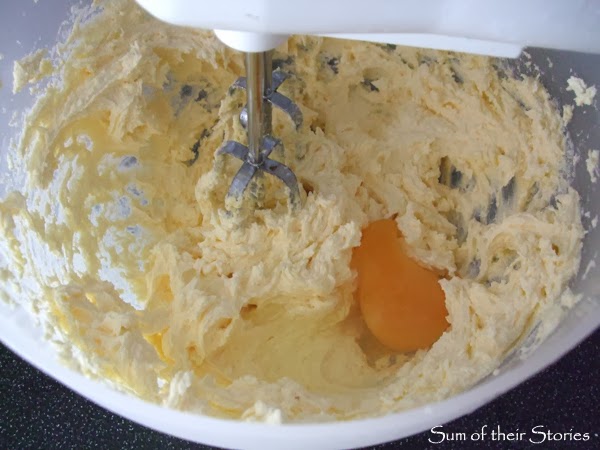
    3) Cream the butter/margarine and sugar. This means to beat it together till it goes all fluffy and light looking. I use my hand whisk for this (If you have a fancy mixer use that, if you have neither - use a wooden spoon) If you chop the butter/marg into smaller lumps it's easier to get started. 

    You can stop when it looks like this:

    4) Add the eggs a little at a time, beating well. How you do this depends on how confident you are cracking eggs. If you are unsure then crack them one at a time into a cup then tip them into the mix. That way if a bit of shell gets in you can fish it out easily. The proper way is to crack all the eggs into a jug and whisk it lightly with a fork, then pour them a little at a time into the mix whilst you continue to beat with the whisk. I just crack them straight into the mix one at a time them whisk away till it's all mixed.

    5) Fold in the flour. Technically you are supposed to sieve the flour, I don't bother, it's fine to just tip it straight in. What you must do is stir it in GENTLY with a metal spoon.
    My mum showed me a round the outside then cut through the middle action that I always do.
    Stop when you can't see the flour any more.

    6) Spoon into the papercases. Use a teaspoon and your finger. See how much mixture is in each one below. That's what you are aiming for. You should get 12 from this mix, be as quick as you can but if you spill on the tray wipe it straight away. Once that's burnt on it will be really hard to clean.

    Does the bowl look empty to you?
    Get yourself one of these flexible scrappers, believe it or not there was enough mix there for another whole cake. (my son calls this the instrument of torture because it leaves less for licking the bowl afterwards!)

    7) Bake for 15 - 20 minutes. Bung them in the oven, try not to peek. They are ready when they smell delicious. Actually a better way to test is to open the oven door, lean in an gently press your finger in the middle of one. If it springs back up they are done. If it leaves a dent give them another 5 minutes. Be careful as you do this!

    8) Place on a rack to cool. Don't ice them until the are completely cool or your icing will melt.
    How to make sponge cakes for complete beginners

    Eat them as they are, or decorate however you like. Next in the series One day I promise I will rustle up some icing recipes and decorating ideas. Then some ways to adapt this recipe to make all sorts of cakes... 
    You might also be interest in:
    My Nan's Shortbread Biscuits
    My Nan's Shortbread Biscuits
    Easy Peasy Banana Muffins
    Easy Peasy Banana Muffins
    Easy Cake Decorating Ideas
    Easy Cake Decorating Ideas
    School Reunion Cake Toppers
    School Reunion Cake Toppers
    I'll be linking up at all these great link parties

    read more