Showing posts with label Clever ideas. Show all posts

Wednesday, 28 June 2017

Adding a handle to your clear mounted stamps

Just a quick tip today, something I found useful when using clear stamps that are mounted onto thin acrylic blocks. I realise this is a bit of a niche problem that I found a solution too, I'm sharing just in case anyone out there finds it useful too!
This post contains affiliate links to the products I used. If you purchase an item using a link you will not be charged any extra but Sum of their Stories will receive a small commission.
custom made clear stamps
I was originally going to call todays post "How to use clear stamps mounted on thin acrylic blocks with a traditional office ink pad without getting your hands dirty" Snappy title eh? 
A few months ago Sum of their Stories had a makeover and a bit of a rebrand. I designed myself a new logo and the lovely Fran at Little Stamp Store made me some custom stamps. I am SO pleased with my stamps and the custom service from Little Stamp Store was amazing. 
I use my stamps for a few things, one goes on the back of greeting cards that I make for sale, one is just the logo which is handy for all sorts of things and one I used for mass producing my business cards. 
recycled business cards
I make my business cards from old greeting cards and packaging. Kleenex tissue box are one of my favourites, they are so pretty and perfect for turning into business cards. 
When I make these I use a regular office style ink pad and this was where I ran into an issue with my lovely mounted stamps. 
I didn't take any before photos so this is a bit of a spoiler! You have to imagine this but without the cork.
adding a handle to clear mounted stamps
See how my fingers end up in the ink? I know for fancy stamping you are supposed to do ink pad to stamp so the whole thing is upside down but for speedy mass production on business cards or stamping on the back of 20 handmade greeting cards I want to do a quick stamp, stamp, stamp.
The solution was easy. I glued a cork to the stamp and now I have a fine and dandy handle. 
adding a handle to clear mounted stamps
For some reason I felt an action photo was necessary. Maybe I felt this would be too hard for you to visualise! 
adding a handle to clear mounted stamps
You just need to make sure you use a super strong glue. I used Gorilla Glue 60ml which expands as it sets hence it is a bit messy around the join, but this baby is not going anywhere. I'm sure other strong glues would work just as well. 
adding a handle to clear mounted stamps
That's it, old corks turned into handles for my mounted stamps.
I have a small collection of clear stamps, the rest are the cling ones (mostly freebies that have come with magazines) that you pop on and off the acrylic blocks. I have a couple of the acrylic blocks which are thicker so this issue doesn't arise with them, it was just these Sum of their Stories ones that were already attached to their thin blocks that left me with inky fingers. Anyone who stamps will know once ink is on your fingers it's on your work, your table, your face - everywhere!
Anyway, this has worked for me. Maybe one day you will have a similar issue and have a vague recollection of this simple solution.

read more

Saturday, 12 November 2016

10 DIY Monogram Cushion Tutorials

Monogramed Cushions or pillows are a bit of a home decor classic. If you have basic sewing skills it's not difficult to have a go at making them yourself.
10 DIY monogramed cushion tutorials
I realised a few weeks back that I'd missed sharing the gift I made for the final wedding in our 'summer of weddings'. If you're curious I shared the gifts I'd made for the other weddings herehere and here.
Initials embroidered cushion
I wanted to make something classy and unfussy for this couple as that suits their style but still wanted it to be personal for them. After some deliberation and time on pinterest searching for inspiration I took a plain gold shop bought velvet cushion cover and embroidered the couples initials in a very simple back stitch. 

I found this plain gold cushion in TK Maxx and fell in love with the velvet. A plainer fabric would actually have been easier to stitch on but the velvet has a beautiful sheen and texture which I do love.
I also chose an embroidery thread the same colour as the fabric so the embroidery is subtle, you could easily do a contrast for a bolder effect.

To make a Simple Initials Embroidered Cushion you will need:
  • A cushion cover and insert
  • Embroidery thread
  • Computer, printer, paper
  • Needle, pins, scissors
First go onto the computer and select a font you like. Play around with different ones you computer has, I used the font "Small Roundhand" for the N and & but I didn't like the E in that font, it was one of those backward 3's so I did the E in "Apple Chancery". If your PC doesn't have lots of great fonts you can use Picmonkey in design mode as they have lots of cute ones.
Print out the initials in the size you want, this will depend on your cushion cover size of course. You may have to print it a few times until you get the size right.
Trim the paper close to the initials then pin the wherever you want them on the cushion. I did mine centrally but yours could be anywhere you like. Use loads of pins so it doesn't slide about.
Using 2 strands of embroidery thread stitch the initials in backstitch going through both the paper and the fabric.
When you are done, gently pull the paper away. I found it easiest to tear the paper as close as I could to the stitching first then the little bits just pull out easily with your finger nails or tweezers.
Initials embroidered cushion
Simple as that! You can see in my photo above that I had trimmed away the paper around the letters as I finished each one, that is not necessary, I was just checking it had worked!
All these photos are taken on an angle as that shows the embroidery better, with the nap of the velvet it was hard to get the initials to show up nicely on a photo.
Initials embroidered cushion

If my velvet initials cushion doesn't take your fancy or suit your style how about some of these beautiful DIY monogram cushions and pillows.

This beautiful cushion was made by Robyn from The Farmer's Nest, it's another done on a ready made cover using a super simple embroidery stitch.

I love this twirly font Trisha from The Sweet Survival chose for this felt monogram pillow, so classy. 

Here is another felt letter but with a completely different look. So cute and modern. It's from How Does She and has a great step by step tutorial.

This cover from Beneath my Heart has a stencilled monogram. The tutorial includes a great set of instructions of making the cover, including that pretty contrast piping.

Another stencilled idea from Merrick's Art, so simple, so effective.

If more colour is your thing, how about this beauty from Yes Spaces. It's made using a traditional machine applique method and a ready made plain cover. It would be a great way to use up fabric scraps.

This is a little bit different, a letter shaped cushion. What a fun idea from Classy Clutter.

I do love a good "crafting with buttons" project and this one from It all Started with Paint, is just lovely.

This beautiful letter made from fabric rosettes is so pretty. Kaitlyn from The Birds Nest used a liquid stitch glue so this is a "no sew" option, but of course you could make a "sew" version if you prefer!

Whether you call them cushions, pillows or something else entirely, hopefully you have found some letter and monogram inspiration here. 
Funny how so many of these tutorials are for the letter B - 5 out of the 10 - I wonder why that is? 
You might also be interested in:
Adipose Cushion
Adipose Cushion
Making Toys from Kids Drawings
Cornishware Ruffle Tote
Running Stitch Embroidered Cushion Cover
I'll be linking up at these great link parties

read more

Friday, 21 October 2016

Fun Cheap Birthday Traditions

Making birthdays special without spending a fortune, it's the little things that count!
fun, easy cheap ways to make birthdays special
In our family we have quite a few birthday traditions. The list has grown over the years, once you do something for one, you have to do it for everyone every year apparently! Some of these are starting to drop off now the kids are older, some we will do forever I think.

Homemade Cake

First up is home made cake. Always. A birthday is not a birthday without cake and homemade is just the best. Even before we had kids my husband would always make me a homemade cake, when they were young he would have them "helping" with the mixing and decorating. 
You can see lots of cakes we've made over the years here, if you are after some ideas. I also have a board on pinterest of cakes I dream of being able to make someday. 
If you have never made a cake before I have an absolute beginners 101 guide to making a simple sponge here.


Birthday Breakfast

This all began when the kids were little, and had to go to school on their birthday. We would all get up a bit earlier than usual, and the birthday person would come down to find the table laid nicely and their presents waiting for them.
Their chair has a birthday balloon tied to it and cushions on the seat and back so they are super comfy!
We eat Croissants and Chocolate Pastries and drink Tropicana from wine glasses ('cos we know how to live large!)
The kids also have a birthday placemat which I must have made about 13 years ago! It's just laminated paper but because they are only used for 1 day a year they are still in pretty good condition - we still get them out now!


The Birthday Banner

This all started when our youngest was about 5 and his big sister made him this beauty. 
I do have his permission to publish this awesome photo!

For the next few birthdays we made a fresh one each time. Then we wised up and I printed this dinosaur one and we used that for several years. 
On our respective 40th's my husband and I were lucky enough to have these beautiful things hanging on the front of the house!


We have even had some sophisticated Bunting style banner's in recent years.

Home made cards 

Everyone in the house makes cards for each other, I can't remember the last time anyone bought a card. The kids used to paint, draw, cut and stick etc. Nowadays they mostly use the computer and do something terribly funny in publisher, often involving a photo of the birthday persons head cut out and stuck on the head of a film, tv or game character. Wordclouds from Tagxedo and Wordle also appear quite often as they are easy and free. My husband usually rustles up something lovely involving an old photo.
You can see some of my card ideas here, here, here and here.

The idea to share our birthday traditions came when I read this lovely idea from One Creative Mommy

Birthday Pizza - How brilliant is that?!

For someone whose Birthday comes right after Christmas how about this clever idea from The Writer Revived?
Turn the Christmas tree into a birthday tree with a quick decoration swap!

Leanna from All Done Monkey has a lovely idea of making a Milestones Birthday Book, which you fill in each year on your child's birthday ready to present to them when they finally fly the nest. Leanna has provided a free printable to get you started or you could easily adapt the idea, add whatever things you'd like to record each year.

Jamie from Scattered Thoughts of a Crafty Mom shows us how easy it is to make a balloon avalanche to surprise a birthday person.

In the house of I Heart Naptime they kept things simple one year for a 3rd Birthday but still had lots of balloons and these lovely streamers on the bedroom door.


Over at Sa Sea Living they have a lovely tradition of taking a photo of the birthday person ever year. One you need to start from year one I guess but really beautiful if you can remember every year. (they also have homemade cake too and they look amazing)

Growing a Jeweled Rose have a whole load of fun birthday traditions, from balloons and streamers to a special birthday bath to end the day!


What birthday traditions do you have?

read more

Saturday, 30 April 2016

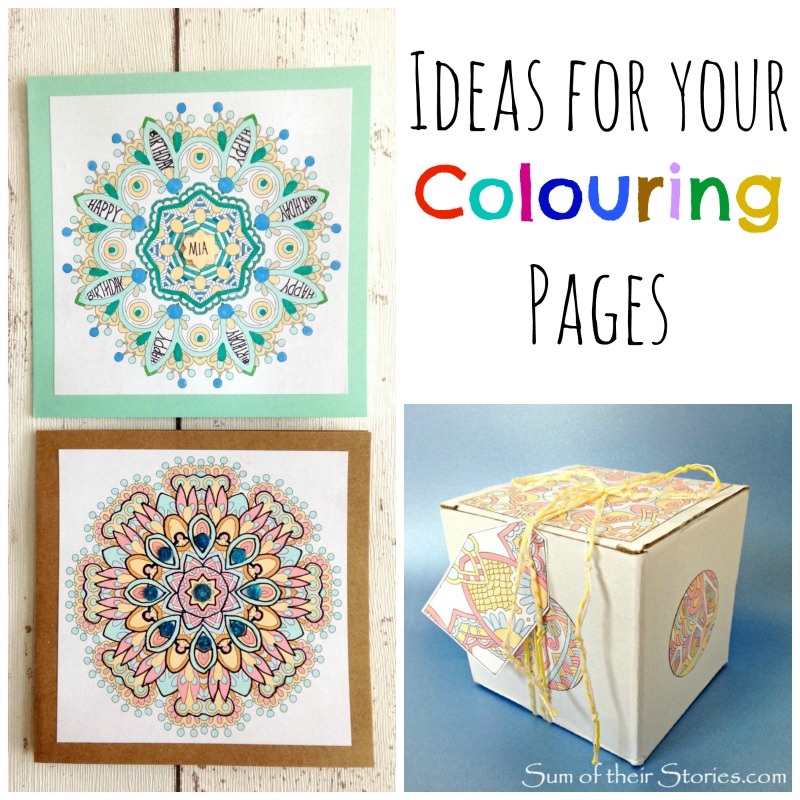
Ideas for your colouring pages

Have you got involved in the colouring in craze? Do you love all these beautiful colouring pages and books for adults around these days? So many gorgeous designs but what do you do with them after you've coloured them in?
ideas to use completed colouring pages
I was given a colouring book/diary for Christmas last year, it seemed like a genius idea, a week to colour each page, but my felt pens all leaked through to the other side like mad and I quickly had to decide - diary or colouring book? It couldn't be both.
I bought another diary and carried on with the colouring, just now and again when I had a minute (mostly sitting at the kitchen table whilst the dinner is in the oven. My colouring is not especially neat so no looking too closely!)
I thought it would be nice to use them rather than just leaving them in the book so I've had fun finding things to do with colouring pages.

Greeting Cards


This is an easy one, use the whole design and just trim it to fit a card blank:
card made using completed colouring pages

I just added some black outlines with a fine liner to part of this design and glued on some sequins.

You can write a message somewhere in the design like this:
ideas to use completed colouring pages

Or you can cut up the finished page and just use part of it:
ideas to use completed colouring pages
  1. This page is pretty but not spectacular
  2. Draw a number or letter in pencil and cut out with scissors or a craft knife
  3. Edge the card blank with one of the colouring pens you used in the design by putting it on scrap paper and then wizzing along the edge with your coloured marker pen
  4. Glue the number or letter onto the card blank, add a few punched shapes too if you like

Gift wrap


If your pages are big or the gift small I guess you could just use your coloured page as gift wrap.
Maybe you could make a gift bag with it?

This gift was a mug that came in it's own sturdy plain box so it was easy to cut or punch out and glue on parts of a colouring page. 
ideas to use completed colouring pages
I even had enough to make a little gift tag, by cutting out a tag shape and glueing it onto card.

The other ideas I was thinking of but haven't actually tried yet are:
  • Decorating a note book
Cut the coloured page to size and glue it on. Cover with clear sticky backed plastic if you want to make it super durable or if you are really messy!
  • Making bookmarks
Cut your coloured pages into strips and glue onto coloured card, add a tassel maybe?
  • Turning it into art
If you have one that is especially lovely it would be nice to just frame it and put it on the wall?

Have you found any other lovely ways to use colouring pages?
  
You might also be interested in:
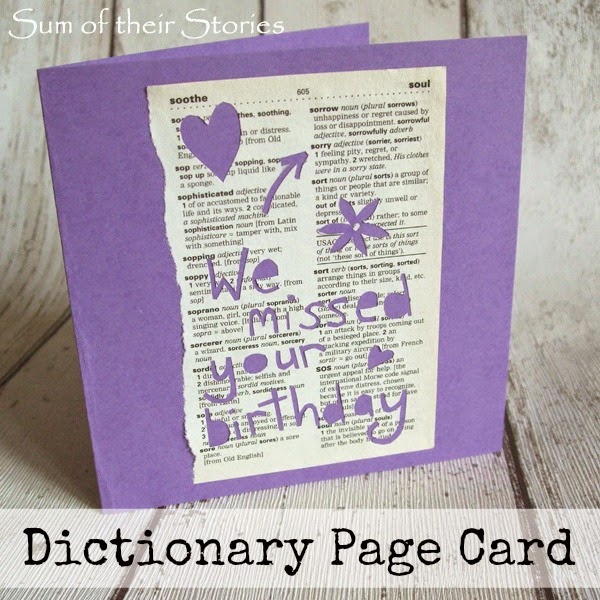
Dictionary Page Card
Circle Card Crazy
Circle card Crazy
Photo Name Birthday Card
How to draw Mandala Greeting  Cards
How to draw Mandala Greeting Cards
I'll be linking up this project at these lovely link parties.

read more