Saturday 25 October 2014

Flowery Letter Birthday Card

Tutorial for initial birthday card
This is my last post (for now anyway) about the contents of my Crafty What Nots box. You can read all about the box, what's in it and how to get one here.

Surely anyone who enjoys any sort papercraft is bound to have a whole heap of little bits. Too good to throw away but kind of tiny to make anything with. I had these sort of bits left.
It's my niece Anya's Birthday soon so I thought I could get all ahead of myself and make a pretty card for her with her initial.

I used:
a 6" square card blank
A piece of scrap cardboard about 6" square - not too thick
Scraps of pretty paper
Foam pads
Bakers twine
2 buttons
2 die cut paper flowers 
Everything except the card blank was from the Craft What Nots box

First I drew a big chunky A on the scrap cardboard
Then I held it up to the window and drew it on the back of the card as well. This just made it easier to cut out later.
Then I just started glueing paper strips over my A.
When I finished it looked like this.
I turned it over and cut it out with scissors.

When I got to this point I had to switch and use my craft knife to finish off.
I attached it to the card blank with the foam pads. Then I tied a length of bakers twine round the card and threaded buttons on each end.
I slid the pink button up so they hang at different lengths and then trimmed the twine off close and fixed it with a blob of pva.
I fixed the two dies cut flowers to the buttons whilst the pva was still wet.
button and flower trim

Ta Dah!
Tutorial for initial birthday card

Easy, pretty and it's another one of those "options are almost endless" ideas. Any sort of different papers would give a totally different effect. Most of all though I love saving those scrappy bits from the bin.
You might also be interested in:
Paper Cutting First Attempt
Paper Cutting first attempt
Flower Collage Canvas
Washi Tape Berry Baskets
Flowery Papercrafting
Floral Papercrafting
Linking up at all these lovely link parties

read more

Tuesday 21 October 2014

Flower Collage Canvas

It's really easy to collage over an old canvas and make a completely new piece of art work with just some pretty papers, glue, paint and a fine liner pen.
Floral collage tutorial

Here is a bit of a follow up post, sharing something else I've made with the contents of my Craft What Nots box. You can read full details about the subscription boxes and see the other things I've made from it here.
The floral papers I had were just SO pretty I thought they would make a lovely flower collage.
I started with this canvas I bought for 25p in a discount shop a few months ago. The plastic wrap had broken and somehow pen has got all over the corner so they were marked right down. I actually bought several so I guess you may see them again sometime.
If you think this is nicer than my flower collage please keep it to yourself! I started by painting over the bunny, puppy and pen marks. I just used white emulsion as that's what we had. This is what happened:
The pen just showed up more! I ended up giving it 3 coats and then gave up, you'll see in a minute.

Whilst I was waiting for the coats to dry on the canvas I cut out some petals from the floral paper. I just drew a template on scrap paper of a simple petal shape and then cut out 8 petals.
I used my 2" circle punch to make a flower centre too.

To give the petal shape some emphasis I doodled a wiggly border with a black sharpie.
Round once, then round again. The trick is to be decisive and not mess about too much. Practice on scrap paper first if you are not confident.

I also punched out a load of hearts and flowers to go with the die cuts from the Crafty What Nots box.

When the canvas was covered-ish and dry I started sticking a few flowers and hearts down with Mod Podge.
I had an idea of where the flower was going to go so I concentrated on the edges, the bits where I knew the petals wouldn't be so much. I also wanted to make sure the pen marks and cute little animals were all covered. (Can you see them still peeking through faintly!)
I wanted some of the flowers to go over the edges onto the sides of the canvas. I found it easier to crease these before applying them as the thicker papers made them a little bit resistant to my idea. They needed plenty of glue and some encouragement.
Feeling a bit inspired by the fact that the white paint had not covered very well, I thought I would create some layers by painting over this lot with just one more layer of white. I was hoping the floral paper would still show through a little, like the bunny/puppy who were refusing to go quietly. So I roughly painted another layer over the whole thing.
It balanced nicely on a jam jar when painted, so the edges didn't stick to the scrap card I put down.
I everso slightly panicked when it was wet....
but as it dried it faded a bit and all was well.

Next I Mod Podged the petals in place and added some more little flowers, hearts etc.
Some I poked under the petals before they stuck down firmly.
I just kept going until I thought there was enough.

Making a flowery collage
Clearly at this point I decided it wasn't quite fussy, pretty, frilly enough so I added just a little bit more Sharpie doodle.
Doodles on a flower collage canvas
Just a twirl, swirl, flower, dot or heart here and there as took my fancy.
Flower Collage Canvas
Lastly the whole thing got another coat of Mod Podge to seal.
Then it was finished - or was it?
I took one of the lovely little plywood Butterflies from the Crafty What Nots box and inked it with the blue ink pad.
Floral collage tutorial
I coloured the edges with a black felt pen and used the Sharpie to give it a few dotty details.
Floral collage tutorial
The idea was that it would add another layer and more texture to the canvas. 
I don't know whether I prefer it with or without. What do you think?
Floral collage tutorial

Floral collage tutorial
You might also be interested in:
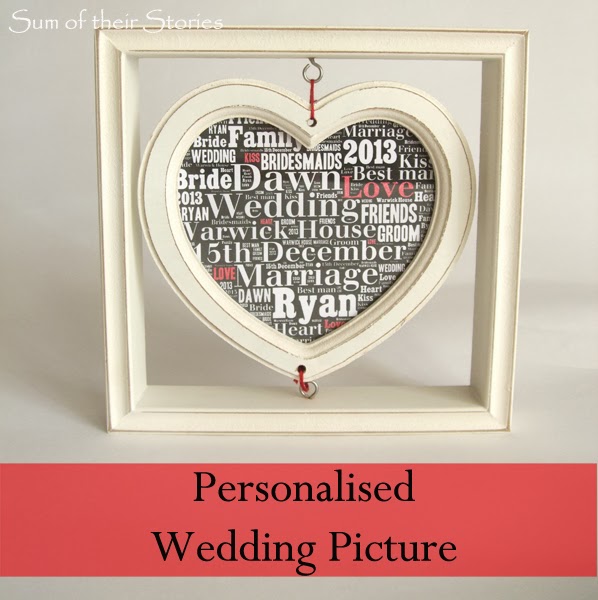
Personalised Wedding Picture
Dotty Card Tutorial
Dotty Card Tutorial
Flowery Papercrafting
Simple Speech Bubble Cards
I'll be linking up this project at all these lovely link parties, pop over for a look at loads of projects from other blogs

read more

Thursday 16 October 2014

Flowery Papercrafting with Crafty What Nots

The first part of today's post is probably of most interest to my UK people, if you're living somewhere else in the world you probably want to scroll down to the ideas bit lower down so you don't get too jealous!
I was very excited last week when I received a parcel to review from the lovely Jennysis. Crafty What Nots is a beautiful craft supplies box subscription service
Crafty What Nots subscription boxes
This month's box is called Floral Pavillion and it was packed with goodies. Included was a flower stamp and acrylic block, 2 ink pads, card blanks with envelopes, 3 plywood butterflies, a bag of die cut paper flowers and a bag of paper dots, foam pads, 15 8"x 8" papers (8 of which are double sided), a bag of buttons, 3 lengths of bakers twine, ribbon and instructions to make super cute little handbag gift bags. 
craft what nots box
I also received a personalised note book, a sweet little card from Jennysis and a personalised gift tag.
Everything co-ordinates perfectly and it's just all so pretty!
The boxes retail at £12.50 plus p&p, with discounts for 3 and 6 month subscriptions. What a fantastic gift for a crafty friend - like a magazine subscription that keeps on giving all year but supplies instead.
It's taken me a while to get this together (some of my fellow UK bloggers have beaten me to it with their reviews) but I have just been having so much fun making things with this box of loveliness. 
I think it is just UK delivery only though, so I am sorry if I've made non UK people jealous! To make up for it, here are some papercrafting ideas!

First I used the really clear instructions included in the box and made these lovely little handbag gift boxes. 
Paper craft handbag gift box
They are just so cute! The one of the left is made using a whole sheet of 8"x 8"paper, with a separate piece for the handbag "flap". For the one on the right I cut my paper to 6" x 8" and incorporated the flap all in. You can find the instructions to make these at the Jennysis blog.

Next I made a card or two....
 Mini hearts handmade card
This is one of the mini card blanks from the box with little hearts I punched out with my heart punch. I attached them with the foam pads from the box and tied a little of the bakers twine to finish.
floral handmade card and gift box
I think it would make a perfect little gift with one of the handbags filled with chocolates or pink jelly beans.


floral handmade birthday card idea
For this card I wanted to show off the double sided paper, so made this simple little envelope to pop a message in. The Happy Birthday stamp is one I already had. The twine, button and ink for the edges was all from the box.

floral handmade birthday card idea
Here I cut strips of the lovely papers about .5" wide and 3.5" long, cut a triangle from one end and stuck them on a square card blank. The sentiment was from an old card (saved in my stash) and the die cut flowers, button and twine finish it on (attached with extra tacky pva)

floral handmade birthday card idea
This one is really similar, just finished this off with a ribbon rose from my stash.

floral handmade birthday card idea
Here it's hard to tell but I cut the square of green floral paper just smaller than the card, then added the strip of white on top (the white card was from the box too, used to separate the different items and keep them safe in transit - waste not want not!) I added the twine before glueing to the card, it just makes it easier to keep it all neat. The Happy Birthday is a stamp I already had, then the bunting is just like the cards above but a bit shorter and attached using the foam pads.

floral handmade birthday card idea
More strips of paper shaped like bunting or flags but this time going in the other direction! I used a card blank from my stash, attached the paper strips, stamped a sentiment them added flowers, dots, button etc from the box. A heart sequin from my stash seems to have snuck on their too!

floral handmade birthday card idea
For this card I used the flower stamp from the box, matted it onto one of the floral papers then added that lovely vibrant pink paper dot with a foam pad. The strip of patterned green and white paper going across is just matted onto some matching pink I had in my stash after I punched it with a flower daisy border punch I already had. 

Mini Floral gift box
 The handbag gift bags turned out so cute that I thought I'd try another gift box idea. This folds up from a very simple shape. I trimmed a sheet of paper to 8" x 6" and marked it out as below. 
how to make a mini gift box

Hopefully that makes sense! The finished box is 3.5" x 2" x 1" so small and cute. It would be nice for giving a piece of jewellery wrapping in tissue paper, or just a couple of special chocolates.

I think that's probably enough photos for one post!
I have one more card with a full tutorial and a piece of art (that probably makes it sound much grander than it is) to share made from the Crafty What Nots box contents and I still have loads of craft supplies from it left. Here is a sneak peek at the art idea:
So, thank you Jennysis for giving me the chance to test your gorgeous Craft What Nots box, I can't believe how much potential you squeezed into one box!


You might also be interested in:
Paper Cutting First Attempt
Paper Cutting first attempt
Share a Coke with Picture
Washi Tape Berry Baskets
Recycled Pen Tub Tutorial
Linking up at all these lovely link parties

read more