Showing posts with label refashion. Show all posts

Friday, 21 July 2017

Inspired by - Comfy Flip Flops

Today another idea I've tried, inspired by another blogger. This time it's super comfy flip flops.
comfy flip flops
This was inspired by Kristen of Down Home Inspiration, she shared a little video back in 2014 showing how to make flip flops more comfy by swapping the plastic straps for stretchy fabric.
I have a love/hate relationship with flip flops, they are great for summer but some just really hurt my feet. It doesn't seem to matter what style, some rub and some don't, you just can't tell before you buy them which way it's going to go! 
I had a pair that were definitely in the 'rub my feet' category so with nothing to lose I chopped the plastic bits off and had a go. 
I used some jersey fabric left over from this top and just had enough. I didn't have quite enough to include the knot in Kirsten's version, my fabric wasn't quite long enough but it still worked out ok.
And here they are on my feet, on the beach last week.
comfy flip flops
 This is how they look without my feet in them!
comfy flip flops
They are SUPER comfy, it's amazing.
My only downside is I'm not sure how long the fabric with last before it wears through on the underneath where the knots are.
I wore these to walk down to the beach for 5 days and they are holding up just fine for now. You can see I didn't trim the fabric very close to the knots. You'd think it would make an uncomfortable lump but it doesn't seem to.
I think another time I would choose a fabric that actually matches with the foam flip flop bottoms! This time was an experimental 'just use what I have' situation!
If I want to take them on holiday for more than a week, I might take a few strips of spare fabric with me, just in case repairs are necessary. 
Get the full video tutorial on how to make them from DownHome Inspiration here.
My conclusion - definitely worth a go.

read more

Wednesday, 12 April 2017

Lace Heart T-shirt Refashion

The simplest of t-shirt refashions, a summery lace heart. 
Lace Heart T shirt refashion
I love a simple refashion, some thing to make a few of my clothes feel a bit "one of a kind" with out spending hours. (or loads of money) 
This one is SO simple (mine almost always are) Take a plain T-shirt and add a pretty lace heart.

To make your own lace heart T-shirt you will need:
An old plain T-shirt (you could go crazy and use a new one of course!)
A piece of lace fabric
A sewing machine or needle and thread
Scrap paper, pencil, scissors

Start by folding your scrap paper in half and drawing half a heart. Cut it out and you have a template. Check it's the right size for your t - shirt, better to waste a sheet or two of scrap paper than your lovely lace fabric.
Once you are happy use your super-de-dooper template to cut a heart shape from the lace fabric.
lace heart for t shirt refashion
Pin this securely to the t-shirt
Lace Heart T shirt refashion
I'm not sure if you can spot my pins. I should have used nice bright ones, there they are:
Lace Heart T shirt refashion
Stitch round the heart using your sewing machine, or hand stitch using a backstitch if you don't have a sewing machine. 
Lace Heart T shirt refashion
If your heart is small then you can finish here, I found as my heart was quite large it was a bit bulgy when I put the t-shirt on. To fix that I just caught the lace with a few stitches at random intervals. The stitches don't really show so you can see it more easily from the inside. 
Lace Heart T shirt refashion
That's it, simple!
Lace Heart T shirt refashion
Here I am posing all nonchalant like in the garden, wondering how long before I spill my tea on those white jeans!
You could add any shape, it doesn't have to be a heart of course. You could add some beads randomly too, especially if you are doing those little stitches to stop the poofiness of the lace. I would have done that myself but I've only just thought of it now! 
Lace Heart T shirt refashion
I think this is going to be a really useful addition to my wardrobe this summer. 
Lace Heart T shirt refashion

read more

Friday, 7 April 2017

Pom Pom Pen Pot

A simple glass jar upcycled with pom poms to make a fun bright and cheerful desk accessory.
Upcycled pom pom pen pot
Pom Pom all the things!

Over the last few weeks I've been sharing some Easter projects made courtesy of Hobbycraft and the selection of fun Easter crafting goodies they sent to me to try. Today's pen pot upcycle is not very Easter-y or Spring like but as I totally LOVE it I am unapologetic! 
One of the Supplies I received from Hobbycraft was this enormous bag of pom poms, all shapes and sizes and colours. I used some little white ones for these bunny tails and flower centres for my Spring Wreath.

But look at all these amazing bright pom poms...
pom pom all the things
Don't they just make you want to pom pom all the things?
I knew they needed to decorate something and I knew it had to be bright and fun.
You can't have too many pen pots, everyone needs pens and in a pot they are handy and ready to grab at a moments notice. If you can make one by upcycling an old container then all the better. 
To make a pom pom pen pot like mine you will need:

An old container, mine was a glass jam jar.
Pom Poms, mine were from this big bag from Hobbycraft
A hot glue gun
Upcycled pom pom pen pot
First wash your container, remove any labels and dry thoroughly.
Sort your pom poms - this was the best bit, it's very therapeutic to plunge your hands into a big bag of soft pom pom, trust me! I separated into a bowl all the ones which were about 1 cm in diameter. Your pot will look more even if you use pom poms that are all the same size. 
I only used the bright coloured pom poms for this, I didn't include black or white or the soft pink or yellow. You can use whatever colours you like but it is definitely worth getting them all ready in a bowl. Once you start gluing you want them easy to grab.

Now just hot glue the pom poms onto the jar. It's easiest to apply a 3 cm or so length of glue then press on 3 pom poms. Then just repeat. You want them pretty close together so there are no big gaps.
I started roughly in the middle and went all the way round in a circle, then added rows above and below. 
Upcycled pom pom pen tub
It would probably make more sense to start at the bottom and work your way up - I'm not entirely sure why I didn't do that! 
I went for a totally random colour scheme but you could do a fab pattern if you felt so inclined. 
Upcycled pom pom pen pot
That's it. Easy peasy, lemon squeezy and you have a fabulous, colourful pom pom pen pot to brighten your day. Your desk will have never looked better! 
Upcycled pom pom pen pot
Doesn't it just make you want to pom pom all the things?! 
Update: This also helps if you are a little clumsy and drop pen pots on the floor occasionally - no breakages here - whoop whoop!

You might also be interested in:
Plastic tub planter
Plastic tub Planter
Comic Covered Pen Pot
Ikea Cactus gift wrap
Ikea cactus gift wrap
Tetris Note Book
Tetris Note Book
I'll be linking up at these great link parties, why not check them out!

read more

Wednesday, 8 March 2017

Embroidered Shirt Refashion

Embroidery embellishment on clothing seems to be everywhere in the shops right now and it's easy to create a little of this look at home. 
Embroidered Shirt Refashion
This post contains affiliate links, if you click through and make a purchase then the cost to you will be the same but Sum of their Stories will receive a small commission
One of the trends that is all over the place at the moment is floral embroidery on clothes. I keep seeing it in every shop window I walk past, it was even mentioned at the CHSI stitches show a few weeks ago as a big fashion thing. Some trends come along and stay for ages, others are in and out again before you know it. I'm no great fashion expert and I don't want to spend lots of money on something that is "here today, gone tomorrow" so I thought a DIY nod to this embroidered fashion trend might be in order.
Pocket embroidery

I've had this old denim shirt for a few years now, it's soft and comfy and goes with loads of things.

A couple of evenings and some pretty simple stitching later and it has a new lease of life.
I love the red embroidery thread on the denim but you could try this idea on any colour or fabric shirt.
I used the DMC magic sheet that was in my goodie bag from the CHSI stitches show to transfer my design to the fabric. I like how it makes the fabric stiffer so an embroidery hoop is not really needed (at least I didn't use one and it turned out fine) 

To create a similar refashion you need:
  • A shirt - with a pocket if you want this "flowers in the pocket" effect
  • Embroidery threads, mine was DMC coloris 4517 for the flowers and DMC 522 for the green stems and leaves
  • Embroidery Transfer Magic Sheet by DMC or similar, or a wash out fabric marker pen
  • Sharp embroidery needle and scissors
Start by drawing a simple design on scrap paper until you are happy with it. Or you can copy mine here,  it's not precisely what I ended up with on the shirt, but it gives a rough idea.
simple pocket embroidery design

Now transfer your design onto the magic transfer paper if using. I used a pale blue pen which was probably a mistake as a darker colour would be easier to see. I'm afraid I was being lazy and just grabbed what was to hand.
simple pocket embroidery design
To put the design onto the fabric you just cut it out, peel off the backing then press it down firmly.

Now you just stitch your design using 2 strands of the embroidery thread. I did all the green stems and leaves first using back stitch for the stems and lazy daisy stitches for the leaves. 
simple pocket embroidery design
I used the DMC coloris thread, again with 2 strands, for the flowers and did a mix of lazy daisy stitches, simple long stitches (I'm not sure exactly what to call them, kind of satin stitch but not so close together) and some woven wheel stitch. My nan taught me these years ago and I was reminded of them just the other week by this great tutorial from Tea and a Sewing Machine. 
simple pocket embroidery design
Because the DMC coloris thread changes colour as you go it gives different shades to the flowers without you having to change anything.
The magic sheet transfer paper is pretty cool, I have no idea what it's made off but when your embroidery is all done you can just run it under the tap and in seconds the paper just turns to a kind of jelly and then vanishes. 
simple pocket embroidery design
I confess I started my embroidery threads with knots, normally a bit of a no no for embroidery but on the weighty denim I think I got away with it. 

I added a little embroidery to the cuffs too, in exactly the same way as the pocket detail. 
simple cuff embroidery design
Dry your garment, if it needs ironing do it on the wrong side with a fluffy towel underneath so you are not squashing all your lovely stitches and the wear your embroidered embellished top with the joy of knowing no one else has one exactly the same.

embroidery shirt refashion

You can go wild and add more or tone it down and add less. that's the beauty of doing it yourself! I can imagine a little on the collar, or maybe actually on the pocket instead of peeking out. 
embroidery shirt refashion


You might also be interested in:
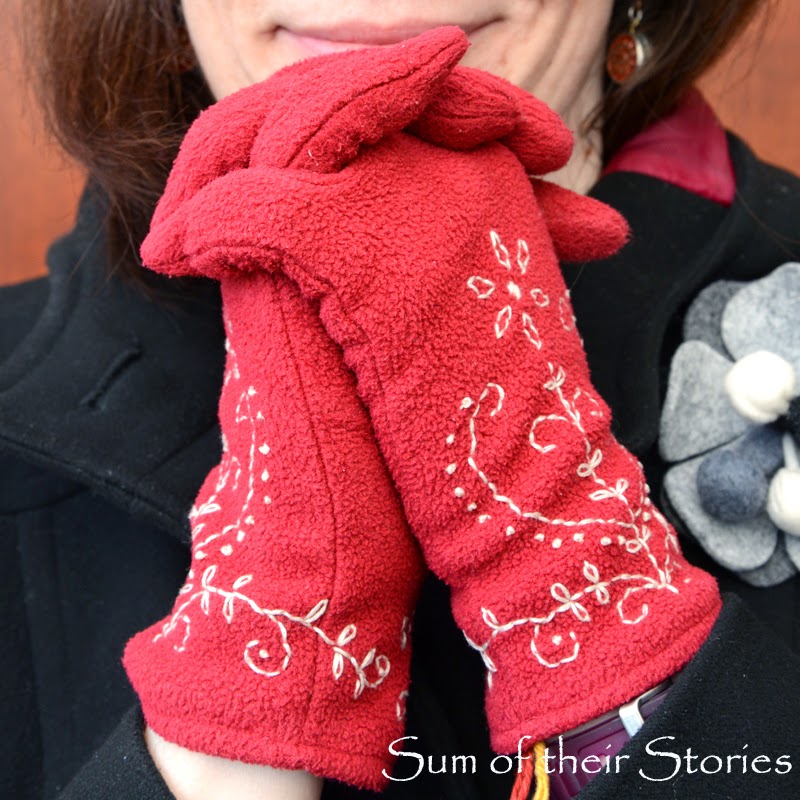
Embroidered Gloves
Embroidered Gloves
Making Toys from Kids Drawings
Cross Stitch Planter
Simple Embroidered Bag
I'll be linking up at these great link parties


read more

Wednesday, 1 March 2017

Button Clutch Bag

Cover an old clutch bag with buttons for a whole new look.
Clutch Bag covered inbuttons
I am SO excited to have this ready to share with you all today. This has been a long old time in the making! 
I first thought I'd like to cover a bag wth buttons several years ago. I keep my eyes open in charity shops thinking I might see something suitable, then thought maybe I should just make a cloth bag myself. Then in April 2015 I took a long haul flight in premium economy. Premium economy was fab, well worth the small amount extra it worked out....but this is not a travel review. On the overnight flight we were given little bags with a few toiletries. Very nice, very handy and a nice little clutch bag to take home and transform!
button clutch bag before
It was a grey felt with a button fastening and fully lined on the inside.
button clutch bag before

Next I needed to decide what buttons to use. I thought about nice bright ones.

Then maybe metallic buttons, which I liked but I didn't have anything like enough. Also most were buttons with shanks which would make the little clutch bag too bulky.
So I settled on pastel coloured pearl type buttons. I had loads and most are the inexpensive kind that had come off old shirts. 

This is a pretty simple makeover / refashion.
You simply sew the buttons on.

Ha ha! So quick to type, SO time consuming to do!
Button bag refashion
The main things I learnt, ie my top tips are: 
  • You will need WAY more buttons than you would think. I thought I had loads but ran out and had to wait to source some more from old garments and charity shop purchases. 
  • Use regular sewing thread but have it double for strength.
  • Don't have your thread too long, it will catch on the buttons. Just accept you will have to cast off and start a new length of thread often. 


Button Clutch Bag

  • It's a little tedious, so sew the buttons on whilst watching tv. 
  • This is not a quick craft, it will take ages. That's ok, not everything has to be instant, not all crafts are quick.
  • My bag had an elastic loop to secure it. I simply swapped the button it fastened to for one with a shank.
  • Your bag will be significantly heavier with all those buttons attached.
Button Clutch Bag
Just the right size for my phone, lippy, cash and keys. Perfect for a night out.
I did cover both sides of the bag, the back is the same as the front. I think I've mentioned before I like the back to have pattern or design too otherwise I feel cheated. I guess that may be why it took so long and used so many buttons! I guess if you are not so fussy and are happy with a plain back then this would be both quicker and use less buttons.
Even quicker would be to just cover part of a bag, maybe just the flap, or a panel if your bag had one. Or you could just add buttons in a strip either to one side or down the centre. 
Button Clutch Bag
After all this time, and it's been about 2 years in all, I am super pleased with my button clutch bag. It's very reminiscent of the amazing outfits of Pearly Kings and Queens from London.

read more