Showing posts with label Knitting. Show all posts

Wednesday, 1 February 2017

Crochet and Knit Fingerless Gloves

I love to knit and I love to crochet, these fingerless gloves bring both of those crafts together.
Knit & Crochet Fingerless Gloves
Photo credit Carla Nyanyo
Oh dear, this post has been a long time in the making.
I actually made these fingerless gloves for our daughter for Christmas 2 years ago! We've been meaning to take some finished shots since then but she was away at Uni, then we just kept forgetting. You can see that these finished gloves are not brand new, they have been well used for 2 years now, there is a little bobbling but that's real life. It shows what a great and useful make they have been!
Knit & Crochet Fingerless Gloves

Photo credit Carla Nyanyo
Let's go back in time a couple of years ..... I'd seen these beautiful gloves from Cherry Heart and just knew I had to make something along these lines, with those lovely little buttons.
Cherry Heart has a free crochet pattern so you may just like to mosey on over and make those. They are just so pretty I wouldn't blame you at all if you just click on over there right now!

I loved this edging and look but thought maybe I could make more stretchy gloves if the main body was knitted. I used a stitch that I have always known as Fisherman's rib, however a quick google shows that there are other types of Fisherman's rib - confusing! The one I do is:
row 1: *knit 1, purl 1 repeat from * to end of row
row 2: knit 
Also note all these crochet terms below are English ones. (also confusing!)

I chose a variegated yarn for a colourful effect but so I didn't have as many ends to sew in (#lovestripesbuthatesewingintheends) and constructed the edging in a slightly different manner to the original inspiration.

So this is what I did:

Crochet and Knit Fingerless Gloves

1 50g ball of Sirdar Click yarn in 'Verve'
6mm knitting needles
4mm crochet hook
A small amount of co-ordinating yarn of the same thickness for the edging. It was double knitting but I'm afraid I don't know how much, I just used up some leftovers. 
12 small buttons

This pattern makes fingerless gloves big enough for an average size woman. They are pretty stretchy.

Cast on 21 stitches.
Work 14 rows in knit 1 purl 1 rib
Then work 22 rows in fisherman's rib like this:
row 1: *knit 1 purl 1, repeat from *to end of row
row 2: knit
Cast off, leave a long tail for sewing up the sides.
It should look something like this:

Knit & Crochet Fingerless Gloves
The fisherman's rib part is different on each side, you can pick whichever side you prefer to be the right side.

Knit & Crochet Fingerless Gloves

From the top, sew up the sides for approx 5cm/2".

Knit & Crochet Fingerless Gloves
Pop your hand inside, you are sewing up from your mid finger to your thumb, so adjust as you need to.

Knit & Crochet Fingerless Gloves
Now we switch from knitting to crochet for that pretty edging.
Take a 4mm crochet hook and join the contrast yarn at the bottom cuff edge. 
Row 1: Chain 2 then HTR 27 stitches along the knitting edge to the point where you have sewn the edges together.
Knit & Crochet Fingerless Gloves
Do 2 HTR in each of the next two spaces (either side of the seam) then another 28 HTR back down the other side. You should have 30 stitched on each side so 60 in all. Turn.
Row 2 forming the button holes: 1 chain, 1 DC in next stitch, *2chain, skip 1DC(makes button hole), 2DC in next 2 sts, repeat from * 6 times. Then finish row by DC in each st to the end. Turn.Knit & Crochet Fingerless Gloves crochet edging
Row 3: DC in each stitch until you reach the button holes. Work 3 DC in each button hole loop, SS into the DC's between the loops, repeating to the end then DC into the last stitch.
Knit & Crochet Fingerless Gloves crochet button band
Fasten off the ends and weave in the ends.

For glove 2 just flip the button border. Work row 1 as described above but then work the button holes on the other edge. So for row 2 you will work all the way to the top to the thumb space, then work 10 DC down the other side. Now start your button hole loops as described in the pattern. 
If you do make 2 identical gloves I really don't think anyone would notice though!
Sew the buttons on to the non loopy side of the border and you are done.
Knit & Crochet Fingerless Gloves
Photo credit Carla Nyanyo
You can be pretty flexible with this pattern; you can make your gloves longer just by knitting more, rib or fisherman's rib. If you do that you will need more crochet stitches for the edging of course and maybe more button holes. Don't get to worried about the edging, as long as it goes all the way round it's all good. You may have 60 stitches, you may end up with just a couple more or less, it's pretty forgiving and not especially crucial to be precise. 

Do you ever wear fingerless gloves? Our daughter likes them when she is using her camera outside and I know some people like them for touch screens, if they have to handle money etc. Personally I still wear these embroidered gloves from 3 years ago, so my fingers are cosy but then when I want to use my phone.......
Photo credit Carla Nyanyo
You might also be interested in:

Diamond STitch Crochet Baby Blanket
Diamond Stitch Crochet Baby Blanket
Earphone Wire Tidy
Earphone Wire Tidy
Rainbow Heart Garland
BasketWeave Cowl
Basketweave Cowl
I'll be linking up to all these great link parties, why not go and have a look!

read more

Wednesday, 4 January 2017

Basketweave Knit Cowl

A free knitted cowl pattern perfect for beginners or experienced knitters who just want a quick and easy project.
Basketweave cowl free knit pattern
Sometimes if I'm let loose in a shop that sells balls of wool and yarn they call to me and I am forced to buy them and take them home. Then I have to think of something to make with them. 
Most of my purchases are made like this, I fall in love with the yarn then have to find a pattern. I think the other way round is probably easier but the yarn calls when the yarn calls.

I bought 3 balls of this beautiful multicoloured yarn a little while ago.
It's Illusion by Hayfield and comes in a few different colour ways with magical names like Abracadabra, Enchant and Presto. I had to buy 3 because there was an offer and it would be rude not to. I chose 3 different shades, thinking a 100g ball would be enough for a scarf, hat or other winter warmer type thing.
I used 1 ball for a child sized scarf for one of my niece's birthday present. I didn't take photos but it was a simple crochet scarf with big ol' tassels on the ends. Maybe one day I'll make another similar one and take some photos and write up a pattern, on this occasion I just needed it quickly as her birthday was looming!
Ball number 2, Abracadabra, is this lovely black, blue, green and purple mix that I used for this simple cowl in a basketweave knitted pattern. 
Basketweave cowl free knit pattern

Basketweave is such a simple pattern and there are lots of different versions. You only need to be able to knit and purl to do this - easy peasy!
Basketweave knit
My basketweave is 4 knits, followed by 4 purls, kind of like doing a really wide rib, then after 4 rows you switch and the knits sit on top of the purls and visa versa. Now it's kind of like an enormous moss stitch.
What I love about this pattern is:
  • it is completely reversible, which means you can wear the cowl in loads of different ways.
  • it doesn't roll up at the sides like stocking stitch.
  • it doesn't pull in and become narrow like rib.
The finished cowl measures 26cm(10") x 76cm(30") and it joins with 3 buttons.
Basketweave cowl free knit pattern
You could easily add additional button holes if you wanted more buttons. I used old buttons from my stash so they are all sightly different, which I kind of like. The buttons are not just a decorative feature though, joining the cowl like this makes it more versatile to wear.
I've found a few different ways to wear it but I'm sure there are loads more.
Basketweave cowl free knit pattern
Just pop it over your head as a simple tube.

Basketweave cowl free knit pattern
 With just the top button done up

Basketweave cowl free knit pattern
 Undo the buttons, give it a twist and then do the buttons up again. This is my favourite as the twist makes it hang nicely. Here you can see how the knit is double sided - you can twist it as much as you like and it makes no difference what side is showing.

You could make your cowl longer or shorter if you like, just knit it to the length you want. You could make it wider or narrower too, just cast on more or less stitches at the beginning, as long as it's in multiples of 4 you can please yourself. 
This photo show how this length hangs round my neck, to give you an idea. (I have the 1 twist in it here too) 
Basketweave cowl free knit pattern
The yarn I've used is DK, which is by far the most common type in the UK. I believe it's the equivalent to a light worsted in the US. You can use any yarn that's close enough, this is definitely not an exact science type project. I used 5.5mm knitting needles which is a larger than the button band suggested for this yarn. The bigger needles make the finish knit nice and floppy.

Basketweave Knit Cowl pattern

You will need:
100g ball of DK or equivalent (you won't need the full 100g though, I had about 1/4 of the ball left)
5.5mm knitting needles
3 fairly large buttons

Cast on 44 stitches
row 1: *k4, p4 repeat from * to end
row 2: *p4, k4 repeat from * to end
row 3: repeat row 1
row 4: repeat row 2
row 5: repeat row 2
row 6: repeat row 1
row 7: repeat row 2
row 8: repeat row 1
These 8 rows form the pattern.
Work the 8 rows 20 times in total (the work should measure about 73cm (29") at this point)
Buttonhole row 1: pattern 5, cast of 2, pattern 14, cast off 2, pattern 14, cast off 2, pattern to end.
Buttonhole row 2: pattern 5, cast on 2, pattern 14, cast on 2, pattern 14, cast on 2, pattern to end.

Continue in pattern for 6 more rows then cast off in pattern.

Sew on the button, lining them up with the button holes. Sew in the ends.
Basketweave cowl free knit pattern
8 rows seems like a lot to memorise for a pattern if you are a beginner but trust me, it's really really simple. You will see how it's building up in no time at all and won't need to refer to the pattern after a couple of repeats.
My buttons are all just under an inch in diameter, but these button holes are plenty big enough if you use buttons that are a bit larger. The knit is very floppy and loose. If your buttons are smaller then I'd recommend making your buttonholes smaller by only casting off 1 stitch instead of 2. 
Basketweave cowl free knit pattern
Let me know below if you have any questions, and if you do make a basketweave cowl I'd love to see it so do tag me in any Facebook, Twitter or Instagram shares. 

You might also be interested in:
Harry Potter Scarf Pattern
I can make you that hat
Pom Pom Scarf Refashion
Doctor Who Scarf Bracelets
I'll be linking up at these great link parties

read more

Friday, 30 September 2016

Clutch bag recycled from an old knit

Saving an old piece of knitting and turning it into a little clutch was a bit of a fiddle but I think, well worth it.
Clutch recycled from an old knit
Photo Credit Carla Nyanyo
Today is a tutorial of sorts with a bit of a personal story attached. It's not a tutorial you could follow exactly as you are very unlikely to have exactly the same sort of knit that you want to recycle but hopefully you might be able to follow the steps and improvise to suit what you have.
I'd had this beautiful piece of hand knit for ages.
It was one of the things I had kept from my Mum's house when we cleared her house after she passed away.
I remember this project well, the pattern is from a book of mine that mum had borrowed, Great Knits for Kids by Debbie Bliss. It was going to be a cardigan for one of her granddaughters, my niece and it's a toddler size. Said niece is now 18 so this was made a LONG time ago. The yarn is a beautiful soft cotton, but no ball bands remain so I've no idea exactly what it is. I think it just got too difficult for mum to keep the Fair Isle pattern and do the decreases so it just got buried at the bottom of her knitting bag as an embarrassment/annoyance. When I found it I just couldn't throw it away but it took a while to decide what I could do with it. Not enough yarn remained to try to finish it and I knit to a different tension than my mum had anyway.

The piece measured approx 70cm (27") by 18cm (7") with just a little extra bit which I think would be one front. The cardigan pattern is one where the main bit is worked all in one and then it splits at the arm holes, that's why it's such a long thin piece.

To form it into a rectangle I undid the little extra bit and a couple more rows so I had a nice even row of loops.
Then chopped the moss stitch border from the bottom...

...and unpicked all the bitty bits to end up with another nice row of loops on the other long side.

So at this point I have a long thin piece of knitting that's all loops along both long edges.
I folded it in half, wrong sides together, so the long sides were basically doubled up. Then, starting from the unfolded edge, I crocheted the loops together using UK double crochet, that's single crochet in US terms. Hopefully the photos show it better than I can explain.
crocheting knit together
I had to be really careful not to pull the knit or it would unravel but other than that this was really simple. I then repeated along the other long side forming a long thin 'bag'.
Next I joined the open short sides together, closing the 'bag" using a simple slip stitch.
At this point I had a piece of knit, double sided, joined all the way round that was approx 35cm (14") x 20cm (8') and it seems I stopped taking photos at this point. I think you can work out from the finished photos how this bit went.
I folded one short edge up by just over 1/3 and then stitched up both side seams. 
Clutch bag recycled from an old knit
Photo Credit Carla Nyanyo
I added a button and a loop closure and that was it. The piece of precious knit was saved. Phew! I now confess as I chopped into the knitting with my scissors early on I did hope I was doing the right thing!
Clutch bag recycled from an old knit
Photo Credit Carla Nyanyo
I'm calling it a clutch, it is pretty small, so maybe more of a pouch. Anyway whatever it is I am happy that this little bit of knitting is no longer sitting in a paper bag. I'm sure mum would have been pleased all the hard work she did wasn't wasted either, I know the fact she gave up on it had frustrated her.

Just to finish the story, I gave this clutch/pouch to my niece, the same person the toddler cardigan had been intended for in the beginning. I think mum would have been really pleased about that.

As I said at the beginning this is a very specific tale of saving a specific piece of knitting but I think the idea of fashioning a bit of lovely knitting into something else is probably transferrable. Do you have any old knits that you could imagine saving in a similar way?
You might also be interested in:
Harry Potter Scarf Pattern
12 alternative uses for novelty yarns
Crochet Flower Garland
Doctor Who Scarf Bracelets
I'll be linking up at these great link parties

read more

Thursday, 16 June 2016

Owl Post

A collection of 18 Owl themed craft ideas and projects.
Owls were everywhere a little while ago, it seemed they were on everything! Never one to be a strict follower of fashion and trends I'm proud to say I still love owls.
So when I was trawling through some old photos the other day and found quite a few handmade owl based things I thought I could collect them up with some other lovely Owl crafts from 'tinternet into an "Owl post" (Awh, see what I did there Harry Potter fans!)
Picture from Pottermore

Let's start with a bit of a long story, I'll try to keep it brief. Long before my own blogging days I read lots of lovely blogs, one of which, You Go Girl I'd come across one day when looking for doodle embroidery ideas. Now it was there that I saw these super cute felt creatures, included an Owl. There was a link to another blog Juicy Bits where you can get a free pattern for a similar felt owl - are you still with me?!
I combined the pattern from Juicy Bits with the embroidery ideas from You go Girl and made a few felt Owls.
Then using the same pattern shapes I made a paper pieced card to match.
I love how this came out, I need to make this one again soon!

Paperchase had a lovely owl wrapping paper at the height of the owl fashion mania and I used it for more card making.
I just stuck one owl to card, cut it out and fixed it with foam pads over another Owl. Then just added googly eyes to finish it off - love googly eyes! The letters are from old coloured envelopes and are punched using my lovely Quickcuts Squeeze die cutter.
Here I've just added another "wrapping paper on card" owl on a really simple gatefold card.

I found this (at least) 10 year old toilet paper tube owl our daughter has kept because her cousin made it for her. It is a little bit faded!
You can find tutorials to make similar ones here and here.

This lovely felt needlecase is something I have inherited from my Mum. Now I didn't actually know if she made it or was given it but I do know she loved it and so do I.
I remember seeing her using it when I was little and I still use it all the time.

I might try to take a pattern from it sometime and see if I can recreate it.

A couple of years ago I made our daughter this cushion using this brilliant granny square tutorial from Repeat Crafter Me.

I'd also used the same basic owl pattern from the granny square but used a much smaller hook and made this little brooch.

Now here is a parliament* of lovely Owl based crafts I've found to inspire you a little more!

These cute pinecone and felt owls from Lia Griffith are a kids craft really but I think it would be perfectly acceptable for grown ups to make them too, don't you?


If you have a friend who sews wouldn't they love an owl sewing buddy? Or maybe you just need to make one for yourself. The pattern is free and there is a step by step photo tutorial too from The Modern Tomato.

Monroe from Sew Crafty Crochet adapted her favourite owl cushion pattern and made this lovely Owl from old denim jeans this Earth day.

Something for you knitters now, how cute are these owl gloves? It's from Julie is Coco and Cocoa and she has patterns for a matching hat and scarf too.


How about getting your upcycling on and making this wood slice owl from House of Hawthornes? Because they are made from mostly recycled bits and pieces I imagine every one would have it's own unique look and personality.


These free printable chocolate bar wrappers from Lisa Storms are so sweet! They designed for Mini Hershey bars but I'm sure it would be easy enough to find a chocolate bar that would fit wherever you live in the world, or just tweak the printing size to make them fit your favourite treat.


The idea of making owl pancakes seems like a holiday thing to me, I can't imagine ever having had time on a school morning! But a chilled out weekend or holiday morning ... so much fun to make and eat!
The recipe, tips and even a short video on how to put it all together are on Simple as That.

Have you ever tried loom knitting? I have to confess I haven't other than using what we used to call a French knitting dolly to make necklaces, bracelets and spiral placemats when I was a kid. I believe it's the same sort of method but it's possible to get much more impressive results. Just take this Owl for example from Loom Lore.
They have loads of useful information to help you get started with loom knitting too if you fancy having a go.

These button owls from Learn Create Love have been made into magnets, what a lovely kids holiday project.

This is fun little fella to make! There is a pattern and full instructions on Rustic Honey
I'm thinking how lovely he would be part stuffed with gravel or rice and used as a door stop.

Amigurumi crochet is often just so darn cute and it doesn't get much cuter than this sweet little owl from Kristi Tullus
A free pattern and super clear step by step photos, my favourite kind of tutorial!

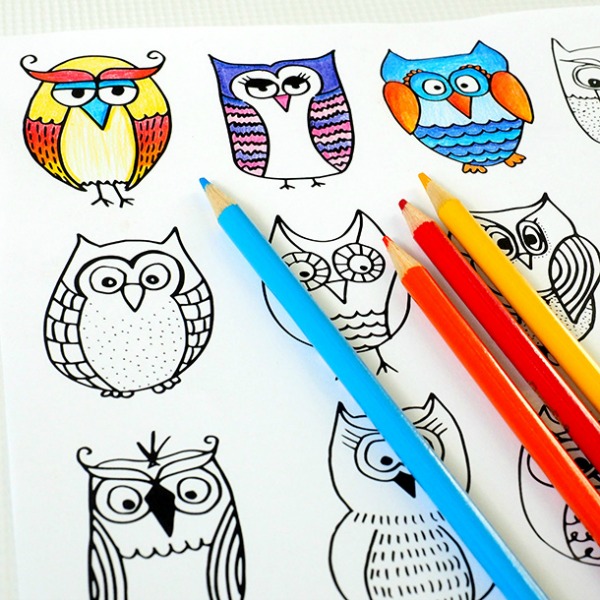
Have you become hooked on the colouring in craze or fancy having a go? Or maybe you are looking for the kids to do on a rainy afternoon, check out these lovely free owl printable pages from Dabbles and Babbles.

So there you have it, an owl post! Are you a fan of these wise old birds? 
* a whole load of owls together is a parliament apparently, I looked it up and that's what Mr Google said so it must be true...
You might also be interested in:
Rainbow Heart Garland
12 Ideas for Novelty Yarns
12 ideas for novelty yarns
Recycled gift wrap ideas
Grey and Bright Crochet Flowers
I'll be linking up at these great link parties

read more