Showing posts with label Gift Wrap. Show all posts

Wednesday, 9 August 2017

Felt Gift Card Envelope

Gift cards are such a useful gift idea but it's nice to make them a bit special by making them their own felt envelopes.
felt gift card envelope tutorial

This idea was one I originally shared over on The Pinning Mama a LONG time ago. Back then I had made Christmassy envelopes, so when I made a pink felt envelope for a birthday person I thought it was high time I shared it here with you.

To make a felt gift card envelope you will need:
  • Felt
  • Ribbon 
  • Thread (either matching or contrasting)
  • A Sewing Machine (you could glue or stitch by hand if you prefer though)
Cut the felt to a rectangle 11.5cm x 19.5cm (4.5" x 7.5") and cut a 13cm (5") length of ribbon
make an easy felt gift card envelope
Here in the UK gift cards are a pretty standard size - 8.5 x 5.5 cm. If yours are different it is easy to adjust these measurements to fit. Use the photo above to guide you.
Fold your felt in half, length ways, measure 5cm (2″) from one end, mark with a pin, then cut from the folded corner to the pin.make an easy felt gift card envelope
Remove the pin and open the felt out.
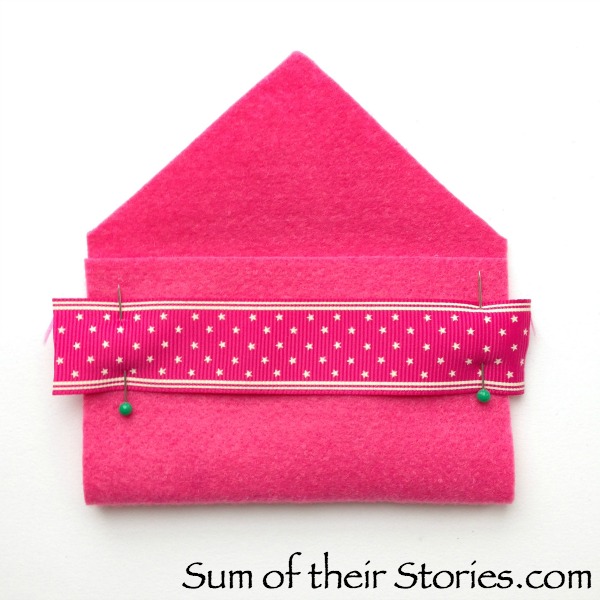
Fold the bottom edge up to just below the place the pin was. Position the ribbon across about 1.5cm from the top edge as shown holding in place with pins.
make an easy felt gift card envelope
Stitch in a straight line on both side seams, using a 1cm seam allowance. If you don't have a sewing machine you could stitch this by hand with a running stitch, or try a fabric glue.
easy felt gift card envelope tutorial
That's it! So quick and easy - you'll probably want to make loads! 
easy felt gift card envelope tutorial
You could make these any size. I imagine they would work for any reasonably flat gift , maybe a special photo or book, vouchers or tickets or even just cash.

I must really like making fancy gift cards holders as I've realised I have shared several over the years.
These made from old sheet music: 
sheet music gift card envelope
This origami folded envelope: 
origami envelope

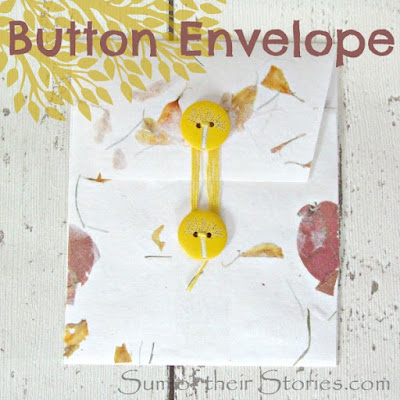
And this little paper envelope with a cute button fastening:
button fastened envelope

read more

Wednesday, 5 July 2017

Upcycled Gift Box

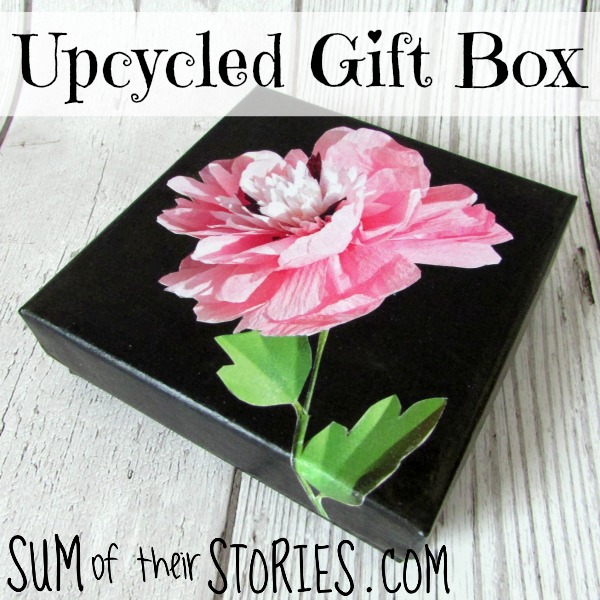
It's really simple to give an old gift box a new look with just a magazine and some glue.
Easy upcycled gift box
If you are a 'keeper' like me you will have a small stash of little boxes that are just too good to throw away! Maybe they had jewellery, a watch, a mug or new gadget in them, some packaging is just too good to just throw out ... and here is an easy way to make it pretty.
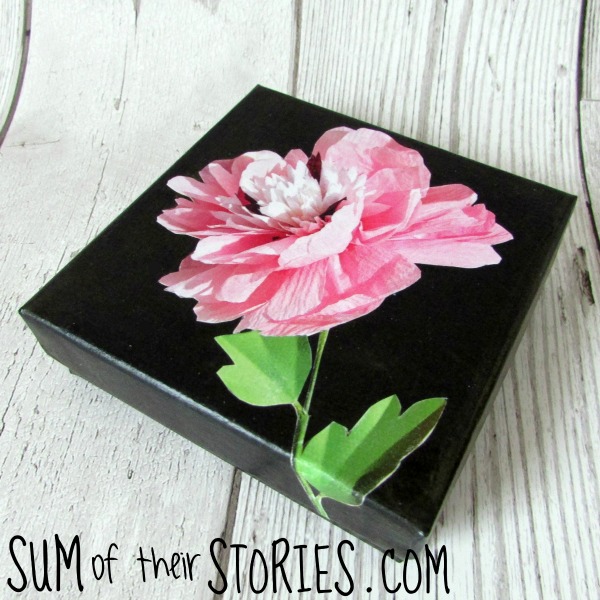
easy floral upcycled gift box


What you need is:
An old box, this one had jewellery in it originally
An old magazine or seed catalogue
Mod Podge or similar pva glue
A craft knife (you could use scissors at a push)
A brush for the glue

Select a suitable image from the magazine, my magazine was last month's Mollie Makes which had these gorgeous paper flowers in it. Rip the page out and then using a craft knife cut out the image.
magazine cut out for upcycled gift box
Be fairly careful but you don't have to be mega precise, especially if the flowers have wiggly petals like these. Do a few if you can, options are nice.
Now experiment for a moment selecting which image fits best on your box. I wanted to cover the marks and the writing on mine of course so turning the box sideways helped with the flower placement.
easy floral upcycled gift box
Cover the top of the box with a thin layer of Mod Podge, apply the flower then cover with another layer of the glue. It will crease or air bubble a little, that's ok. Smooth it with the brush as best you can but don't overdo it. Magazine paper is pretty thin and you don't want to rip it. 
You can see that a little of the stem went over the edge of the box here, I think that's a nice detail. You just glue that down in exactly the same way.

Just leave it to dry and ta-dah! You are done. What a pretty gift box you have made. 
easy floral upcycled gift box
I loved this so much I found a few more bits & pieces to stick my magazine paper cut outs onto. 
easy floral upcycled gift box
I covered the foam inside the old jewellery box with a little matching fabric too, just to make it more pretty.
easy floral upcycled gift box
I love the big bold flowers on the dark background especially. I think I'll start saving seed catalogues for more big floral cut outs. 
These are affiliate links, if you make a purchase when clicking through from here Sum of their Stories will receive a small commission. The cost to you is the same.
Shop this post UK:
Shop this post USA:

read more

Wednesday, 10 May 2017

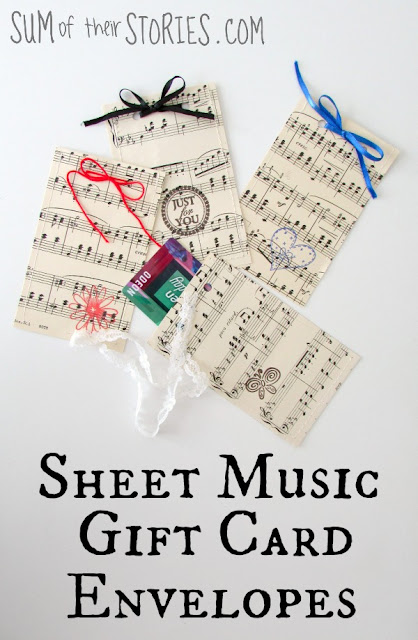
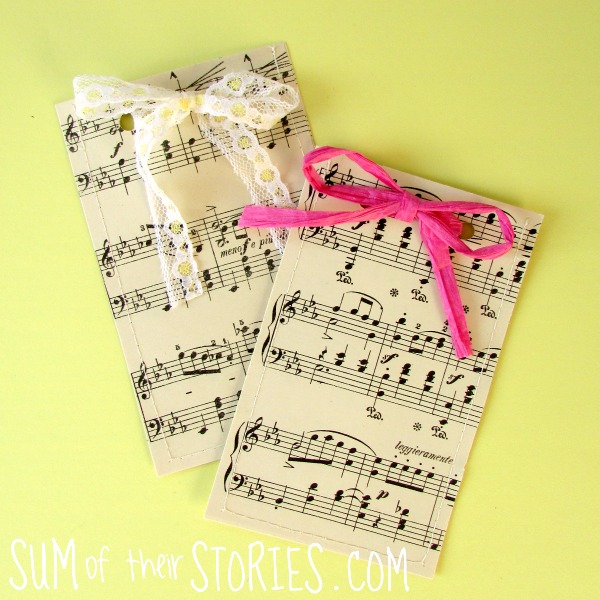
Sheet Music Gift Card Envelopes

Repurpose old sheet music into pretty envelopes for gift cards.
Sheet Music Gift Card Envelopes
I needed to make a cute gift bag of some sort for the embroidery scissors from last week's giveaway. I came across an old sheet music book when tidying up that came in handy.
Old sheet music
I bought book of music in a charity shop at least 30 years ago (eek) when as a teenager I was learning piano. My ridiculously optimistic teenager self thought I would be able to play anything if I practiced enough. Ha ha! The reality was I didn't practice enough and certainly never got to the point where I could play anything in this book! I had used a few sheets for card making a while ago and then forgotten all about it. 
I made this simple little flat gift bag and slipped the scissors inside ready to send to the lucky winner.
gift bag made from sheet music
The gift bag turned out pretty cute and made me think a smaller version might make a nice envelope for giving gift vouchers.
 
To make you own sheet music gift card envelopes you will need:
Old sheet music (any old books would work nicely too)
Sewing Machine with an old needle
Sewing thread
Hole punch
Lace or ribbon
Optional - stamps and ink pads

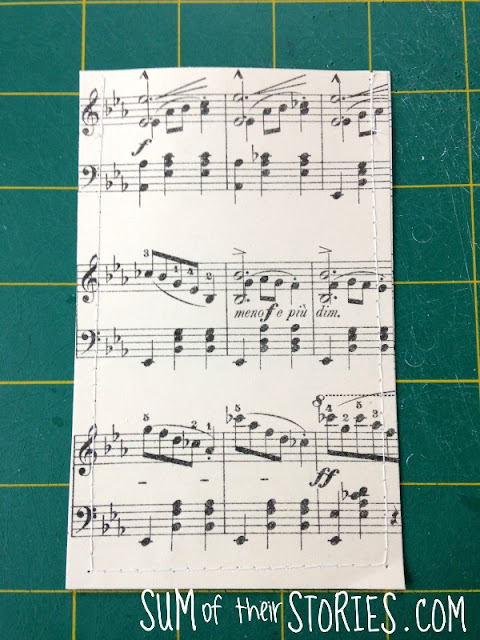
Cut 2 8cm x 13cm pieces of sheet music.
Sheet Music Gift Card Envelopes
Stitch round 3 sides, leaving 1 short side open. 
Sheet Music Gift Card Envelopes
If you start stitching an inch or so down the side and immediately go backwards to the top, then stitch down the side you won't have to worry about the ends undoing but at the same time you are not perforating the paper more times than necessary.
Sheet Music Gift Card Envelopes
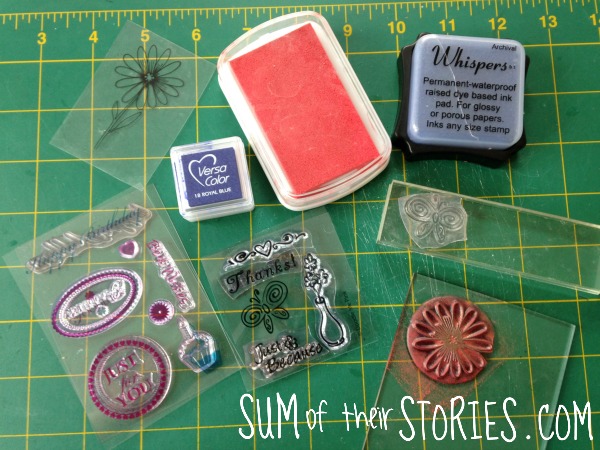
If you want to, add a design or 2 using any stamps and ink you might have. I don't have masses of stamps, mainly ones that have been free gifts on magazines.
Stamps and ink
I found bolder, thicker designs worked best. Anything too fine and detailed didn't show well on the busy background. These were my tests on scrap bits of paper.
I like how the brighter colours came out too, I thought gold would be lovely but really it was just a bit disappointing. Maybe embossing it would work ... I'll try that next time.
Sheet Music Gift Card Envelopes
Next use a hold punch to make 2 holes at the open edge. You could measure, I just eyeballed it. 
Sheet Music Gift Card Envelopes
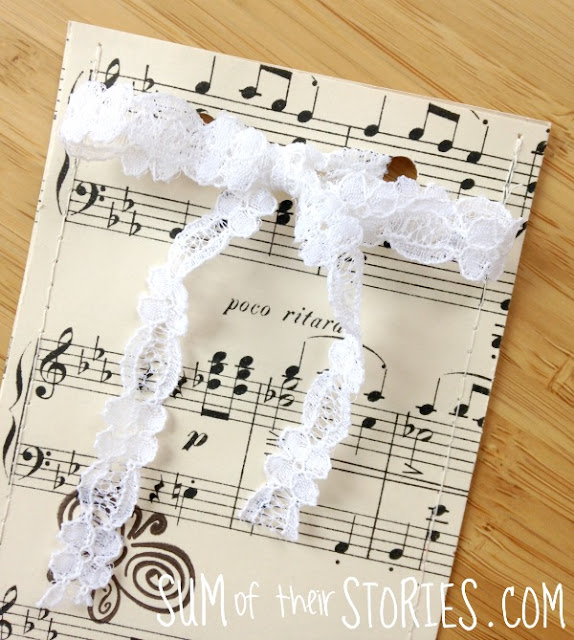
Pop in your gift card then thread a length of lace or ribbon through the holes and secure with a bow. A length of about 42cm should be about right. 
Sheet Music Gift Card Envelopes
I tried lace, thin ribbon (those ribbon loops you get in new clothes are idea), embroidery thread and raffia.
Sheet Music Gift Card Envelopes
I'm not sure which I like best, the ones with a stamp or the ones without. 
Sheet Music Gift Card Envelopes
I suggest keeping a sewing machine needle especially for sewing with paper. I used the one I had wrecked a few weeks ago when I made my cork and fabric key ring. I'm now keeping it separately especially for projects like this. Don't ruin a new one!

read more

Wednesday, 18 January 2017

Recycled Plastic Valentine Hearts

Make cheap and simple valentine decorations from old plastic food containers and nail varnish.
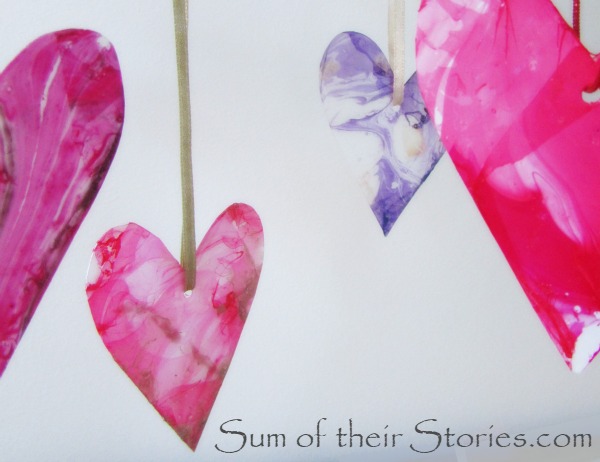
Recycled plastic Valentine hearts
This is an idea I originally shared as a contributor over on The Pinning Mama last year and as Valentines Day is looming I thought it was time to share the full tutorial here in case you want to have a go at making some easy Valentine decorations from old plastic food tubs.
Valentine hearts made from old plastic tubs

All you need is:
Old plastic tubs
Nail Varnish
Water
Plenty of scrap paper, kitchen roll and nail varnish remover for cleaning up afterwards!

You can use pretty much any food tubs that you have, the effects you get may vary a little but that is all part of the fun!
Valentine hearts made from old plastic containers
I had a white plastic margarine tub and a clear plastic ice cream tub that I used for my marbled nail polish hearts.

Unless you are lucky enough to have a tub with no pictures or writing on it the first thing you need to do is remove any print.
I found the easiest way to do that was to give it a good scrub with a kitchen scourer and a cream cleaner. Here in the UK we have something called Cif (it used to be called Jif back in the day) which worked a treat.
Now just cut out your heart shapes, I drew round a cookie cutter first but you can freehand if you prefer.
Punch a hole now if you want to be able to hang your hearts.
Now the fun bit....
Fill another old plastic container with water and drip some nail varnish on the top.
Add as many colours as you want, play around, experiment with what you have.
DO NOT try to stir the nail varnish to make patterns - it will stick to whatever you are stirring with. You just have to be brave and go for it!
Valentine hearts recycled from old plastic tubs
Dip your plastic heart in, then pull it out. That's it!
Now leave it propped up on some scrap paper to dry for a few minutes.
You need to add more nail varnish drops to the water for each heart, a little may be left on the water but not really enough for another dipping.
It's quite messy, you may find you marble the end of your finger like I did.
I found metallic nail varnishes showed up best on clear plastic, the results on white plastic were a little disappointing. It's so quick though, that if you don't like how one turns out you can just wipe it off with nail polish remover and start again. 
Recycled plastic marbled valentine hearts
Recycled plastic valentine hearts with nail polish marbling
These could make good card toppers, or maybe gift tags too. Don't be restricted to just hearts for Valentines day either, you can cut out any shape that takes your fancy.
This marbling with nail polish is SO much fun and it really does feel like magic when you lift out your item and the pattern is just there. You don't know quite what you are going to get which is not ideal for those who like control, but I loved the surprise and to be honest most came out WAY better than I could ever have planned.

You might also be interested in:
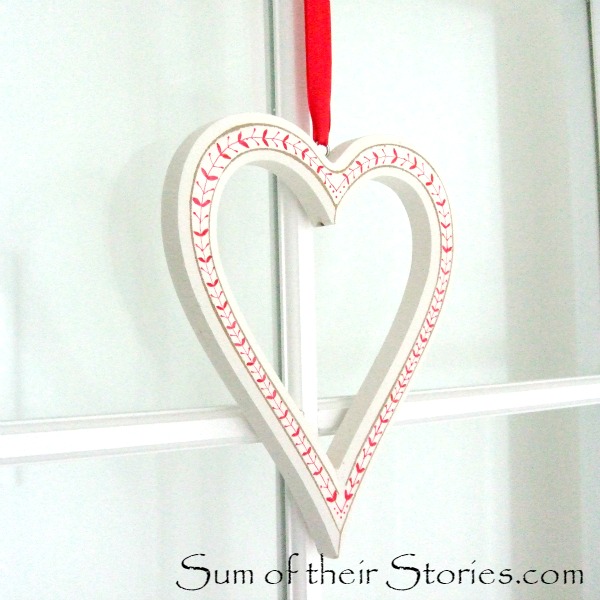
Red and White Heart Decoration
IKEA Cactus Gift Wrap
Recycled Pen Pot Tutorial
Gold Heart Pot
Gold Heart Pot
I'll be sharing this project at these link parties

read more

Saturday, 26 November 2016

Budget Gift Wrap (thanks IKEA)

Here's a budget recycling gift wrapping idea that comes thanks to our IKEA purchases back in November last year.
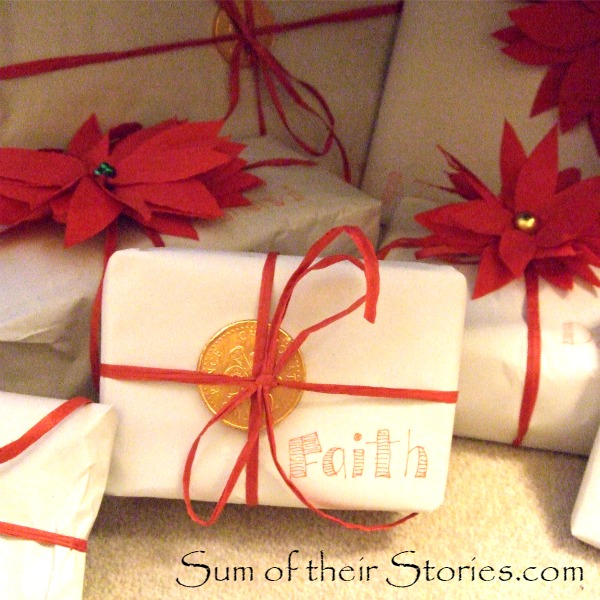
Budget gift wrap with Ikea paper
Apologies, these photos are not great as the presents are under the tree and we have had such grey weather here back in December last year that getting decent shots was problematic.

Two year's ago our Christmas gift wrapping was all red paper finished off with inexpensive white gift ribbon and gift tags made from old Christmas cards.

Then last year we have a reverse thing going on, quite by accident! 
In November we had some furniture delivered from IKEA, 5 low cupboards to go along one wall in the living room. I don't know if you have ever brought furniture from IKEA but sheets of thin white paper are put between some of the bits to protect them so I ended up with A LOT of really quite big sheets of this thin white paper.
Just that week I had made these paper napkin poinsettias with the intention of using them on presents, it was like it was meant to be!
The IKEA packing paper is pretty thin so I used it doubled up, luckily I had plenty, the ribbon is very inexpensive red raffia from Tesco. I've added the poinsettias for grown up ladies with a little dab from my hot glue gun. For the kids I added a chocolate coin (again with a teeny dab of hot glue), the guys just had the raffia ribbon. 

Budget gift wrap with Ikea paper and lettering tags
Instead of tags I'd written names on with a red pen and a cute font, I had to write on them after they were wrapped as I just couldn't work out the placement on the paper in advance. It came out ok on boxes but on some of the more squishy presents the letters wiggle a little bit!
Budget gift wrap with Ikea paper
I keep reading that normal wrapping paper is difficult to recycle, something about the inks and whatever makes it shiny. I tend to keep big pieces and reuse them anyway but this year I am happy to have saved this packing paper for a second use before it goes in the recycling.
I'm not suggesting for a second that it is cost effective to buy furniture from IKEA just to save money on wrapping paper! However if you are buying it anyway maybe save the paper and give it another use? This idea is not just for Christmas either, plain white paper could be great for birthdays all year round too. Just jazz it up with some ribbon, a flower or two or maybe some doodles, stamping and paint.


read more