Showing posts with label doodle. Show all posts

Thursday, 22 June 2017

Watercolour and doodle cards

I have had so much fun recently getting a watercolour effect just using regular kids colouring pens then doodling over the top when they were dry.
Watercolour and doodle mandala cards
I'd seen on Instagram a few people using Tombow pens as watercolours and it got me to wondering if those regular, inexpensive felt pens the kids had loads of over the years for colouring would work to. What I discovered is, that if they are the ones that say they wash out of clothes, then yes, they do - huzzah! 
I do have a pack pf pastel coloured Tombow's as well and I can confirm they work really nicely too. 
fake watercolour and doodled mandala cards

To make your own watercolour and doodle cards you need:
Washable felt pens
A fine line permanent pen - mine is a sharpie
Paint brush
Watercolour paper
A card blank & envelope
Watercolour and doodle cards

For the mandala cards I started by drawing round a tin lid, then filling in concentric circles with colours of your choice.
Watercolour and doodle cards
Then wet it with your paint brush until it's all smudged, the colour will start to spread immediately but your circle will still be pretty "line-y"
DIY fake watercolour and doodle cards
Leave it to dry, after about an hour mine looked like this:
water colour effect with felt pens
Nice, but still a bit lined. At this point I thought it wasn't going to work with the cheaper pens.
fake watercolour
Next morning when it had completely dried I was super pleased to see the lines had almost disappeared.
Now you are ready to doodle with your fine pen. Mine is a sharpie but i think other fine liners would work too.
These ones I did freehand, you can see they are a little wonky but I'm not unhappy with that look. 
Watercolour and doodle cards
You can see my tutorial about drawing more symmetrical mandalas here if you want some more ideas. 
Next I simple cut them out and glued them onto card blanks.
fake Watercolour and doodle mandala cards

Next I tried a more rectangular shape of felt pen 'watercolour' and drew feathers on top.
fake Watercolour and zentangle cards
I added the greetings with stamps.
fake Watercolour and zentangle cards
There are no step by step photos here but they are done in exactly the same as the mandala ones. Scribble with the water soluble felt pens, wet with the paint brush and then leave to dry completely.
Then doodle whatever you fancy. I did feathers filled with doodle but I'm thinking they could easily be tweaked into leaves.
fake Watercolour and zentangle feather cards
fake Watercolour and zentangle cards
The colours don't blend quite perfectly but I love that you can get this effect with something as simple as a kids felt pen or two.
I do have some bits and pieces of actual water colour and some water soluble colouring pencils that I had as a teenager (never throw anything away that might be useful!) so I'm going to do some more experimenting soon. 
There are millions of ideas online for zentagling and doodling (I have a board on pinterest if you want some more inspiration). If you are not feeling very artistic then you could use stamps, but honestly the doodling doesn't have to be complicated to look pretty. It's all about overall effect rather than expert drawing - have fun! 

read more

Saturday, 10 December 2016

Christmas Windows with Chalk Markers

Simple designs drawn on the window in fantastic Chalkola chalk markers that just wipe away in the new year.
Christmas Window doodles with Chalk markers
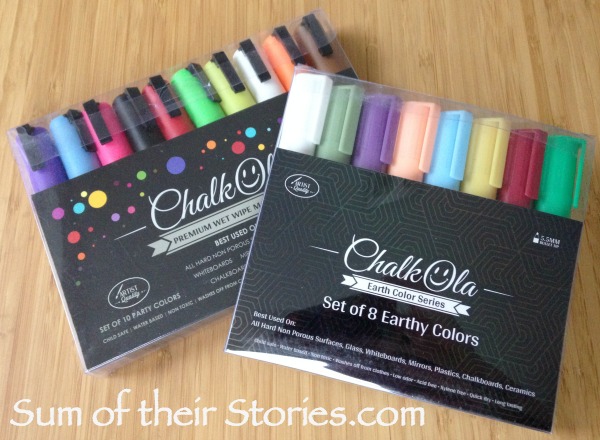
I was lucky enough to receive some Chalk Marker pens from ChalkOla in exchange for a review. 
Scroll down to the bottom for a 20% off discount code.
ChalkOla Marker pens
I have loved trying these Chalkola Chalk Markers out. They are so simple to use, smooth to write or doodle with and the colours are way more vibrant that I was expecting. They contain a high density chalk ink and it takes a couple of minutes to get them going when they are brand new. You pump the nib down a few times (like you would for any paint marker) and the nib gradually fills with colour - then you are ready to go. After that the ink flows pretty constantly even vertically like I was using them. If the ink flow slowed a little I just gave them a shake, depressed the nib again then it flowed freely again.

I've tried a few idea out with them so far, the first is a Christmassy wreath and greeting on the doors to our back garden.
That IS glass, it's just evening. Here it gets dark pretty early (about 4pm) this time of year so most crafting has to happen in the dark!
Start by drawing round a side plate with a white chalk pen.
Then add a very simple sets of leaves and then twiggy lines to make a wreath design.
Christmas Windows with Chalk markers
Add a few dots with a red Chalk Marker pen for just a little touch of colour. You could do your wreath in green if you prefer, the sets from ChalkOla have loads of colours to choose from.


This next bit I did a bit earlier the next day so daylight - yay! This is what I had so far.
Christmas Windows with Chalk markers
Next print your chosen greeting onto regular printer paper. I used a font called Bromello which I downloaded from DaFont. You might need a little trial and error before it is the right size for your wreath, I got lucky with mine. Or you could be super organised a measure everything properly first.
Blue Tack the greeting to the glass outside lining it up centrally.
Christmas Windows with Chalk markers
Doodling Christmas Windows with Chalk markers
Now you just need to trace over the words with your Chalk Marker pen. I found I needed one eye shut to do this, I'm not sure why, it just made it easier!
Christmas Windows with Chalk markers
It looks like I was a bit off with the tracing, but remember the camera is off the the side so it's a bit of a weird angle.
Christmas Windows with Chalk markers
Next just thicken up the down strokes next to give them a little more of a modern calligraphy look.
Christmas Windows with Chalk markers
The white pen shows best where there are no curtains or binds as once it's dark the design really shows beautifully. I'm going to try the other brighter colours on our front windows, where we have shutters, if I get time before Christmas.

In the daytime, with gorgeous dull grey UK skies the effect is more subtle but still pretty festive.
Christmas Windows with Chalk markers

These are the UK links to the products I tested :
https://www.amazon.co.uk/Chalk-Pens-Whiteboard-Chalkboard-Blackboard/dp/B01E17WAQO

https://www.amazon.co.uk/Chalk-Pens-markers-Whiteboard-Chalkboard/dp/B00VVOWCSC

Christmas Windows with Chalk markers
I've had SO much fun playing with these pens already and have more ideas to share with you using them. Photographing anything on glass is a challenge though! Hopefully you get a good idea of the fun and vibrant effect you can get with these pens. And as long as you use them on a non porous surface they just wipe away easily when you've had enough of them.
Update 7th Jan 2017
Just to reassure everyone that they really do just wipe away here is a quick photo from last night when I finally cleaned off our window wreaths using a damp cloth.


You might also be interested in:
Festive Mirror Fun
Festive Mirror Fun
Papercut Christmas Tree Picture
Paper Serviette Poinsettias
Origami Christmas tree ornament
Origami Christmas Tree Ornament
I'll be linking up at all these great link parties, pop over and have a little look round at all the lovely ideas.

read more

Friday, 18 November 2016

Themed Mandala Greeting Cards

If you can draw a really simple cartoon or doodle then you could make Mandala style birthday cards in a theme to suit the birthday person.
Themed Mandala Greeting Cards
This post has been a long time in the making. Way back in January I shared how to draw mandala designs for greeting cards and then a rare thing happened, I got all organised and ahead of myself and made cards for our kids for their 2016 birthdays.
This time I picked a theme from something they like and used that for the basis of the design.
I've had to wait all year until all their birthdays passed before I can share the idea with you!

First was this Star Wars themed card for our Star Wars super fan son. He has many other fandoms too but I really wanted to do a mandala with loads of little Yoda heads so that was that!
Star wars Themed Mandala Greeting Card
If you look closely, the doodles are VERY simple versions of the iconic Star Wars symbols, space ships and characters. I am a doodler not a great artist.
Star wars Themed Mandala Greeting Card
The words are basically all my favourite Star Wars quotes (and quotes from his favourite bits too of course!) 
  • Help me Obi-Wan Kenobi, you're my only hope
  • When 900 years old you reach, look as good you will not
  • These aren't the droids you are looking for
  • I love you. I know
  • I find your lack of faith disturbing
  • You were the chosen one (oh the feels!!!)
  • He's holding a thermal detonator
  • That's no moon
  • No, I am your father

I also wanted to include "Not if anything to say about it I have" but there just wasn't space in the end :-(

Next in the year was our oldest son's birthday and for him I did an Superhero themed card. He is also into all sorts of other things that I know nothing about so I thought it was best to pick a theme that I am at least a bit familiar with. Initially I thought it would be an Avengers theme but when I ran out of ideas that were simple enough* I extended it out to a more general superhero theme.
Superhero Themed Mandala Greeting Card
Again for the words I just picked out my (and his hopefully) favourite quotes:
  • I think our first move should be calling the Avengers
  • With great power comes great responsibility
  • I'm always angry
  • The price of freedom is high
  • Like the old man says - together
  • Baskin-Robbins always finds out
  • Hulk smash?
  • By Odin's beard
  • Genius Billionaire Playboy Philanthropist
  • I'm multitasking
  • I am burdened with glorious purpose
  • Is the sun come up?
  • We're just like Kevin Bacon
Superhero Themed Mandala Greeting Card

Last in the year, but actually the first I made, was this Harry Potter themed card for our daughter. She is a massive HP fan so picking this theme was a no brainer.
Harry Potter Themed Mandala Greeting Card
The words are "always" (again, the feels!!) and the rest are spells and of course no unforgivable ones.
Harry Potter Themed Mandala Greeting Card

To make one you just need to research your theme and start doodling.
Practice the elements first on scrap paper and simplify everything*
Check out the X wings and Yodas on the Star wars card to see what I mean by simplifying.
You really don't need to be super artistic (just see my lion in the Hogwarts shield above!) It's much more about creating a recognisable nod to each item rather than a work of art. 
The mandala is built up in the same way as I set out in my How to draw Mandala Cards tutorial.
You'll need a square shaped card blank, a compass to draw circles, a soft pencil and a decent eraser and then whatever pens you want to draw with. I used a black fine liner and just regular kids colouring felt pens. These cards were a bigger size than the other mandala cards I'd made, they are about 20cm(8") square. 

This whole thing was totally inspired by a fellow member of Dawn Nicole Designs Art & Hand-lettering Class Facebook Group. Dawn does a daily challenge which I have dabbled in now and again. She give a word prompt for hand-lettering or doodling and everyone shares their attempts. On Jan 1st 2016 the prompt was Mandala. I started drawing them and just couldn't stop - hence turning them into cards - and one talented member shared a Harry Potter themed mandala they had created. I took her brilliant idea and ran with it! After asking the group for help I've been able to find that is was a talented Photographer called Robyn, you can find her facebook page here to check out her photography and digital scrapbooks. 
If you like hand-lettering and art then this is a fabulous group to join. There are members from all over the world and they are so talented, friendly and supportive. As well as the daily prompts there are discussions about equipment, hints and tips etc. 

Have I sparked your imagination? What themed mandala card you could make for someone special?


read more

Saturday, 9 January 2016

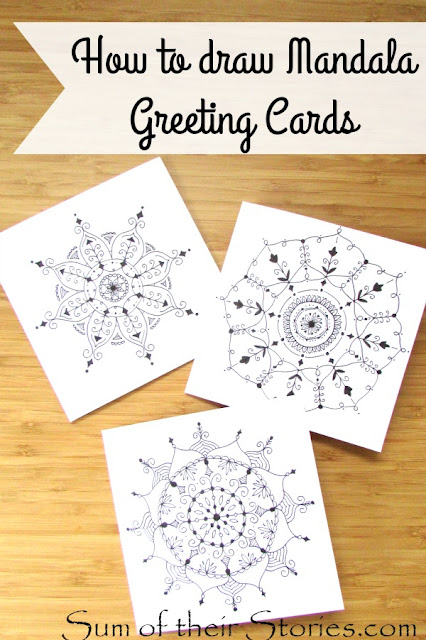
How to draw Mandala Greeting Cards

I've been really enjoying making these Mandala inspired cards so I thought I would share the process with you in case you fancy having a go at making your own.
How to draw Mandala Birthday cards
Even though I have enjoyed making these SO much I have been in two minds about whether to share them publicly. I am aware of issues of cultural appropriation and the rampant taking/stealing of things of cultural significance to others. Mandalas and Rangoli are sacred geometric art for many people so I do not create them lightly. A quick internet search will find you lots of information about them, traditional symbolism, meaning and uses if you want to know more.
I have asked several friends who are Buddhist, Hindu or Sikh and none had any issue with my cards, in fact they all asked if they would be getting one on their birthdays. With their nod of approval I feel comfortable sharing here and hope no one is upset as that is not my intention.

To make one you will need:
A square card blank and envelope
A pencil and ruler
A good eraser
A compass (the kind to make circles not to navigate!)
A black fine liner pen

Using the ruler and pencil, draw diagonal lines faintly from corner to corner on the front of your card blank.
Then going through the centre point where those lines cross draw a central line vertically and horizontally. I'm not sure how best to describe this so here is a diagram!
Now take your compass and with the point in the centre of the card front, where all your lines are crossing make a series of circles in faint pencil 
This photo shows this but might be a little hard to see as the pencil is faint so that it's easy to rub out later.
 Now just start drawing. Circles, lines, swirls, ovals, whatever you like.
If you are not confident just keep it really simple; circles joined by lines, a swirl or two.
 I've generally started in the centre and worked out. 
drawing your own mandalas
Use the circle guide lines to keep the design round and the straight guide lines to help you keep everything symmetrical.
I think it looks best if each "slice of pie" is the same, has the same number of each element in it, the same number of circles etc.
Stop once you have the basics of a design in place and then start inking it in using a fine liner pen. Mine was black but you can use any colour, I suggest you check on some scrap card that it doesn't seep through first though.
Once you have inked in the design so far you will find it much easier to see any gaps that you think need filling in with more design elements.
It can be hard to know when to stop, I say just stop when you think it's enough! 
These are incredibly relaxing to draw. Because you can do very simple shapes and just repeat them it is quite meditative. You need to think about what you are doing so you don't make a mistake, but then that means you are not thinking about everything else - like what is for dinner etc! 
Normally I would have the radio on when I'm making anything but for these I just liked it quiet.

This next design is a little more flowery but you can see it was built up in exactly the same way.
In this close up you can see what I mean about using the guide lines to keep things symmetrical.
I drew one petal centrally over the guide lines, then another centrally between them. Finally I filled in the gaps. Does that make sense? 
Here are some of the other designs I ended up with:
How to draw your own Mandala designs
I ran out of square card blanks so made some on 5 x 7" rectangular cards and added some twirly writing.
How to draw your own Mandala designs
I made a mistake on the outside border of this last one below and had to end up putting more lines with a loop in that I originally intended, if you look closely you can see it's not very even. However I think it finished up being pretty so I'm including it here so you can see little mistakes don't matter too much!
draw your own Mandala birthday card
This whole thing started when "Mandala" was the word of the day on the brilliant #DNDchallange over on instagram. It's a doodle and hand lettering challenge organised by the super talented Dawn from Dawn Nicole Designs, details on how to join here
This was my entry on that day, I liked it so much I just wanted to draw more!

It's a really lovely challenge, you might remember I did it back in September too. Dawn also does a facebook based class for learning fancy hand lettering, where she gives helpful hints and homework. You can find more details are here.

I've left all my Mandala designs just black and white but you could colour them in too if you like. 
I hope you have a go and enjoy drawing these Mandala's as much as I have.

read more