Monday 16 March 2015

Photo Name Birthday Card

Here's a really personal greeting card idea that is super simple to make.
How to make a photo name card tutorial
Of course it helps if you are making it for someone as gorgeous as my nephew Luke. Honestly - just look at that lovely little face, could he be any cuter! Anyway, I digress! Back to making the card.

You need:
A computer
photo paper (not essential but nice)
A DL card blank

I used Publisher for this but I think you could just as easily use Word or Powerpoint. 
Paste your chosen photos onto a new blank document then insert word art letters and position them over the photos.
Choose a nice chunky font, select "no fill" and a 4pt or more outline.
Just think about which letters of their name goes on which photo, so that you can see most of their face nicely.
When you are happy just print onto your photo paper.
I chose to make my photos Black and White too, in Publisher you can just do that with the "adjust picture" tool "recolor". Where that is exactly will depend of what version you have.
Just cut out the letters of your little cutie patootie and stick then onto the card. Just take a minute or two to line them up nicely and make sure they are properly spaced.
I used a pretty thick outline for the lettering and cut them out leaving the outline showing. I like the outlined effect but you could just as easily have no border, especially if you have bright coloured photos. 
How to make a photo name card
I doodled a little aeroplane on the envelope. This was actually the start of my thoughts to make envelopes for handmade cards less boring. You can see some of my other efforts here and I do have some more ideas in the pipeline.
Luke loved seeing himself on his card, even though he is a little too young to be able to read yet!

You might also be interested in:
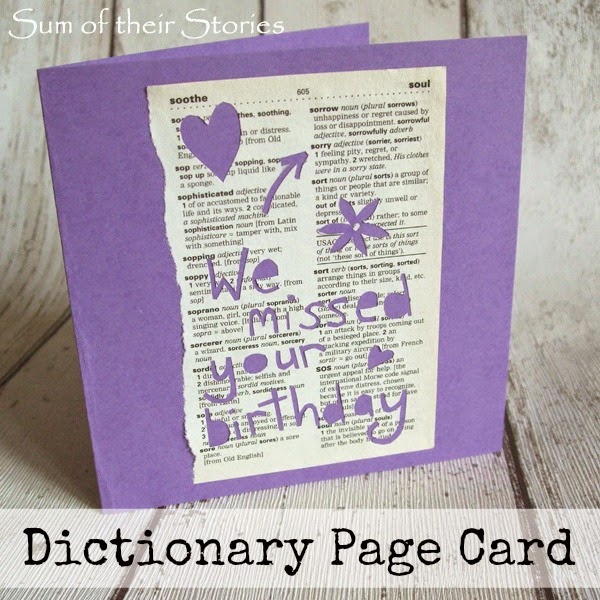
Dictionary Page Card
Circle Card Crazy
Circle card Crazy
Simple Speech Bubble Cards
Photo Earring Gift Card
I'll be linking up this project at these lovely link parties.

read more

Wednesday 11 March 2015

Easter Egg Gift Box

These little gift boxes are easy to make and perfect for giving little eggs for Easter.
I'm over at The Pinning Mama sharing a tutorial on how to make these little boxes. They are just the right size for a Cream Egg, but you could just as easily fill them with mini eggs, or something completely different. Just follow to link here to find the full step by step tutorial.

read more

Saturday 7 March 2015

Lilla Rose Flexi-Clip Review and Giveaway

Do you like to wear your hair up sometimes but struggle to get it to stay put all day? Do you have 3 minutes or less to get yourself looking presentable in the mornings?
So, something a bit different on the ol' blog today! A product review and giveaway.
I was lucky enough to receive this beautiful Flexi-clip from Lizzie, an independent consultant for Lilla Rose and I've spent the last few weeks trying it out. What a super easy way to put my hair up! 
Now years ago, when I had time for such things, I was quite adventurous with my hair and would try all sorts of different hair styles. Lately it's just dangling round my face or maybe in one of those ponytails where you don't pull it all through. I've lost my hair styling mojo but I really don't have time for messing about with it and I certainly don't have time for any sort of during the day fixing.

This is my hair from the back, just so you can see length, thickness etc. 
I can't believe how long it's gotten, I don't see it like this very much! (I think I need a trim) Anyway, the Flexi-clip comes in a variety of sizes for different hair types and lengths, they really do seem to do something for everyone.
I chose Medium, because I always find that this kind of clip...
is never quite big enough to get all my hair in when it's twisted up. Have you been there when you think it's all in then you turn your head and "ping" it's sprung undone?!

It came in very pretty packaging.
You also get a little instruction leaflet showing a couple of styles you can try, there are also demonstration videos on her Lilla Rose Website.

I tried the Ponytail.
Very easy, it's not rocket science to see what I did here! You don't need a hair elastic underneath, the clip hold it all in by itself.

The twist.
This is my favourite, so easy to do and feels so secure once it's in. No pins apart from the Flexi-clip are required. I used the clip whilst on my holiday recently (it was the only hair accessory I bothered to take) and you can see this twist came out a little different, but the same basic technique. These photos were taken at the end of a day's sightseeing - no touch ups!

I also tried a style where I did a quick sort of French plait then folded the ends up and secured them with the Flexi-clip.
My hair is just a little too long for this one on reflection, I'll try this again after my trim.

My Flexi-clip is called Interlocking Vines. I like the classic design and the fact it kind of goes with everything. They come in LOADS of different designs though, some with coloured beads and different coloured metals.

Now the fun part, I have a Flexi-Clip to give away to one lucky reader.
You can enter using the Rafflecoper below, there are lots of ways and you can enter as many of them as you like. 
The winner will be chosen at random on 15th March and will be able to choose any Flexi-Clip in the size of their choice (except the Flexi-clip of the month) 
The giveaway has now closed, I'll be notifying the winner tomorrow. Thanks to everyone who entered.

a Rafflecopter giveaway
Even if you are not the lucky winner you can register on Lizzie's Lilla Rose site and get updated with an email when there are sales on - no purchase necessary to register. They ship internationally too.
Disclaimer: Although I have no received monetary compensation for this post I have received a free product. The views I express are, however 100% my own
read more

Tuesday 3 March 2015

Late to the Party!

I've finally joined Instagram! Whoop Whoop! 
Maybe a little late to the party but better late than never. 

I'm slowing working out what to do, with the help of some of my very lovely blogging friends (honestly craft bloggers are just great people). It's visual and I like visual so I have high hopes for liking this as a social media.
If you have any fabulous hints or tips do let me know by leaving a comment. Like how to I get my images on that grey box up the top for starters? 
You can find me here, if you want to follow (that's a thing right?)

To start things off I'm joining in with a fun sewing themed photo challenge from The Daily Seam
I think it's fun to participate with others, especially when starting something new. Hopefully by the time the month is up I'll be an Instagram expert and will have found lots of like minded folks to follow. (Yes I know, good luck with the "expert" thing!) 
I think it's unlikely I'll manage a photo everyday but it will be fun to try.

So please, pass on your Instagram wisdom, as usual there is lots to learn.

read more