

Sewing My Stash - Part 1
I feel like I must have been living under a rock or something, I'm not quite sure how this has happened. I make things. I've been making little bits and pieces my whole life so how is it possible I've never seen this way of making super cute, super easy fabric holders for your pocket pack of tissues until now? How? How?
This all started a few weeks ago when I finally got round to sorting out my fabric stash. I tend to keep it all - big bits, little bits, teeny tiny left overs from all the sewing I've ever done, charity shop bargains that I think I might make into something else one day. Plus I inherited quite a bit from my mum and my nan who both sewed a lot.
I got it all out, thinking I would be ruthless, get rid of all the bits too small to actually do anything with.
It looked like this:


Oh dear, oh dear, oh dear! Can you tell where I was sitting as I got it all out around me!
The trouble with fabric is that even tiny bits COULD be made into something. To throw it away just seems so wrong. So instead I decided I'm going to "Sew my Stash" and started looking on pinterest for quick ideas to use these tiny bits. I found a cute folded coaster idea and from there a folded fabric tissue pouch. All I could find at the time was one of those long pins with simple step by step but it didn't lead anywhere, so I played about a bit and took some photos as I went to show you how, just in case this is something you've not seen before either.
I made LOADS, I'm not kidding, if you know me in real life there is a good chance you will get one of these as part of your next birthday present! The first one (photographed for the tutorial) I added a length of elastic on the back for a little bottle of hand sanitiser . That is completely optional, just miss it out if you don't want that.
So, to make a super easy Pocket Pack Tissue Pouch you will need:

Fabric:
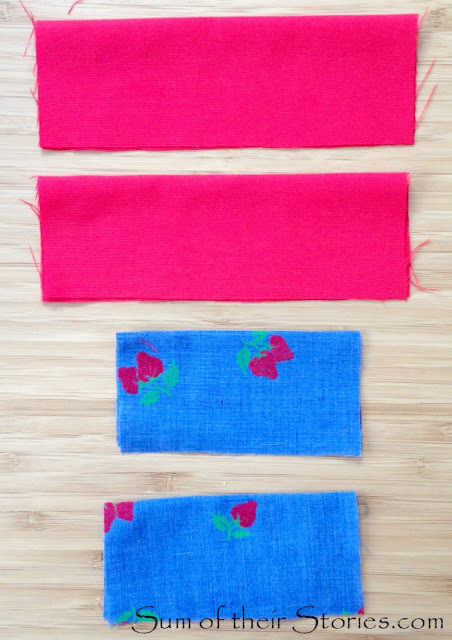
3 pieces 6" x 4"
2 pieces 4" x 4"
Optional
A length of ribbon, approx 5" ish
A length of elastic, this only has to be 4". Mine in the photo is way longer, I ended up trimming it off.
Fold both 4"x4" bits in half and 2 of the 6"x 4" bits also. Press with the iron.
 Now you just layer the pieces up.
Lay the remaining unfolded 6"x4" pieces on the table RIGHT SIDE UP, this is the back of the tissue pouch.
1) If using them, place the elastic and the ribbon, folded in half onto the back
2) to 5) lay the folded fabric pieces on as shown, making sure the folded edge is always to the middle


 I made this one for my mum many, many years ago, she always had it with her in her handbag. I can't bring myself to use it so I keep it in a little box of her things.


Lay the remaining unfolded 6"x4" pieces on the table RIGHT SIDE UP, this is the back of the tissue pouch.
1) If using them, place the elastic and the ribbon, folded in half onto the back
2) to 5) lay the folded fabric pieces on as shown, making sure the folded edge is always to the middle

6) lift the corner of the first piece and tuck the last piece under (that's in the top right corner of these photos) then pin to hold everything in place

7) stitch all the way round leaving a 1/2" seam allowance - you will want to stitch a little straighter than I did!
8) if you are adding a ribbon tag, when you get to it just reverse back over where the ribbon is just to reinforce it, then carry on
9) trim the corners as shown and the seam allowance. You can neaten the raw edge however you like, I used my pinking shears as you can see
10) turn the pouch out through the gap in the middle
Use something pointy to poke the corners into shape, a chop stick or similar, do not jam your fabric scissors into the corner too hard or your might do this:

Ops!
I also discovered that some tissue packs open at the end now, rather than in the middle. My seam ripper turned out to be perfect for making a middle opening to make the tissues work with the pouches I had just made.

Squeeze the tissues into the pouch and that's it - done!

I am a little disappointed that I wasn't more careful thinking about the placement of the strawberries, they are all rather hidden on the front. The back is all strawberry fabric though so it's not too awful.

This is just a small selection of the ones I made, you can see I didn't measure the ribbons and I only actually put the elastic on the first one. I am keeping my eyes open for prettier elastic for the next batch.

You can use 5 different fabric, just 2 or 3 complimentary ones or all the same, whatever you have that needs using up.

I've made tissue pack holders before, using the more traditional method.

I am loving this new method (new to me anyway) so much more. It seems quicker and the raw edges inside are less visible as they are tucked in further.

I don't pretend for a second to have invented this, but just in case you, like me, have missed out on this before, maybe you will enjoy making these as much as I did.
I'll have some more "Sewing my Stash" Projects to share in the next few weeks.

You might also be interested in:
|
|
|
|


I'll be linking up at these great link parties


I have made tissue pouches with my sewing class. If you can check out my pinterest board called classes, it has lots of small sewing projects that use up scraps and small pieces of material. Oven glove, scissor pouch, tissue holders etc. I have a make up /project bag on my blog last week that would be good for scraps - Keep going it is so liberating to see fabric used up. Jo x
ReplyDeleteOoo thank Jo, I'll check them out now. I'm always on the look out for more ideas!
DeleteNeat idea, but what is the elastic for? Thank you
DeleteHi, some people put a little bottle of hand sanitiser with their tissues, the elastic is to hold that. You could add a little pocket instead if you prefer, or leave it off altogether (which is what I ended up doing)
DeleteWhat a great litte gift idea! Thanks for sharing with us on Thursday Favorite Things.
ReplyDeleteCheers,
Jennifer
http://awellstyledlife.com
These are cute! I need to make me one for my tissues in my purse. You make it look pretty easy. Thanks for the tutorial. Pinning!
ReplyDeleteIt's a doddle Linda, so quick and easy it's ridiculous!
DeleteThis is such a good way to use scraps! I save them too and am not much of a sewer, but this I could tackle! Thanks so much for sharing. pinning! XO-Wendi@H2OBungalow
ReplyDeleteSuper easy, no mad sewing skills required - promise!
DeleteWhat a good idea, and adding room for hand sanitizer that would suit my friend just perfectly. I think she will be getting one of these thanks for the idea. xx
ReplyDeleteAh, I think we all have a friend who loves their hand sanitiser!
DeleteThank you for the remark about the hand sanitizer. I couldn't figure out what the elastic was for. I guess I need to get out more!
DeleteYou are not the only one. I couldn't figure out what the elastic was far either.
DeleteI can so relate to you sitting on the floor, surrounded by your fabric. And yes, the problem is... it all could be used. Good on you for finding ways to use up the small pieces. I've never seen this method of making tissue pouches - super simple and they look great!
ReplyDeleteI was cross legged with it piled up all around and the thought of it going in the bin was just too much for me! I'm surprised you'd not seen it before Pam, I think of you as a font of all knowledge for all things sewing related!
DeleteThese are so cute! I really like the fabric swatches they look so retro. And you get to use up your stash. I also hve a pretty large stash, something to think about. Maybe I can do this too!
ReplyDeleteIt's always good to find things to use up your stash Mary! and Yes I'm sure you could, it's REALLY easy.
DeleteWhat a great idea, they look lovely :)
ReplyDeletePinning! Thanks for sharing at Creative Mondays
My daughters love those little tissue packs. This is a project I am going to ear mark to make with them this summer. Thanks for the idea. Thanks for sharing your post with Creatively Crafty Link Party #CCBG.
ReplyDeleteThese are so simple they'd make a great beginner project.
DeleteLove how these turned out, made before but bot the overlapping way and think it looks so much better and stronger. Agree with the tissue packets they always used to open from the front middle.
ReplyDeleteI couldn't believe just how easy it was compared to what I've tried before!
DeleteThanks for the great tutorial.
ReplyDeleteThese are really cute, I might have to try and use up some of my fabric stash too - I really have lots of odds and ends to use up.
ReplyDeleteIt's nice to put them to good use, very satisfying!
DeleteSuch a creative idea I love the way you used the small scrap parts and made them into something beautiful, Clio lending a helping hand for Coombe Mill
ReplyDeleteThanks Clio, and thanks for visiting.
DeleteThese are really cute - and would stop my tissue packs getting all ratty in my handbag! Great tutorial - may have to give it a go! xx
ReplyDeleteA ratty old tissue that leaves fluff on your nose is never a good look!
DeleteThese are super cute and look simple enough that even I could make them! Thanks for sharing with us at Creatively Crafty :) #ccbg
ReplyDeleteReally really easy - promise!
DeleteBrilliant. Coming to you from Threading My Way.
ReplyDeleteCongratulations! This post is going to be featured over at Diana Rambles tomorrow and has been pinned in the Featured at Diana Rambles board at Pinterest and Tweeted. Please grab a featured button off my button page or via the post guidelines graphic. Thanks for sharing this awesome idea!
ReplyDeleteHow lovely, thank you.
DeleteVery cute! I have this on my "to do" list, because I too keep EVERY piece of fabric. Why is it so hard to throw out the leftovers? LOL.
ReplyDeleteI'm exactly the same, those little bits are hard to part with - now you don't have to!
DeleteI love them! Like you, I tend to save every little bit of fabric, and my crafts closet is one big mess. I totally need to dedicate myself to these stash busting projects. Thank you for sharing at The Really Crafty Link Party!
ReplyDeleteIt feels good to use little bits but weird that it doesn't have much impact on the space the stash takes up - at least it hasn't yet!
DeleteThanks! I knew it might come in handy to keep all those leftovers... eventually... now it did!
ReplyDeleteHappy crafting,
Marjan
Thanks so much for this. I am a volunteer tutor with an upcycling project and this will be perfect for using up the scraps left from cushion making. Shirt body makes the cushion and the sleeves will be used to make the tissue holders and some flower brooches. Very happy with this pattern. Catriona in Scotland
ReplyDeleteWhat a great idea to use up old shirts, that would be perfect.
DeleteLove this! So sweet looking and simple. Those small plastic packs are always getting torn up in my purse. Feel free to send any birthday leftovers my way ;). Thanks so much for sharing this great tutorial, Pinning!
ReplyDelete#makinghome great idea for using up scrap bits ....
ReplyDeleteYep, and most sewists have a lot of them!
DeleteI love this .. I think a pocket in the back for the sanitizer.
ReplyDeleteGood idea Alice, that would be really easy with just another folded piece of fabric laid on the table first, then the rest as normal.... I think. I might actually have to try it to make sure that works though!
DeleteOne of these has been on my to do list for sometime! haha. Thanks for sharing #MakingHome
ReplyDeleteI LOVE this way of making tissue holders, it is so easy and I have used up so many of my scraps!!! Thank you for showing us how to do this!! :D
ReplyDeleteI'm so pleased you found it useful. It's a great scrap buster isn't it?!
DeleteThis tissue holder is perfect for little gifts. I'm glad I found this., I'm just getting into sewing again after many years. always fun to have fast and easy projects to use up scraps. Thank You!!
ReplyDeleteHi Georgina, it's such an easy project you can wizz a load in no time. Good to hear you've got back into sewing after a break. It's such a lovely thing to be able to make stuff!
DeleteWhat a cute idea to get rid of scraps. I have made coasters that way, but never thought about making a tissue holder. As you mentioned in your instructions the elastic could be used for a small bottle of hand sanitizer, very handy in case it is a cold or even to clean your hands for any reason. I am thinking a little pocket would be great, using a snap. Thanks for sharing.
ReplyDeleteThank you for sharing this tutorial. These will make the perfect finishing touch to the cosmetic bag sets I am making for my daughters-in-law. Plus using up the scraps left over from the bags;)
ReplyDeleteHopping over from your feature at Threading My Way... These are wonderful! -Marci @ Stone Cottage Adventures
ReplyDeleteGorgeous idea. When I saw the picture I wondered where I would find packets of tissues to fit but I love that you've even covered that. Love it!
ReplyDeleteWhat is the elastic for? Why does it go on the out side? What is the ribbon for?
ReplyDeleteHow perfect these are! We're having a fundraiser at school and these would be perfect to raise a few $$ for our preschool grade level. I, too, have WAY too many small pieces of fabric that I can't bear to toss out.
ReplyDeletePut a piece of thermal wadding between the layers but make a square rather than a rectangle and after sewing all rough edges add an edge like a quilt for nice coasters
ReplyDeleteWhat a neat idea! Thank you - now I know what my friends are getting for Christmas. I think that a scaled-up version would be a nice pouch for baby wipes; maybe as an addition to a baby shower basket. You could even splash out and buy some baby-themed fabric - or perhaps PVC to make it moisture-proof.
ReplyDelete