Showing posts with label glitter. Show all posts

Wednesday, 2 August 2017

Glitter Hand Lettered Greetings

Make easy sparkly greeting cards for family & friends with simple hand lettering.
Glitter Hand lettered Greeting Cards
This post contains a review of products I received free of charge and contains my honest review.

As I've mentioned before, back in July when I attended the Stitching, Sewing & Hobbycrafts Show and the bloggers workshop I was given a goody bag with some lovely crafty goodies in it.
Tonic Studios products
In the bag was a great selection of products from Tonic Studios, several packs of cards, glitter, glues and Crystal Drops.
Jewel Tonic Studio product lids
First can we just talk about how pretty these products are? The lids are jewels - isn't that lovely? I think they would make great gifts for a craft loving friend.
I've been practicing hand letter again recently, not anywhere near as much as I should but still, practice makes progress. So I thought it might be fun to try making some simple hand lettered greeting cards.

The NUVO Deluxe Adhesive glue and the NUVO Crystal Drops both have a fine nozzle so it was fairly easy to just write with them.
  • Write a word lightly in pencil on the Craft Perfect Jet Black card and then go over it with the NUVO Deluxe Adhesive.
  • Sprinkle liberally with the NUVO Pure Sheen Glitter and then tap the excess away onto scrap paper.
Glitter Hand lettered Greeting Cards
The spare glitter can be tipped back into the pot ready to use again.
The glue needs 24 hours to dry throughly then it can be mounted onto a card blank.
Glitter Hand lettered Greeting Cards
The glitter sheds a little bit once the glue is dry but not too much at all. 

As my hand letter is still quite beginner-y I tried using a lovely font printed on the computer next.
I printed a selection of words in Bromello font (downloaded from DaFont) at font size 100.
  • Lay the printed word over a piece of Craft Perfect Electric Purple High Gloss card, positioning it centrally.
  • Trace over the word with pencil, pressing quite hard.
  • You'll be left with an indent which is fairly easy to see on the shiny surface. Easier to see in real life than on these photographs that's for sure!
  • Go over the word with the NUVO Crystal Drops and then set aside to dry for 24 hours.
Glitter Hand lettered Greeting Cards

I also had a NUVO Glue Pen in my goody bag and as it has a chisel nib I thought it might work for hand lettering too.
Glitter Hand lettered Greeting Cards
I made this card in exactly the same way as the ones using other adhesive glue. It's easier to write with the glue pen but the glitter sheds from this one A LOT more. Picture that trail of glitter everywhere....
The glue pen was perfect for mounting the card to the card blanks. I think I'll keep it for that from now on.

Lastly I tried using a cute hello stamp from papermania. I stamped it onto patterned paper, went over the stamped image with the NUVO Deluxe Adhesive then sprinkled then with glitter as before.
Glitter Hand lettered Greeting Cards
Glitter Hand lettered Greeting Card
So in summary, these products are high quality and the packaging is lovely.
Glitter in a loose format like this does end up spreading itself around the house, that's just how it is! The Deluxe Adhesive holds it in place pretty well though.
The Crystal Drop product is meant for making tiny little jewel like drops on papercraft projects. This means when you write with it, the letters have a lovely depth to them. They really stand up from the card. I'm not sure if the photos here really show that off properly, or if they show just how glittery the glitter is. I did a little video on Instagram to try to show that shimmer.
Glitter Hand lettered Greeting Cards
You don't have to just use this idea for cards either. I used the 'thank you' on black card with the adhesive and glitter as a postcard and just wrote a message on the back. It might be nice to make gift tags too or even write straight onto gift wrap with the adhesive or crystal drop. Just allow time for it to dry before handing it over! 

read more

Wednesday, 11 January 2017

Marbled Clay Ring Keeper

Make a simple cone shaped ring keeper from marbled air hardening clay, with a touch of sparkle.
Marbled Clay Ring Keeper
This post contains affiliate links
If you like are like me and like to take your rings off when washing up, washing your delicates by hand or just at night when you go to bed, then you need a safe place to keep them. I've been using a little ring dish for the last few years but when I received some air hardening clay from Cass Art for their #BeInspired campaign, I thought I'd try making something new.I'd seen some ring cones in the shops a while ago and though this simple shape might be easy enough to make from clay for a beginner like me. It was! 
You can find details of the materials I was given by Cass Art here in my post about the Marbled Jewellery I made first.
To make a clay cone shaped ring keeper you will need:Clay - mine is DAS air hardening clayMarbling Mix - again mine is from DASA piece of scrap card to form a cone mouldA sharp knifeVarnish - mine is Vernidas from DASGlitter
  • Roll the scrap card into a cone and secure with tape. Ideally use card that is glossy and roll so the glossy side is inside.
  • Marble a lump of clay using the marbling mix.
  • Push the clay into the cone, really squishing it in there to get as many air pockets out as possible.
Marbled Clay Ring Keeper
  • Cut the tape and unwind the card from the clay.
  • Wet your fingers with a little water and smooth the cone, you can roll it gently as well to remove any creases and improve the shape.
  • Cut off the excess with a sharp knife making the bottom level.
  • Roll and smooth it again just to make sure you are happy with the shape.
  • Leave to dry and harden - this took about 2 days.
  • Varnish and leave to dry.
  • Apply another coat of varnish this time concentrating round the bottom of the cone, just dabbing a little varnish here and there as you go towards the point.
  • Holding the cone over a plastic container sprinkle with glitter.
  • Leave to dry again, I found it easiest to pop it in a cotton reel.
Make yourself a Marbled Clay Ring Keeper
  • Once dry, brush off any loose glitter and cover the whole cone with one last coat of varnish to seal and stop the glitter leaving a trail wherever it goes.
Make your own Marbled Clay Ring Keeper
Of course the glitter element is entirely optional. I just fancied a little sparkle. You could mask off part of the cone and spray paint a section, or real gold leaf just dabbed here and there would look fabulous. Or you could just leave the marbled effect of the clay, which is really pretty by itself.
Make your own Marbled Clay Ring Keeper
I've been using this for a few weeks now and I have to say it's actually easier that a little ring dish, you can pick your rings up in a stack and just pop them on the right fingers so quickly - I think I must be saving at least 2-3 seconds every day. At this rate I'll have an extra 15 minutes or so every year, what on earth will I do with all that extra time! 
You might also be interested in:
Special Date Coin Keyring
Cluster Drop necklace
Cluster Drop Necklace
Gold Heart Pot
Gold Heart Pot
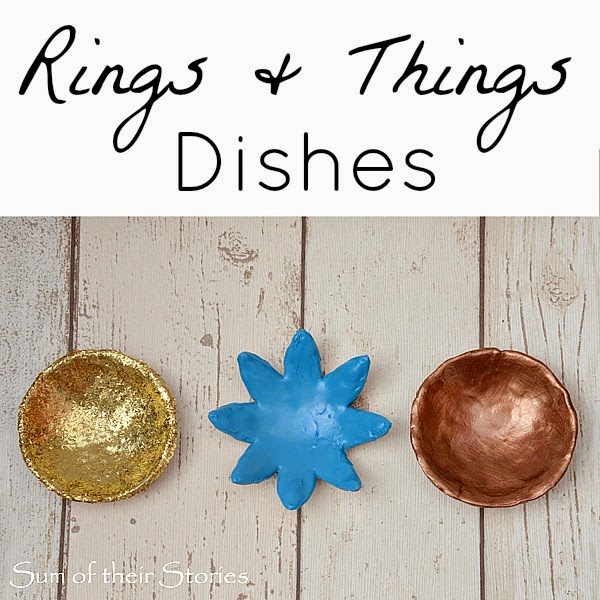
Rings and things dishes
I'll be linking up at these great link parties,

read more