Showing posts with label what can go wrong. Show all posts

Monday, 5 December 2016

Turn Old Cards into New Cards

Save the Christmas cards you are sent and turn them into next year's cards to send.
Turn old cards into new cards

I've always loved cutting and sticking. When I was little I would sit for ages cutting up junk mail apparently! I also hate waste and like to recycle or reuse whenever I can.
Lots of people are now in two minds about Christmas cards these days. They are not very eco friendly but they are a lovely way to stay in touch with people. I love receiving cards, especially from people far away who I don't see often. I figure if I love to receive them maybe others do too, and if we don't send them no one will be receiving them. Do you see what I mean?
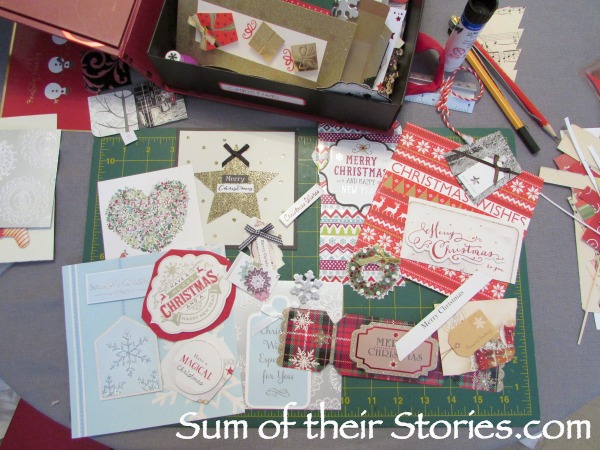
Every year we get some beautiful cards and once it's January I have a 'cutting them up' session. Some are turned into gift tags...
 ... the rest I take off all the cute bits I think I can reuse and the rest goes in the recycling. Then in November I have a box full of resources to make this years cards.
recycling old Christmas cards

This is not a precise tutorial kind of thing, what you can make will depend on what you have but here are a handful of my ideas, just in case you find they spark your imagination.
My master plan is to use new card blanks made from recycled card with all the embellishments coming from previous cards we've received. Occasional I supplement my reclaimed embellishment stash with craft papers but I try not to! 

Here's an example.
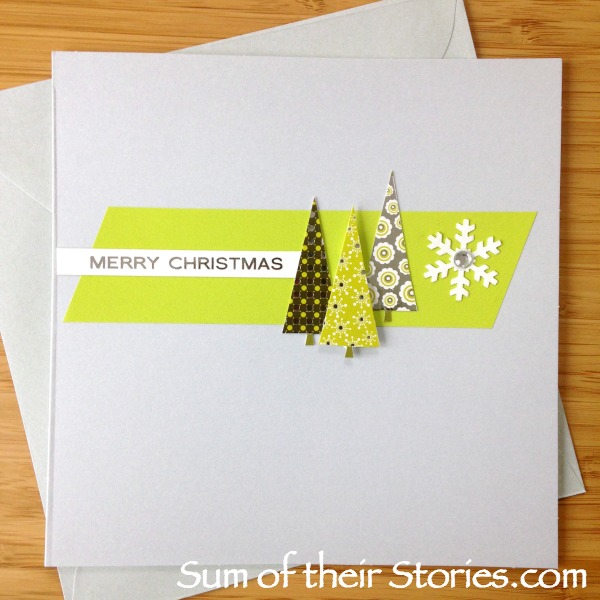
This card blank is a silvery grey. The old card I saved has cute modern Christmas trees which are very cut-outable. The used green envelope goes nicely with the trees, I thought the silver snowflake, saved from some Christmas crackers might go well too.
The envelope didn't have quite big enough bits with no writing or franking so I joined two bits and covered the join with a tree.
I used a tiny foam pad to raise one of the trees and the greeting just cut from the card. Turns out the snowflake was a bit too big in the end so I found this more delicate one in my stash.
Turn old cards into new cards
And I've still got enough trees to make another 2 of these.

Here's a more traditional looking card idea:
Here I had a tall think white card blank, a used red envelope, some shiny gold card from a lovely layered card, a wreath and a greeting.
Layer up a rectangle of the gold onto a slightly larger rectangle of red envelope and glue it onto the card blank. Add the wreath & message and it's done. If the wreath was plain I might have added a bow or jewels but this one was already blinged up so it was even easier.

These 3 are made with gift tags we received last year, no one is ever going to pull them off and see the writing on the back - I hope! 
Turn old cards into new cards
They just had a strip of patterned paper behind them, a bow of bakers twine and a sequin, gem or additional element added, all rescued from old cards. I stamped the greeting on these.  

Sometimes a card element is so lovely all you have to do is attach it to a new blank.
All I did here was attach the laser cut to the blank with foam pads and add the bow.

For these mini cards I just attached an embellishment pulled straight of an old card. The bauble just had a little bit of old sheet music underneath first.

If you are peeling off embellishments that are attached with foam pads, a word of warning. Do this carefully as if the card element you are keeping creases it will spoil.
Pull the card from the embellishment not the embellishment from the card.
Cut round it roughly first then lay it face down on your table. Peel the backing away carefully pressing the bit you are keeping down on the table.
I've ruined a few lovely bits that I had wonderful plans for by pulling them from the card :-(

About a million years ago, I had some of my card designs published in a couple of UK craft magazines now and again. I had made some with this same "new cards from old cards" theme then, one even made it to the front cover of a Christmas card supplement in 2007.
I'm quoted encouraging everyone to "Go green"! It doesn't really make clear though that all the elements on this card were recovered for old cards.
I actually still really like this wreath made from punched stars, it means you can use even the tiniest of scraps.

Would you consider making new cards from old ones or do you have any other great ideas for the cards you receive? I know here in the UK there are Charity collection points where they are recycled, I assume for craft project but I don't actually know. Anything to stop them just becoming landfill seems like a good idea to me.

read more

Friday, 6 May 2016

Kitchen Tin Planters and a cautionary tale

Old tins make fabulous planters for a kitchen windowsill right?
Kitchen Tin Planters
I guess you would call this up-cycling. It's an idea I'd seen all over pinterest, using old tins as planters, they look great so I thought I'd have a go. I've made mistakes so you don't have to, read on for my cautionary tale...

I actually started with this "vintage" OXO tin. I say "vintage" like that because really it's just a bit old and I'm not sure if it properly qualifies as vinatge. It was a freebie from OXO back in the 80's and was one of the things I kept when sorting out all my mums things. It's kind of cute but very "of it's time" - apparently only white people used OXO cubes in the 80's and am I the only one thinking that guy on the far right looks a bit like Hitler (ooo, far right ... spooky)
Over the last 6 months I've just kept my eye out for red food tins (to go in our red kitchen) and now I have 4 I feel this is enough to share with you.
At first I imagined fresh herbs on my kitchen window sill - how lovely that would be. Turns out herbs are quite a lot of work!
  • they get big quickly
  • they get straggly looking quickly, unless you use them all the time in everything you cook
  • a lot of them are annuals and die off in the autumn
If you use a lot of herbs in your cooking you go for it.
I moved to more of an "any easy to grow" plant theme.

The OXO tin is not water tight so I lined the base of the tin with thick plastic and put a dish in the bottom just to make sure water doesn't get inside. I added a plant still in it's plastic regular pot too. This is one of the babies from when I showed how to take cutting from these succulents.

The next tin I found was the Black Treacle tin, once the treacle was all used up I washed it out and planted it up. I figured this tin was made for liquids so I wouldn't have any problems with it leaking.
Kitchen Tin Planters
I planted it up with soil directly in the tin using some Jade or Money tree babies, also from my plants for free post. It doesn't leak but 6 months on it is going rusty on the bottom: 
Not a massive problem but I'm thinking this might leave rings on a windowsill which could be hard to clean off.
Turns out maybe not everything you see on pinterest is as simple as it seems! 
  • make sure your tin is sealed or waterproof and line it if it's not
  • herbs are lovely but not super easy to look after
  • consider putting regular plant pots inside your nice tins rather than planting directly into them
  • watch out for rusty bottoms!
Luckily the tin I've got that's gone rusty is the easiest to replace, as soon as we've used all the treacle in the next tin I can swap this one out. It would be a shame to use a lovely vintage tin that took ages to find though and then ruin it. 
Kitchen Tin Planters
In the other tins I've settled on a mixture of artificial plants and putting a plastic lining to the tin, with the plant still in it's plastic plant pot. I've not planted directly into any of them.
Kitchen Tin Planters

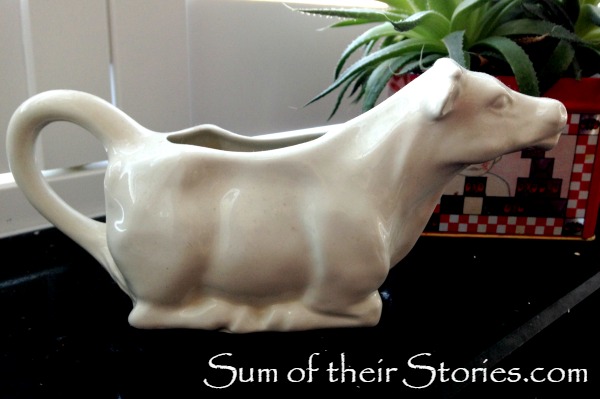
And finally, just because she is rather lovely, here is the cow milk jug that sits on the windowsill with our kitchen tin planters.
cow milk jug
I'm still keeping my eyes open for foods that come in red tins so I can add to the collection. Have you tried using anything unusual as a planter and had any unforeseen problems? 
You might also be interested in:
Plastic tub planter
Plastic tub Planter
Pretty Garden Planters
Ikea Cactus gift wrap
Ikea cactus gift wrap
Taking succulent cuttings
I'll be linking up at these great link parties, why not check them out!

read more

Thursday, 11 February 2016

Celery Pinterest Fail

Growing a new celery plant from the leftovers of a previous bunch sounds fab doesn't it? So where did I go wrong? 
my celery pinterest fail

So today, a Pinterest fail - let's be honest, we've all had them! 
Last summer I saw on Pinterest that you can regrow celery stalks from the stubby end bit of a bunch. If I remember correctly the pin said "Never buy celery again" or words to that effect.

"What a great idea" I thought, and "I must try this" 
It all started quite well, see the photo above, how exciting.
Then the stubby bit started to go a bit mouldy and I thought it would be running out of goodness so I planted it up into a pot of compost. 
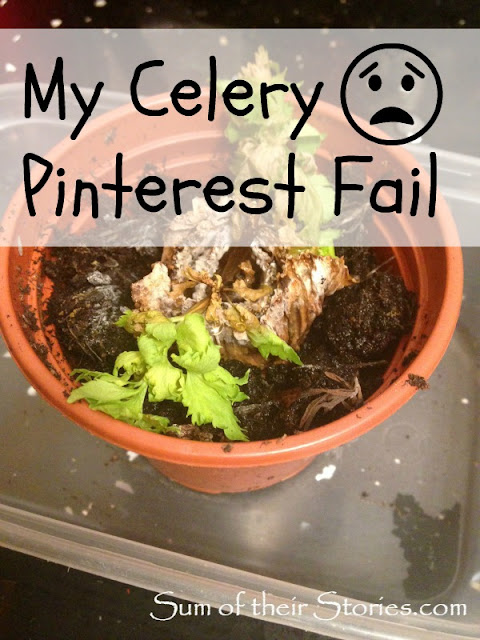
Then about 3 weeks passed and this happened: 
Celery pinterest fail
I'm not quite sure where I went wrong. I kept the soil moist, it was on the windowsill, it just sort of collapsed, withered and died.
Should I have buried the stubby bit in soil completely do you think? Should I have left a longer stubby bit? Did it need to be planted outside in the garden? 
Has anyone actually managed to make this work? I'd love to hear how. 
My fail hasn't stopped me loving Pinterest though, funny that!

read more

Saturday, 2 January 2016

Laundry Hamper Makeover

Giving an old laundry hamper a makeover was really quite straightforward, even though I managed to make hard work of it! But with a saving of £45 from the one I had seen in the shops I am perfectly happy with my final result.
An old laundry basket given a revamp
This was my predicament: 
Our old laundry basket was a round, natural wicker colour. It stood perfectly well outside the bathroom in our old house and serviced us well. 
I find it really difficult to replace things that are perfectly good but the old basket just didn't fit well in our new house. We'd had it as a wedding present 23 years ago so actually it is not too wasteful or extravagant to replace it really! 
We are in a 3 story town house now so the mid point, the first floor landing, is where we want the family laundry hamper. I'm not someone prepared to go round the house emptying multiple baskets I'm afraid, it goes in here or it doesn't get washed by me. However this first floor landing is just a small square and it's all doors and stairs, no where to put a big round basket.
I saw some lovely tall thin grey woven baskets in the shops but the best fit was £50. £50 for a thing to put dirty clothes in - really?! 
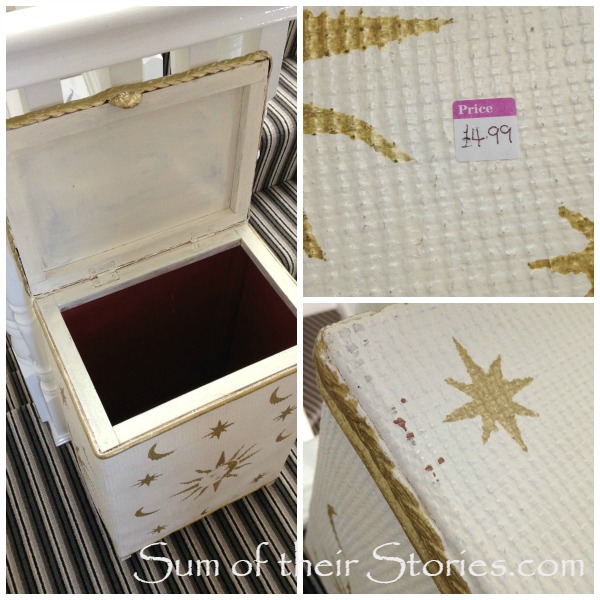
Then I just happened on this little gem in the charity shop just around the corner - bingo!
My charity shop laundry basket before it's makever
For £4.99! Or as I like to think, a £4.99 donation to charity and a free laundry hamper.
At this point I REALLY hope the person who so lovingly did this stencilling is not reading this blog! I also hope you don't all love the before more than the after - that's always a danger with a makeover post. 
Anyway, it was a bit marked and not to our taste so I bought a can of grey spray paint got busy.
Sadly, as you can see, when I had finished and put it into place I realised the colour was completely off. Oh dear! 
The spray paint colours are limited and I couldn't find a better match so then I brought a couple of little tester-pots of grey paint at the local DIY shop for less than £2 and mixed them until I had a better colour to go with our carpet. It was just a regular emulsion, like you would put on the walls. I put it on with a brush, using a swirling technique to make sure it got into all the nooks and crannies. 
This time the results were much better. I finished off with a fine brush just adding a little white detail on the plaited edge. The white I used was a little pot of Painters Touch from Rust-oleum.
Laundry basket makeover
To finish, just to try to make it durable, I gave the whole thing a coat of clear sealer.
I love this stuff. I bought it to coat the bangle you can see it the photo, I used it for the comic book glasses case (which I saw being used again just the other day and still holding up well to everyday use)
It just covers and protects without changing the surface noticeably. It does stink though, so use it outside!
Finally, just to add a touch of reality amongst all the glamour here is our inexpensive, perfectly sized for the space, carpet matching laundry hamper in use!

read more

Thursday, 3 September 2015

DIY Coasters including the fails!

I've over at The Pinning Mama today sharing a tutorial on how to make these Cut Out Coasters.

They are made from left over scraps of the pleather I used for a coat repair a little while ago. Remember this?

The cute, bright, "felt peeking out" Cut Out Coaster tutorial I'm sharing at The Pinning Mama was not my first coaster making attempt, it's been a process. This whole coaster making tale is a bit of a saga. 
Are you sitting comfortably? Then I'll begin...
If you saw my post a little while ago about the changes I've been making to our existing things to match the bedroom décor in our new house you may have seen this photo of my bedside table. 

It's very nice (and tidy!) but something very important is missing. A coaster for my cup of tea! Doh! I was using a scrappy bit of junk mail (NOT photographed!), then a really bright crocheted coaster. But I really needed to make something elegant.
The pleather I'd used for the coat repair is cream coloured so perfect for the bedroom, it's wipeable so perfect for a coaster - good so far.
I glued a piece of pleather to a piece of felt with Mod Podge, pressed it under a pile of books for a bit then let it dry thoroughly.
Next I cut out an octagonal shape using a card template (I just used a "Insert shape" option on the computer in word)

I had a perfectly serviceable shaped coaster.

I thought I could make it better, prettier, more classy. So I used a gold paint marker type pen to mark a simple jewel pattern.

I was really happy with this until I used it for my tea.
Oh dear, oh dear, oh dear! Somehow the gold paint pen never quite dried properly on the pleather. FAIL!

Not to be deterred I tried again. This time I used a gold spray paint and a doily.
Slightly better, I love how the coaster looks. BUT after a few uses I can see where the bottom of the mug lifts and smudges the paint a little. A BIT OF A FAIL!
I have still to find some thing I can paint onto this pleather with that can withstand a mug of hot tea, 'tis a quest...
What I did like though, was seeing the felt layer underneath the pleather from the side. That made me think maybe coloured felt and some sort of cut out to let the felt show through would be the way to go. 
NOT A FAIL AT ALL! HORRAY!
The bright colours don't really go in our soft neutral pallet bedroom so I will make some more with a gold felt bottom layer when I get a moment. I just couldn't resist making something with the brights, these have gone in the living room and are standing up to wear and tear very nicely. Pop over to The Pinning Mama for the full tutorial here.
I don't normally share all my fails, and they are not infrequent believe me. Everyone makes things that just don't work out sometimes, it's perfectly normal. As long as you don't stuff things up with a very expensive piece of material or equipment it's all good!
What do you do with your fails? Pop them in the rubbish bin quickly before anyone sees or leave them out to give everyone a good laugh?

read more