|
|
|
|
Showing posts with label Guest Post. Show all posts
Showing posts with label Guest Post. Show all posts
Thursday, 3 March 2016
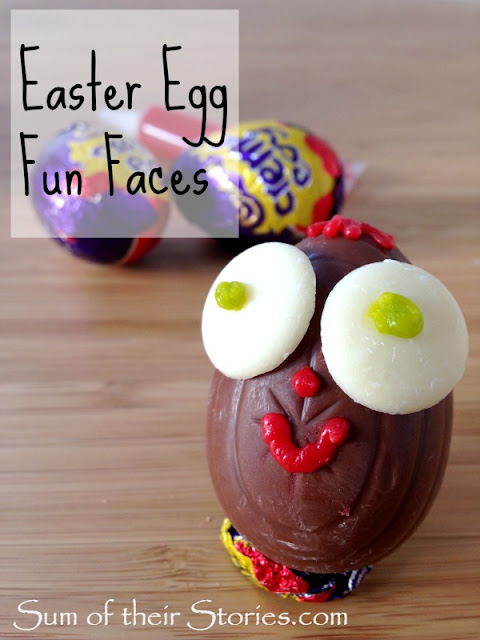
When my kids were little they enjoyed decorating plain Easter eggs as faces to give to all their cousins.
I'll be linking up this project at some of these lovely link parties
Here in the UK all the supermarkets have shelves full of hollow chocolate eggs in boxes, usually with a mini bar of chocolate or a teeny packet of buttons/smarties etc. The eggs are usually about 6" high and are pretty inexpensive. It was these kind of eggs that our kids decorated.
Today I'm over the The Pining Mama sharing this idea but as those larger eggs are not so easily available in the US I've been trying out the idea with smaller eggs, which I understand you can get in most countries.
Whatever sweets you can get in your local shop, some icing in a tube, maybe some sprinkles and set the kids to work!
You'll find a little more guidance over at The Pinning Mama here. I've had lots of fun preparing this post and have to confess these little samples didn't last long, I do like a creme egg with a cup of tea!
You might also be interested in:
Wednesday, 20 January 2016
We seem to collect dozens of plastic tubs in our house so I was happy to find a way to recycle them into pretty valentine heart decorations.
I'm over at The Pinning Mama today with a tutorial to turn an old margarine tub into these pretty hanging hearts using the popular "marbling with nail polish" technique.
Over the last year or so I've seen so many objects beautified with this technique I've been itching to try it out on something.
They are super inexpensive and such fun to make, this nail polish marbling is like magic. It is a bit messy though and you have very little control over how your heart comes out - for me that was part of the fun!
Pop on over to The Pinning Mama now to see the full step by step tutorial here
Use them as decorations, gift tags, card toppers or anything else you can think of! Enjoy!
Wednesday, 28 October 2015
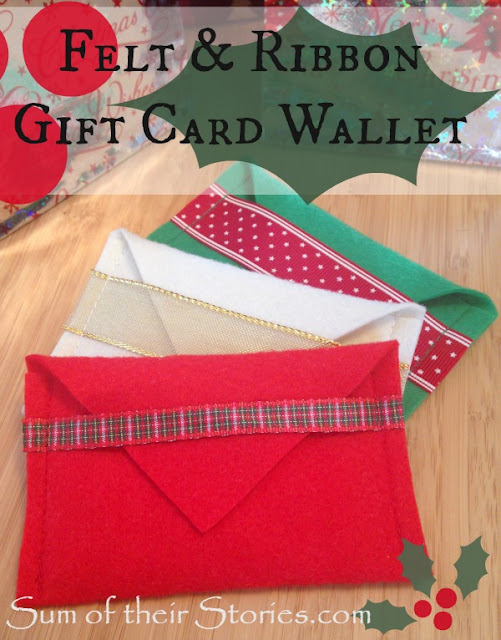
Gift cards make such an easy gift but it's nice to wrap them in a way that makes them a bit more special.
You can find the full tutorial here.
I'll be linking up at these great link parties, pop over and have a little look round at all the lovely ideas.
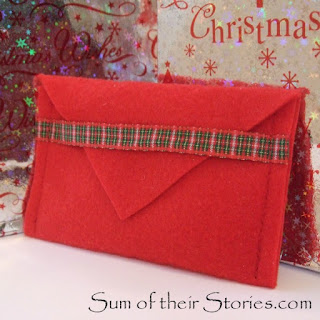
Today you can find me over the The Pinning Mama, with a tutorial showing how to make these simple little felt and ribbon gift card envelopes.
The ones I'm sharing have a Christmassy feel (yes, I know it's October - I'm sorry!) but if you want to make handmade things it's nice to have a bit of time to plan. Of course these don't have to be Christmassy at all, a different felt and a different ribbon and they would be great for any gift card giving occasion!
You might also be interested in:
|
|
|
|
Monday, 14 September 2015
My mother is law is brilliant with words, she always puts something beautiful and personal in cards. For our first anniversary she wrote an amazing letter to us where she went through all the things that we had done together as a family during the year. Me, I'm more of a "Best Wishes" or "lots of love" kind of gal!
Today I'm welcoming a guest here at Sum of their Stories, Lesley from Decorque Cards who has some ideas for you if you are more like me and less like my mother in law!
What to Write in a Card When You Can't Find the Words
If you've ever opened up a blank card and been stumped for the right words, you’re
not alone. We bet almost all of us have been there at least once, pen poised
and at a complete loss for inspiration. Well, no more! We've put together some
ideas for some of the biggest occasions in your card and gift-giving diary.
Read on…
Anniversaries - You've been married years and feel like a simple ‘I Love
You’ in a well-chosen anniversary card just won’t cut it. We don’t blame you!
Why not think outside the box this year and consider writing something that
will spark old memories and refuel your love for one another? A bit of
nostalgia is often all you need to bring back a little romance, so start by
sitting down and jotting down some ideas that might make good one-liners or fun
anecdotes. If you’re still struggling, how
about penning a lyric or two
to the track you had enjoyed first dance as a married couple to? Failing that,
simply jot down a verse from his or her favourite song? Simple yet thoughtful
touches like this will go a long way.
Christmas – Now, we bet it’s not often you’re stuck for words when it
comes to writing Christmas cards. If you have a mountain of cards to get
through – for colleagues, neighbours and friends – it can be all too tempting
to simply write ‘Merry Christmas’. But think of the 100s of cards your
relatives and pals receive stating these simple words. True, it is what it is,
but why not put a little thought into it as the festive season approaches? Try
something slightly different like: ‘In the true spirit of the season, wishing
you peace and joy’, or even ‘We hope your holidays are happy days’.
If
someone’s recently lost a family member, however, it’s important to tread
carefully. A simple ‘Our thoughts are with you this Christmas’ is appropriate,
but think about following up a few days later with a friendly phone call. The
festive season is a difficult time for those who are without their loved ones
and a kind gesture like a thoughtful note or a quick call will let people
though they’re in your thoughts.
Congratulations – If someone’s done a great job at something, let them know!
It’s surprising how many good deeds or achievements go unnoticed, so think
about treating them to a gorgeous handmade
card containing a lovely note. A blank card is ideal, as it’ll give you
plenty of space to get down everything you want to say. So often, a card
‘steals’ our very thoughts when it puts words into your mouth. After all, it
can be difficult to know what else to write when the card’s verse says it for
you. But again, think outside the box. Tell someone how proud you are of them,
how you ‘knew they could do it’, and how you’re looking forward to celebrating
their success with them soon. Instead, you could try something like ‘Kudos to
you! You’ve earned this’, or ‘Just want to add my good wishes to those you’ve
no doubt already received’. Don’t over think things; instead, just write as you
might speak to the recipient face-to-face.
Retirement – When a colleague is leaving work, you’ll probably be asked
to sign a card that inevitably lands on your desk. In this case, don’t be
tempted to simply take a look at what everyone else has written; ‘All the Best’
and ‘Enjoy your retirement’ is all well and good but it’s not very original, is
it? Think about how your colleague has helped you do your job and write a note
of thanks referring to that. Or perhaps they’ve proved a real inspiration to
you? There’s nothing wrong with saying it. So next time a card gets thrust into
your hands at work, take a minute to think of something thoughtful to write.
Next
time you’re stuck for the right words, simply take a look at this handy blog;
we bet ‘All the best’, ‘Congratulations’ and ‘Well done’ will fast be omitted
your card-writing dictionary!
Lesley makes and sells a range of Greeting Cards, visit her website Decorque Cards for more details.
Thursday, 3 September 2015
I've over at The Pinning Mama today sharing a tutorial on how to make these Cut Out Coasters.
They are made from left over scraps of the pleather I used for a coat repair a little while ago. Remember this?
The cute, bright, "felt peeking out" Cut Out Coaster tutorial I'm sharing at The Pinning Mama was not my first coaster making attempt, it's been a process. This whole coaster making tale is a bit of a saga.
Are you sitting comfortably? Then I'll begin...
If you saw my post a little while ago about the changes I've been making to our existing things to match the bedroom décor in our new house you may have seen this photo of my bedside table.
It's very nice (and tidy!) but something very important is missing. A coaster for my cup of tea! Doh! I was using a scrappy bit of junk mail (NOT photographed!), then a really bright crocheted coaster. But I really needed to make something elegant.
The pleather I'd used for the coat repair is cream coloured so perfect for the bedroom, it's wipeable so perfect for a coaster - good so far.
I glued a piece of pleather to a piece of felt with Mod Podge, pressed it under a pile of books for a bit then let it dry thoroughly.
Next I cut out an octagonal shape using a card template (I just used a "Insert shape" option on the computer in word)
I had a perfectly serviceable shaped coaster.
I thought I could make it better, prettier, more classy. So I used a gold paint marker type pen to mark a simple jewel pattern.
I was really happy with this until I used it for my tea.
Oh dear, oh dear, oh dear! Somehow the gold paint pen never quite dried properly on the pleather. FAIL!
Not to be deterred I tried again. This time I used a gold spray paint and a doily.
Slightly better, I love how the coaster looks. BUT after a few uses I can see where the bottom of the mug lifts and smudges the paint a little. A BIT OF A FAIL!
I have still to find some thing I can paint onto this pleather with that can withstand a mug of hot tea, 'tis a quest...
What I did like though, was seeing the felt layer underneath the pleather from the side. That made me think maybe coloured felt and some sort of cut out to let the felt show through would be the way to go.
NOT A FAIL AT ALL! HORRAY!
The bright colours don't really go in our soft neutral pallet bedroom so I will make some more with a gold felt bottom layer when I get a moment. I just couldn't resist making something with the brights, these have gone in the living room and are standing up to wear and tear very nicely. Pop over to The Pinning Mama for the full tutorial here.
I don't normally share all my fails, and they are not infrequent believe me. Everyone makes things that just don't work out sometimes, it's perfectly normal. As long as you don't stuff things up with a very expensive piece of material or equipment it's all good!
What do you do with your fails? Pop them in the rubbish bin quickly before anyone sees or leave them out to give everyone a good laugh?
Tuesday, 23 June 2015
You don't need lots of special equipment to make cute personalised gift tags.
I'm over that The Pinning Mama sharing how to make these personalised gift tags.
You can make any name, so this is perfect for those family members with unusual names. All you need is a bit of patterned scrapbook paper, a computer with printer and a pair of scissors or craft knife.
Even easier is making an initial tag like this one, perfect for reusing a gift bag.
I never buy gift bags, I am a reuse, recycle type of gal, but people will insist on writing on the gift tag so I am forced to remove it and make a new one!
There are probably lots of different ways to get type onto patterned paper in reverse, so you can make tags like this. A lot seem to depend on what set up of computer and printer you have though and my old way doesn't work any more.
I've messed about and found a way I think will work no matter what your set up is. The full tutorial is over at The Pinning Mama here, pop over and have a peek.
Tuesday, 12 May 2015
It's so easy and cheap to make pendants from popsicle sticks.
I've back at The Pinning Mama Today sharing how to make these pretty pendants from "popsicle" sticks. It does pain me to call them that - to me they are lolly sticks - always have been, always will be! I even made an image with a Lolly Stick Pendant title - just for UK readers!
But today I am a guest at The Pinning Mama and "when in Rome" and all that, so popsicle stick it is.
Anyway, whatever you call them they are cheap as chips and you can make 2 pendants from each one with just a scrap of pretty paper and some glue.
They would be great for kids to decorate (you'll have to prepare them first) and would make great earrings or charms too.
So pop over here to see a full tutorial and a few different versions I tried out.
Just out of interest, what do you call them in your part of the world?
Wednesday, 29 April 2015
I'm over at The Pinning Mama again sharing a tutorial of how I transformed a plain old bangle into this pretty floral one.
I used paper so the options on this one are almost endless. My paper was floral Cath Kidston writing paper but you could use old books, wrapping paper, magazines, sheet music, whatever takes your fancy.
Pop over to The Pinning Mama for the full instructions and my usual "loads of photos" and "loads of waffling on" with details that I think might be helpful!Wednesday, 11 March 2015
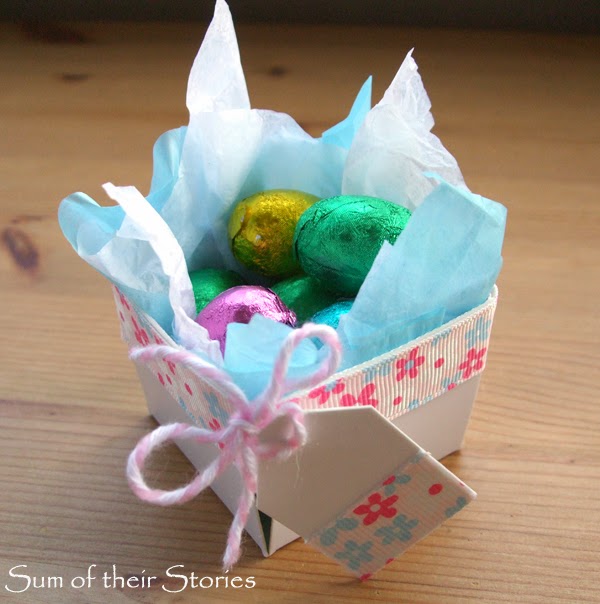
These little gift boxes are easy to make and perfect for giving little eggs for Easter.
I'm over at The Pinning Mama sharing a tutorial on how to make these little boxes. They are just the right size for a Cream Egg, but you could just as easily fill them with mini eggs, or something completely different. Just follow to link here to find the full step by step tutorial.
Sunday, 22 February 2015
You can find me over at The Pinning Mama sharing a full tutorial of how to make this pretty bracelet from an old pair of jeans and a little lace and ribbon.
It's really easy and perfect for all this beautiful spring weather we are going to be getting soon!
You could easily adapt the basic idea too and make a completely unique bracelet depending on what trims you use. I'm definitely making another as soon as another pair of jeans rips where it shouldn't!
Wednesday, 28 January 2015
I've over at The Pinning Mama again today sharing a Charity Shop bargain tray makeover which I am hoping will help me keep my desk tidy!
Tidy and me are not normally BFF's so time will tell how it goes. But we don't stop trying just because we fail now and again now do we?
This photo is the after, pop on over to The Pinning Mama to see the before (and the middle bit too!)
Monday, 29 December 2014
I'm over at The Pinning Mama again today sharing how to make this cute and fun infinity scarf from an old t-shirt and some scraps of wool.
Perfect for brightening up a plain outfit and adding a fun splash of colour on a dull day.
Pop over here now to see the full step by step tutorial, if you fancy having a go.
Subscribe to:
Posts (Atom)
Labels
Air Hardening Clay
Blogging
Christmas
Clever ideas
Craft show
Crochet
Doctor Who
Easter
Felt
Geekery
Gift Wrap
Gifts
Hand Lettering
Handmade Monday
Home Decorating
Kids activities
Knitting
My Favourite Finds
Needle case
Party ideas
Pattern review
Pinterest Challenge
Sewing my Stash
Silent Sunday
Valentine
Wedding
accessories
art
bags
buttons
cakes
cooking
cushions and pillows
doodle
embroidery
gardening
gift ideas
greeting cards
jewellery
organising ideas
papercraft
papercutting
pretty ideas
recipes
recycling/repurposing
refashion
sewing
their stories
thrifty tips
tutorials
what can go wrong

