Sunday, 30 November 2014

A Little Tribute to Pearl part 2

 Granny Square blanket
Anyone who has read the story behind the name Sum of their Stories will know how much I owe to the ladies who inspired me to make things as I was growing up. So each year, on what would have been their birthday, I plan to share something they made.
November 30th was my Nan Pearl's birthday and this "Thing of Beauty" is the blanket she made for me about 40 years ago.
A traditional granny square blanket
I LOVED this blanket when I was growing up, I had it over the end of my bed, ready to pull up on chilly nights. I would be covered by it when I was poorly and off school, lying on the sofa watching TV and dozing. 
More recently our daughter has used it on her bed. She had a cabin bed and cleverly draped it over the side bars then tucked it under the mattress. It stopped anything (books, diary, Ipod, phone etc) from falling through the gap and down onto the floor. Pretty and functional - Pearl would have approved!
Multi coloured granny square blanket
It's made from 200 granny squares almost exclusively from baby wools so it is super soft. It has been washed and washed over the years and is a little bit bobbly in parts and a little bit felted here and there.
Multi colored crochet granny square blanket
I called it my Happy Blanket, because it made me happy (awh, what a sweet little thing I was!!!) I hope you like it too.
You can see the other tributes I've shared here.

read more

Thursday, 27 November 2014

Sequin Christmas Trees

How to make mini Sequined Christmas Trees
Looking for a quick, cheap and easy Christmas Decoration idea? I've made these little sequin Christmas trees to go on our mantelpiece this year with things we already had making my total cost £0 -  Absolute bargain! (Even if you have to buy a few bits to try them, nothing needed is expensive)

This is what you need:

  • Sequins
  • Mod Podge or PVA
  • Acetate (mine is from this pad of fairly thin acetate from back in the day - who remembers overhead projectors? You could use any clear plastic, even old packaging will work I think)
  • Scissors
  • Paint brush
  • Glue Gun
  • Scrap paper
  • Compass (for drawing a circle not finding your way north!)
Cut a quarter circle template from scrap paper.
The radius of the circle will be pretty much the height of the finished tree. For the smaller trees mine was 14cm and for the larger one 21cm.
Then use the paper template to cut the shape from the acetate. I just held the paper underneath and cut round it. I didn't have anything that would write on the acetate and didn't want marks on it anyway. Turns out acetate is slightly difficult to photograph, what with it being clear and all!

Roll the acetate into a cone shape and give the top a little squidge just to help it hold it's shape.
Now glue down the long edge with the glue gun and press to form the cone. There will be an overlap, mine was about an inch.
This is a little bit of a fiddle, you have to be pretty quick as the glue sets quite rapidly. That's why I found rolling the cone first, squiding the top etc made it much easier. Some of my cones were prettier than others but it doesn't have to be perfect, it's all about to get covered up anyway. 
acetate cone to make a Christmas tree

The most important thing is that the bottom is flat so the tree stands nicely, if your doesn't you can trim it with scissors at this stage.

Now the fun bit. Paint a good thick layer of Mod Podge, I found it easier to do a section at a time.
Then sprinkle with sequins.
mod podge and sequins tree
Keep glueing and sprinkling over the whole tree.
Use Mod Podge to make a Christmas tree
Leave it to dry, it takes a couple of hours. Give it a gentle shake to get rid of any loose sequins, then you can fill in any gaps that bother you with a dab of glue and an extra sequin or two.
DIY mini Christmas tree
They are much more sparkly than I was able to catch in a photo. That little green flare was just good luck, I didn't add it on afterwards! 
how to make a sequin Christmas tree
They catch the light beautifully and are really shimmery.
Make a sparkly mini Christmas tree
The acetate is flexible so these little trees are not going to last forever. If you squish them, sit on them or the dog gets hold of them a sequins or two will drop off.
make mini Christmas Trees with sequins
However if you put them away carefully in January I think you could get a few years out of them no problem. Ideal if you are one of those people who has a different colour scheme every few years!
make mini Christmas trees that sparkle
I was thinking tiny little seed beads might work too, instead of the sequins. I think buttons would be too heavy, but to be honest the super sparkliness of these sequins is so lovely I've not ended up trying anything else.
You might also be interested in:
Knitted Mini Christmas Tree
Scrabble Christmas Sign
Christmas Scrabble Sign
Gift Boxes from old cards
Gift Boxes from Old Cards
Christmas Pudding Chocolate Buttons
I'll be linking up at all these great link parties, pop over and have a little look round at all the lovely ideas.

read more

Friday, 21 November 2014

Comic Book Glasses Case


There is exciting news here at Sum of their Stories, I am now a contributor to The Pinning Mama and this is my first contribution. Hop on over here to see a rather long, but hopefully very thorough step by step tutorial on how I transformed this rather awesome (if I do say so myself) glasses case.


read more

Tuesday, 18 November 2014

Papercut Quotes

papercut quotes by hand to make unique gifts
I am loving learning how to papercut by hand. You can see some of my first attempts here and I've been trying a few larger projects since then. It is pretty time consuming but I love the results so much, it feels like magic as the design appears.

I've done two different quotes as gifts for two friends recently, trying out different ways to get the design onto the paper. The cutting out method remains the same, you just take your time and try not to rip the paper!

For this first quote I was inspired by this tutorial from Kyleigh's Papercuts. Kyleigh uses Adobe Illustrator on her computer which I don't have so I experimented with Publisher and managed to get a similar effect.
If you want to have a go I seriously recommend having a thorough read of Kyleigh's excellent tutorial, she goes into lots of detail about how she gets this look. I can only run through quickly roughly what I did, sadly I didn't make notes so this next bit is from memory (note to self - always make notes!)
I chose a chunky font Cooper Std and created text boxes, each with just a few words in them. There is an option with text boxes to have the letters with a grey outline and no fill. 
I closed up the line spacing and letter spacing until most of the letters were touching. I also found that by having lots of text boxes I could overlap them slightly and get the words even better spaced.
It was just a case of playing around till it was good as I was gonna get.
I also found that our version of publisher automatically flips the design if you choose that you are printing on iron on transfer paper. You are not printing on iron on transfer paper, just normal, nice quality A4 paper, but the printer doesn't know that so the printed side is mirror image and becomes the reverse.
ideas to cut quotes from paper
Once it was printed I just added a few extra swirls and lines to make sure the letters and lines were all joined. In her tutorial Kyleigh does them in Adobe Illustrator but again, as I was improvising I had to use a pencil.Then I just started to cut. Slowly and carefully using my super de-duper X-acto knife.
How to papercut quotes

Kyleigh advises working from the top down so that's what I did, I really do love the magic as the letters appear and it is hard not to keep turning it over for a peek at the right side.
Papercut quotes
When it was all done, I mounted it in a frame on scrap book paper. 
make art from quotes by cutting paper
I love this quote, I fell over it on Pinterest, like you do! I have no idea who said it but they were obviously very wise. It is very fitting for the lovely friend who I gave it to, she is someone who is always there for others.

Kyleigh's Papercuts also has a new website and blog too, with even more of her beautiful work to drool over, be sure to check that out too. 

The other quote I've done recently is another favourite of mine and from Elizabeth Edwards. Again, very suitable for the recipient. 
papercut quotes by hand to make unique gifts
This one I prepared much more like the cards I shared before here, using the tutorial from Robyn Wilson Owen. So here I just drew the design on scrap paper first then lay that paper face down on the nice quality A4 paper and scribbled all over the back to transfer it. (you can see photos of the process on my post about my first papercut attempts

The cutting out is the same, careful and slow. Don't rush -  just put on some music or TV that you can just listen to and gradually cut it all out. 
How to cut quotes from paper
Then I just mounted it on plain coloured paper that co-ordinated with this pretty frame I had.
DIY artwork using paper and quotes

I don't think I'll be winning any papercutting prizes any time soon, once you start looking there are some AMAZING pieces out there, but I was able to make unique gifts for 2 special friends. 

Each one took maybe 4 or 5 hours, I wasn't really counting. I did about 15-30 minutes at a time, between other jobs over a couple of weeks. I kept each one separately in a plastic wallet to keep it flat and safe whilst it was in progress. DO NOT put them in the same plastic wallet if you have several on the go at once, they WILL get caught on each other and they WILL cause you some unnecessary stress as you untangle them - apparently!

I know clever machine exist that can do this kind of thing in a fraction of the time, but this slow methodical craft is so much fun, is very inexpensive and really kind of relaxing - honest!


You might also be interested in:
Papercutting first attempts
Circle Card Crazy
Circle card Crazy
Simple Speech Bubble Cards
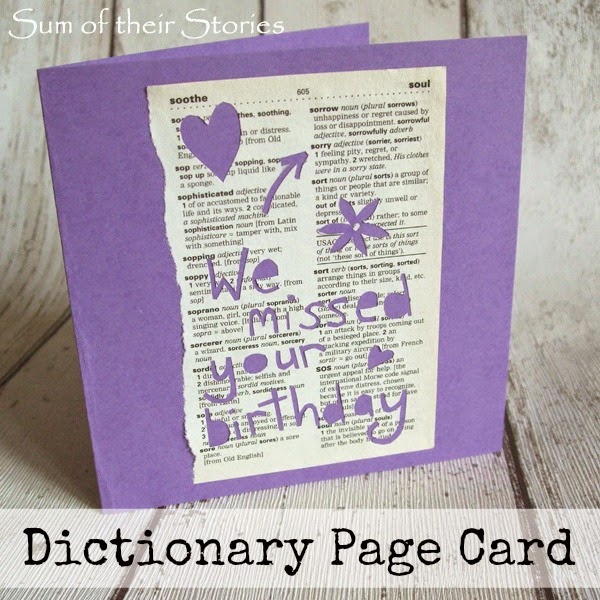
Dictionary Page Card
I'll be linking up this project at these lovely link parties, pop over for a look at loads of projects from other blogs.

read more