Showing posts with label Instagram. Show all posts

Wednesday, 14 September 2016

Fabric Trimmed Cardigan Refashion

A really quick and easy way to give a plain cardigan a new look.
cardigan refashion fabric edge
This poor old plain black cardigan was a useful but boring staple of my wardrobe.
It looks a little bit grey here but that is just the light.
I saw a lovely jumper to cardigan refashion from Jo at Three Stories High back in March, a gorgeous mix of plain knit and pattered fabric edging and so I totally ripped of her idea was totally inspired by her to give my old cardie a new lease of life.
I found an old scarf in my rag bag, I used to wear this over my long woollen coat, shawl style back in the 80's (that was a thing then, honest!), it was a bit holey along one edge but the pattern is just lovely.

First I took the old buttons off the cardigan, it is a narrow fit so I never do it up anyway.

Next I cut 2 long strips of the scarf fabric from the non holey side both about 2" (5cm) wide.
I folded and pressed them in half, then half again, to make a fat bias binding.
I pinned it in place over the button and button hole bands on the cardigan.
I used loads of pins as my scarf fabric is pretty floppy.
I stitched mine by hand using a fairly small slip stitch. I chose to hand stitch because my scarf fabric is so floppy and I didn't trust myself not to pull the knit edge out of shape, if you feel confident you could whizz this on the machine in no time.
Fabric trimmed cardigan refashion

Hand stitching did mean I stitched all the way round on the outside of the cardigan, then all the way round again on the inside. Twice as much stitching but I felt worth it, I feel sure I would have the front edge twisting if I had tried a short cut. 
I did this whilst watching TV and took about an hour.
I actually did this little refashion way back in the spring but by the time I was ready with photos etc the weather was warm and it seemed a bit unseasonal. There was a sneak peek of this on Instagram back in May: 
Fabric trimmed cardigan refashion
It was when I wore it for Me Made May. What I love most about my new look cardie is that it still goes with everything, the multi coloured scarf fabric means it is still a really useful wardrobe basic, just a tiny bit less boring now!
Fabric edged cardigan refashion

The weather here in the UK is always a bit unpredictable so a cardigan is an essential pretty much all year round. To be fair it's been pretty nice the last few weeks but I have a feeling cardigan weather will be with us again really soon!
Fabric trimmed cardigan refashion

You might also be interested in:
Another Lace Top Refashion
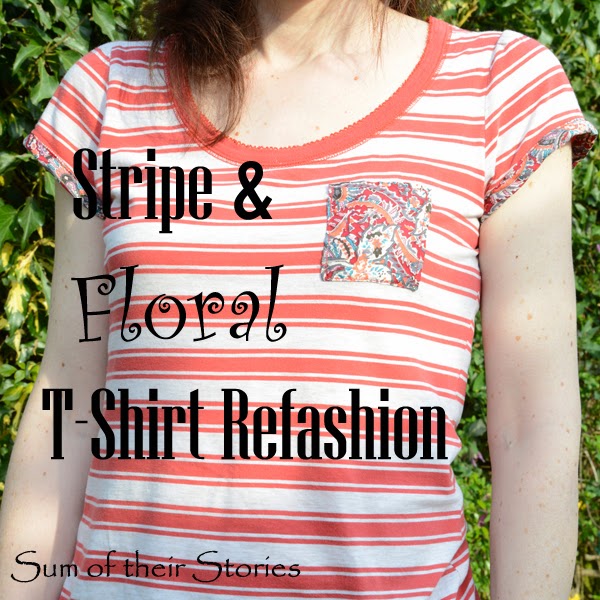
Stripe T Shirt with Floral Trim
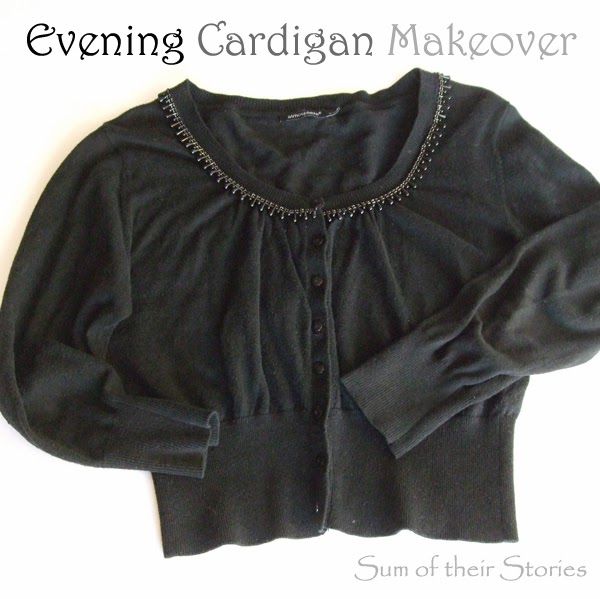
Evening Cardigan Makeover
Evening Cardigan makeover
Too tight at the top hem fix
Too tight at the hem top fix
I'll be linking up to all these great link parties, why not go and have a look!

read more

Friday, 26 August 2016

3 Year Blogiversary

It's Sum of their Stories' 3 year Blogiversary this week!
doodled number 3

Sometimes I feel "Wow, where has the time gone" & other times that I've been doing this forever! One thing is for certain, I still only know a tiny a fraction of all the things you can learn about blogging. 
It's hard to know how to celebrate a Blogiversary, different people do all sorts of different things. I know a giveaway is popular, lists - what you've learnt, advice for newbies, fascinating facts etc - are also lots of fun. I read a brilliant post from Pam at Threading My Way just the other day talking about her 5 years of experience with her blog and how things have changed.

During this last year I added something new to my long list of creative pastimes - hand-lettering.

I don't really have time for another hobby but it was all the fault of the lovely & super talented Dawn from By Dawn Nicole! This time last year we were both guest contributors over on The Pinning Mama and Dawn had started her Art & Hand-lettering Class on Facebook. If you fancy having a go this is such a great place to start. Dawn has free downloadable practice sheets, freebies by email every month if you sign up, advice on what supplies you might want to try and loads more. There are a couple of Facebook and Instagram Daily Prompt Challenges each month and a really lovely supportive bunch of participants of all different levels. I've dabbled in the Monthly prompts a couple of times but haven't actually managed every day yet...
number 3 in many fonts

I had an interest in hand lettering years ago, I had this book back in the late 90's. 

It's been so much fun to revive my interest and attempt some once again. The styles have changed a bit now and there is so much inspiration around - I'm looking at you Instagram!
One of the best things about it is you can start with stationery you already have and then build up to fancy pens and the like later. 
I don't share much here because I don't think I'm very good (yet) and don't practice everyday either, even though I know that's the way to improve.
doodled number 3

Another first this past year was my invite to the Bloggers Breakfast at the CHSI In Stitches Show. It was great to meet some lovely fellow bloggers and see all the new innovations in the crafting world.

I participated in Me Made May for the first time this year too. It's a pledge to wear things you've made and share on Instagram.
You set your own pledge so it can be as much or as little as you want. I pledged to wear everything "me made" that I still have and I almost managed it. The weather wasn't playing ball though and a couple of summer dresses just never made it. The whole thing was so inspiring and I found a whole load of amazing sewists to follow for year round motivation. The only downside is taking all those photos of yourself in the garden feeling just a little bit silly. 

Thanks for visiting, I hope your last 12 months was filled with as much time for being creative as you would have liked. Here's hoping for the same in the next 12!
I'll be sharing over at these Link Parties

read more

Monday, 1 August 2016

Crochet Flower Gift Wrap and a Romantic Papercut

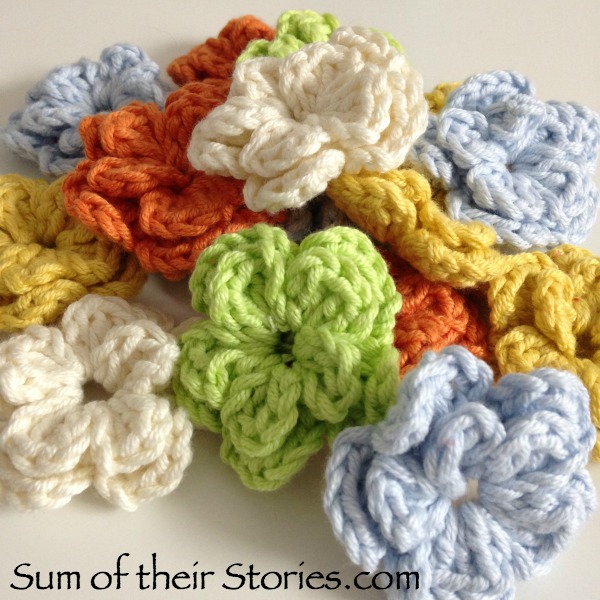
I learnt to crochet years ago especially so I could make flowers! 
Crochet flowers for gift wrapping
Fortunately I discovered you can crochet all sorts of other things but sometimes I still like to rustle up a heap of crocheted flowers.
heap of crochet flowers
This lovely free crochet flower pattern comes from Annemarie's HaakBlog. These flowers are so quick and easy, each one takes about 10 minutes. You make them with just 3 rounds and then the middle petals are turned in through the centre hole which makes them sit forward nicely.
I've made mine with DMC Natura Medium yarn which is a lovely soft cotton that is an equivalent to an aran weight I think and I used a 4mm hook. 
My flowers have ended up approx 5cm or 2" in diameter.
This is another fabulous stash buster project, you can just use up whatever little bits you have left over from other projects.

I am planning to make a flower garland like the one on Annemarie's lovely blog but I needed a pretty pastel gift wrap idea for a wedding gift. We are having a summer of weddings this year, 4 in all! (I've been sharing bit from all these weddings over on Instagram and trying REALLY hard not to overdo it!). This was for wedding no.1 and the bride is a person who enjoys all sorts of crafts so I knew she would appreciate some crochet flowers (Is it bad that I wouldn't waste them on someone who wouldn't appreciate them???!)
I made them in the same way as the pattern but left a long tail at the beginning and again at the end, about 25" or so. You would have to vary that depending on the size of the gift.
Crochet flowers ready for gift wrap
When you finish one of these flowers the ends are both in pretty much the same place, the back looks like this:
To use these for gift wrapping I wanted the flowers to lay flat and the ends to be opposite each other, so I simply threaded one end onto a needle and through some of the loops on the back like so:
Then it was just a case of wrapping them twice round the wrapped gift and securing each one in a bow on the back. I did these one at a time, the ends are pretty long and it would be easy to get in a tangle it you tried to do them all at once!
Crochet flowers used or gift wrap
Photo credit C Nyanyo
We gave a jar of sweets too with a roll of card in the middle with money inside (which was the proper present) so to co-ordinate everything I added a flower to the jar too.
Crochet flowers used for gift wrap sweets in a jar
Photo credit C Nyanyo
The original idea of the sweets and roll of cash is one I saw on pinterest here years ago.
Crochet flowers for gift wrapping
Photo credit C Nyanyo
The card is just a little doodled thing inspired by several pretty doodles and designs l've pinned recently.
Crochet flowers used in gift wrapping
Photo credit C Nyanyo
The gift wrap paper I used was just white tissue paper so it has creased a little at the edges, if I were doing this again I would try to find a thicker, crisp wrapping paper.
The present inside was this papercut. 
Home is wherever I'm with you papercut
Anyone who follows on Instagram will have had a sneaky peek of this already. It's the bride and groom's favourite line from the song "Home" by Edward Sharp and the Magnetic Zeros, with their initials and the wedding date tucked in at the bottom.
papercut wedding gift
It's not perfect by any means but it was made with love.
This wedding had so much prettiness going on, with a pastel colour scheme which I'd tried to match with the crochet flowers and sweets. So I'll finish with just a tiny glimpse of some of the loveliness from the day:

 
I'll be sharing over at these Link Parties
You might also be interested in:
Rainbow Heart Garland
12 Ideas for Novelty Yarns
12 ideas for novelty yarns
Personalised Wedding Picture
Papercut Quotes
Papercut quotes

read more

Thursday, 2 June 2016

Me Made May

A little roundup of how I got on in Me Made May 2016
Me Made May round up
So it's over, Me Made May 2016, and I've really found it so interesting and inspiring.
Way back at the end of April I pledged to join Me Made May saying I would attempt to wear all the wearable things I own that I've made during the month of May. I included refashions and accessories just to make it a bit easier on myself.

I've been sharing how I got on over on Instagram throughout the month. I had some spells of several days in a row, some days I even managed 2 items I'd made at the same time. Other days, not so much. I actually didn't manage my challenge :-( and had 3 skirts, 2 maxi dresses and 1 necklace that I missed out, I'm blaming the weather!
This is what I learnt:
  • I used to make more clothes than I have done recently
  • I keep some things for a long time - I found a wrap skirt I made over 20 years ago, sadly the weather just wasn't warm enough to wear it this May
  • I'd like to make more clothes for myself
  • There are some super talent sewist out there making some amazing outfits
  • I no longer own a single jumper or cardigan I've knitted for myself even though over the years I've made loads
  • I found some forgotten gems lurking in the wardrobe
  • I found some "Oh dear, back to the drawing board" items lurking in the wardrobe
  • People who really get good results often make a test garment first, a muslin, and those of us who don't often don't get such good results!
  • I need to work on honing my mad selfie skills
Here is just a selection of the "Me Made" things I've been wearing this May.
Turns out I've made quite a few dresses into skirts over the years - the simplest refashion / alternation of them all!
dress to skirt refashions
Chop the top from the dress and add a simple casing at the top for elastic - job done! 
The one on the far right here didn't even make it to Me Made May, not sure how I missed that one.

I have a quite a few tops that I've made, some refashioned from old clothes, some made from new fabric.
Me Made May round up

I also have quite a few jewellery bits I've made, I seem to be especially fond of bangles.
Me Made May round up

The tutorials for these are all here on the blog:
Cluster Drop Necklace
Fabric twine Bracelet
Cath Kidstone Notepaper Bangle
Doctor Who Scarf Bracelet

And just to finish here are just a couple of photos that didn't quite seem Instagram worthy!

Note to self - Don't try to pose and maybe move the bag of compost!
Ops, some days it got a bit breezy....(plus where are my shoes???)
Participating in the challenge was such a great experience, a combination of this and Sewing Bee being on the tv at the moment and I'm super inspired to sew more clothes.
You can see loads more participants and what they wore all month on Instagram, just look for #memademay2016 or #mmm16
Do you fancy joining in next year?


read more

Wednesday, 30 September 2015

My Lettering and Doodle Adventure

Anyone who follows me on instagram will have noticed I've been taking part in a Lettering and Doodle Challenge this September.
Lettering and doodle challenge
I have had way more fun than I thought I would and have produced little doodles and lettering that are much better than I thought I would ever be able to do. The challenge was set by the lovely (and super talented) Dawn Nicole. I've been a big fan of her beautiful handlettered work for some time so when I saw her instagram challenge with it's daily word prompts for either a doodle or lettering it seemed like a fun thing to join.
Swirl and dots leaf doodle
I didn't manage every day, but I kind of knew that would be impossible before I started and am pretty pleased with the 19 out of 30 that I did.
Shine Bright doodle
Half way through the month Dawn started a Facebook group too where she gives us hint, tips, lessons and homework as well as links to resources and loads more. Check out Dawn's facebook page for more details.

I haven't rushed out and bought any special equipment (yet!) This is what I used through the month.


I used the thinner supermarket sketch book for my "sketches and ideas" phase then did most of my "proper" versions on the better quality drawing paper. For some though, I just used the thinner paper, usually when the initial sketch was turning out ok and I had no time for a do-over! 
Most of the lines were either with the Stabillo fine liner pens or the ultra fine or fine Sharpies. 
The most expensive thing in my collection are the lovely ProMarker coloured pens which I used for this "Circles" doodle,
Circles doodle Lettering and doodle challenge
 and this "Wild and Free" lettering 
Wild and free handlettering

I was given them about 3 years ago and they are still going strong and blend beautifully. They do also bleed through all the papers I've tried them on, but you win some you loose some! 
I'll just treat you to a special close up of my awesome eraser. I think a new one is long overdue, but this one does rub out pretty well without leaving streaks or marks on the page.

Dawn has recommended a good brand so I'm going to check that out.

Most of my (almost) daily doodles were several to a page.
I had issues with my first version of the "Steam Punk Cogs" doodle - and on the good paper too :-(
Garlands Lettering and doodle challenge
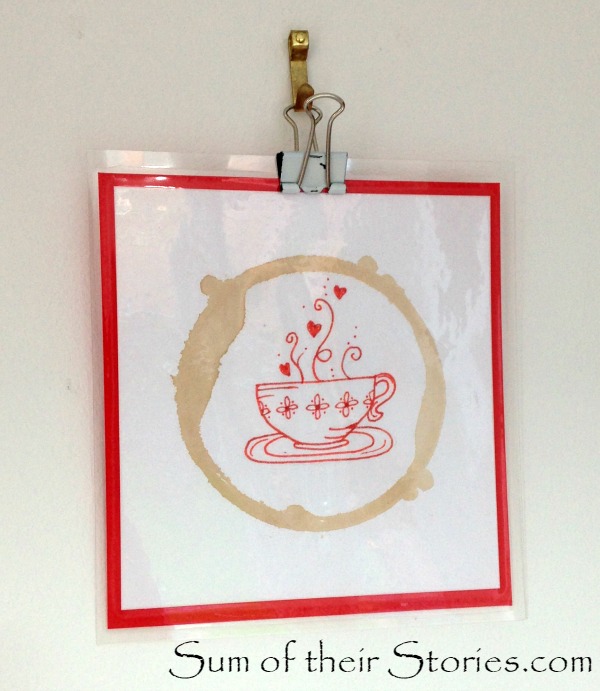
I have turned some of my doodles into greeting cards, and the "Teacups" doodle which was Day 1 I've mounted on card, laminated and it's hanging on the kitchen wall as part of my ever growing but not yet finished gallery wall.
Teacup doodle
Some days I sketched a few ideas last thing at night, other times I did 3 or 4 at the same time in advance when I had a minute. It was really therapeutic to just switch off from everything for a short time and loose myself in a little light doodling.
The instagram participants are super supportive, lots of people dipping in and out as they can, no pressure. Lots of different ages and levels of experience from all over the world, all just enjoying sharing their arty endeavours.
The October prompts are ready now if you fancy joining in. I don't think I'll have time to participate as much this month but I will certainly be dipping in now and again. I'd love to be able to do beautiful lettering of my favourite quotes to put up on the wall, or turn into cards - practice, practice!

read more