Wednesday, 15 March 2017

Meet Elspeth from Ragged Life

Now for something completely different!
Meet Elspeth Jackson from Ragged Life, self confess fabric hoarder, colour lover and expert rag rugger.
Meet Elspeth from Ragged Life
A few weeks ago at the CHSI stitches show I had the pleasure of meeting Elspeth, the talented rag rug making teacher, designer and founder of Ragged Life. I've asked Elspeth to share a little more about her creative journey and plans for world rag rug making domination. (ok - I added that bit, but wouldn't that be fun, a rag rug in every home on the planet!)
Meet Elspeth from Ragged Life
How did you first get into rag rug making?
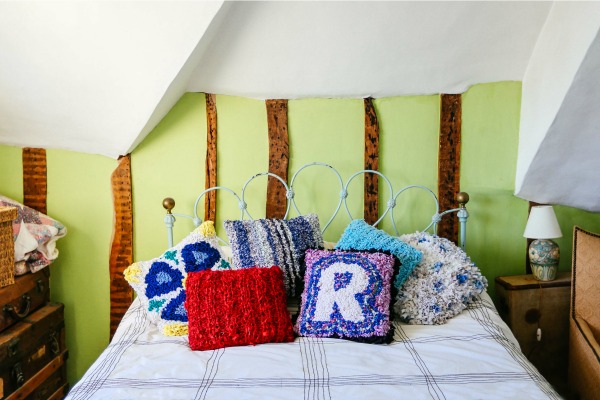
Every year my school used to put on a “Recycled Fashion Show” where the students had to make costumes out of recycled materials. My mum had been making beautiful rag rugs out of old clothing for years and I thought it would be a great medium for my outfit. My masterpiece took hours to make, weighed a tonne and was baking hot under the catwalk spotlights but won me a prize. By then I had caught the rag rug bug! Afterwards I began making rag rugs for myself and eventually for other people. My core rag rug pieces are for sale on my website (www.raggedlife.com) but I also undertake commissions for custom-made pieces. My mother is the original rag rug guru. I’ve learned new techniques, tips and tricks over the years but without my mum’s patience when I was learning as a youngster, Ragged Life would not exist today.

What made you decide to start Ragged life?
I decided to launch Ragged Life after noticing how many people were interested in learning how to rag rug. There were very few rag rug “experts” out there to teach and lots of crafty people looking to learn. I’d been looking for a creative outlet for a while so it was the perfect opportunity and timing.
Meet Elspeth from Ragged Life
What is your background? What did you do before starting Ragged Life?
Although I’ve always made rag rugs, it wasn’t until 2014 that I took the leap of faith to make my passion, my work. In fact, most people are very surprised when they learn that I did Geography at university, not an art or textile degree. After university, I went straight to work for Unilever in London. I worked in Marketing for three years, working on incredible brands, including Persil, Flora and Lynx. Although I don’t regret working for a big company, I knew deep down that working for a company that large just wasn’t for me.

Are there any other crafts you enjoy?
Like most crafty people, I just love making things. I flit from one craft to another and have tried everything from modern calligraphy and pottery to cross stitch and lampshade making over the years. Aside from rag rugging, I love to crochet - I'm not the most competent at it but I do love hoarding wool and making snoods. 

What's your favourite thing about what you do now?
I love meeting so many happy, creative people. The craft world is such a nice industry to be in - people are friendly, inspiring and never fail to surprise me. 
Meet Elspeth from Ragged Life
Where do you get your design inspiration from? 
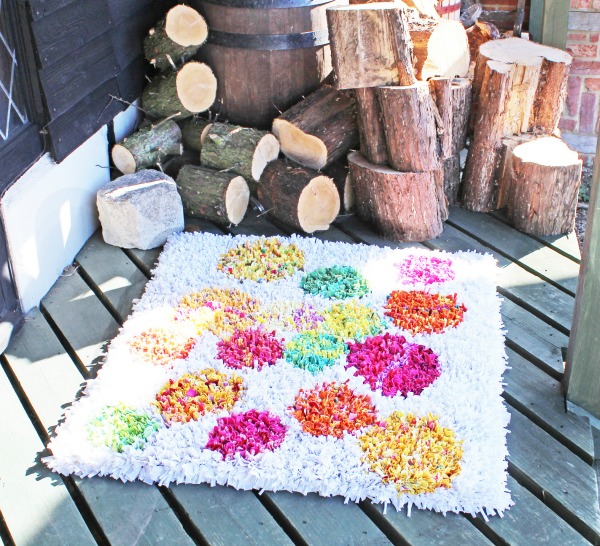
Inspiration can come from anywhere so getting out there and seeing different things is key. Last year, while on holiday, I went to the Spello Infiorati (Spello Flower Festival) which was incredible for design and colour inspiration. Closer to home, exhibitions such as the “Henri Matisse - The Cut-Outs” show at the Tate Modern or the Alexander McQueen “Savage Beauty” exhibition at the V&A were great for helping me to think outside the box. Of course, there’s also Pinterest which is the place for inspiration. I have plenty of boards chock-full of ideas here.
Meet Elspeth from Ragged Life
What are you most proud of in your rag rug journey so far?
In October, 2016 I had my first ever book, "Rag Rugs, Pillows & More", published globally. I'd never even imagined that I would become a published author so I couldn't believe it when CICO Books hunted me down. There are few things more satisfying than that moment when you receive the first copy of the book you've slaved over for months. 

Do you have a favourite piece that you've made?
I don't necessarily have a favourite piece but I do really love the boucherouite-inspired stool I upholstered in rag rug. It never fails to bring a smile to my face. 
Meet Elspeth from Ragged Life
What does the future hold for Ragged life?
At the moment, I'm working on quite an ambitious project to create a rag rug piece to submit to the Royal Academy Summer Exhibition next year. I'm incorporating ragged clothing from 1900-2000 which has been a lot of fun to track down. My ultimate aim is get as many people interested in rag rugging as possible so keep your eyes peeled for Ragged Life popping up in shops over the next few years. 
Meet Elspeth from Ragged Life
Where do you suggest a beginner should start if they are interested in rag rug making? 
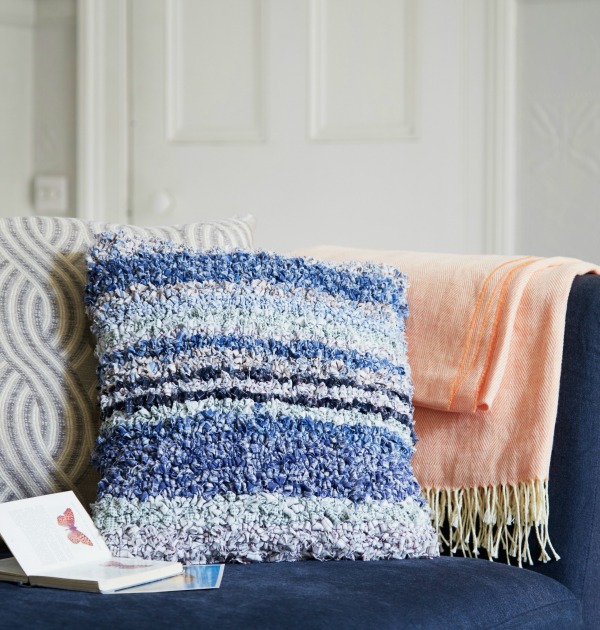
One of the most daunting thoughts for a rag rug beginner is the thought that they've got to make an actual rug when they first start out but actually rag rugging can be applied to so many small projects. I would recommend starting with something like a shopping bag or cushion to get used to the techniques then work your way up to an actual rug.
Meet Elspeth from Ragged Life
My second piece of advice would be to do a simple design to start with. Even basic patterns like stripes, spots and check look extremely effective when rag rugged because of the texture. As long as you're happy with the colour scheme, you can't really go wrong. 

What social media are you on?
www.youtube.com/ragged

A massive thank you to Elspeth for sharing her rag rugging story so far, I don't know about you but I'm itching to have a go now. I've been watching Elspeth's brilliant You Tube tutorial on how to make a rag rugged letter.

Making a rag rug has been on my "to do" list for years, I've had a pinterest board where I've collected a variety of tutorials but I've never actually taken the plunge. But it turns out there must have been rag rugs around in my grandparent's house because look what I found in the depths of my sewing box.
rag rug making tools
These were my nan's, and although they are a little bit marked they seem in good working order. Maybe subliminally that's why I like rag rugs so much, that and the fact they are a great recycling/upcycling project. I'm going to take Elspeth's advice and start small. I'm thinking a cushion or bag, or maybe coasters if that's not too small, using my nan's old tools. I think she would have liked that.
You might also be interested in:
Lace Cut Off Jeans
Lace Cut off jeans
Embroidered shirt refashion
Star Sweatshirt Refashion
Simple Embroidered Bag
I'll be linking up at these great link parties

read more

Sunday, 12 March 2017

Handmade Monday #16

Welcome to Handmade Monday, our weekly craft linky.
Come and join us, share your makes, bakes and other handmade craft ideas or just find some new inspiration.

How's your week been? Have you had time for any crafting? I received a skein of the most beautiful yarn from EasyKnits.co.uk, so I've been balling it up and testing it out with some samples squares.


Now onto the features from last week's Handmade Monday.
Vicky and her family made this lovely pebble wall hanging after a day out together. what a great way to involve everyone and make something beautiful too.

Lina from Sew Historically made her own stamps with nothing more than a scrap of craft foam and an old cork. I'm a sucker for keeping corks, they look like they are going to be useful so I have quite a tub full now and this is such a versatile idea. 

Congratulations, here is a "Yay! I was featured" button for your blog.


Instructions: Select all code above, copy it and paste it inside your blog post as HTML

We have a Handmade Monday Facebook Group where here we share tips and ideas. If you like to link up here regularly you are welcome to join us, just send a request. Every entry to Handmade Monday gets pinned onto our Handmade Monday pinterest board too, send a request to join this group board if you love to pin.

The rules for Handmade Monday are simple:
  • Did you make it? Yes - hooray, we'd love to see it!
  • Add the link to a specific blog post, not your main site URL.
  • Link up to 3 posts each week.
  • Mingle - visit some of the other links - comment - sharelet's support one another and grow our craft community.
If you're not sure, more information can be found here.


read more

Wednesday, 8 March 2017

Embroidered Shirt Refashion

Embroidery embellishment on clothing seems to be everywhere in the shops right now and it's easy to create a little of this look at home. 
Embroidered Shirt Refashion
This post contains affiliate links, if you click through and make a purchase then the cost to you will be the same but Sum of their Stories will receive a small commission
One of the trends that is all over the place at the moment is floral embroidery on clothes. I keep seeing it in every shop window I walk past, it was even mentioned at the CHSI stitches show a few weeks ago as a big fashion thing. Some trends come along and stay for ages, others are in and out again before you know it. I'm no great fashion expert and I don't want to spend lots of money on something that is "here today, gone tomorrow" so I thought a DIY nod to this embroidered fashion trend might be in order.
Pocket embroidery

I've had this old denim shirt for a few years now, it's soft and comfy and goes with loads of things.

A couple of evenings and some pretty simple stitching later and it has a new lease of life.
I love the red embroidery thread on the denim but you could try this idea on any colour or fabric shirt.
I used the DMC magic sheet that was in my goodie bag from the CHSI stitches show to transfer my design to the fabric. I like how it makes the fabric stiffer so an embroidery hoop is not really needed (at least I didn't use one and it turned out fine) 

To create a similar refashion you need:
  • A shirt - with a pocket if you want this "flowers in the pocket" effect
  • Embroidery threads, mine was DMC coloris 4517 for the flowers and DMC 522 for the green stems and leaves
  • Embroidery Transfer Magic Sheet by DMC or similar, or a wash out fabric marker pen
  • Sharp embroidery needle and scissors
Start by drawing a simple design on scrap paper until you are happy with it. Or you can copy mine here,  it's not precisely what I ended up with on the shirt, but it gives a rough idea.
simple pocket embroidery design

Now transfer your design onto the magic transfer paper if using. I used a pale blue pen which was probably a mistake as a darker colour would be easier to see. I'm afraid I was being lazy and just grabbed what was to hand.
simple pocket embroidery design
To put the design onto the fabric you just cut it out, peel off the backing then press it down firmly.

Now you just stitch your design using 2 strands of the embroidery thread. I did all the green stems and leaves first using back stitch for the stems and lazy daisy stitches for the leaves. 
simple pocket embroidery design
I used the DMC coloris thread, again with 2 strands, for the flowers and did a mix of lazy daisy stitches, simple long stitches (I'm not sure exactly what to call them, kind of satin stitch but not so close together) and some woven wheel stitch. My nan taught me these years ago and I was reminded of them just the other week by this great tutorial from Tea and a Sewing Machine. 
simple pocket embroidery design
Because the DMC coloris thread changes colour as you go it gives different shades to the flowers without you having to change anything.
The magic sheet transfer paper is pretty cool, I have no idea what it's made off but when your embroidery is all done you can just run it under the tap and in seconds the paper just turns to a kind of jelly and then vanishes. 
simple pocket embroidery design
I confess I started my embroidery threads with knots, normally a bit of a no no for embroidery but on the weighty denim I think I got away with it. 

I added a little embroidery to the cuffs too, in exactly the same way as the pocket detail. 
simple cuff embroidery design
Dry your garment, if it needs ironing do it on the wrong side with a fluffy towel underneath so you are not squashing all your lovely stitches and the wear your embroidered embellished top with the joy of knowing no one else has one exactly the same.

embroidery shirt refashion

You can go wild and add more or tone it down and add less. that's the beauty of doing it yourself! I can imagine a little on the collar, or maybe actually on the pocket instead of peeking out. 
embroidery shirt refashion


You might also be interested in:
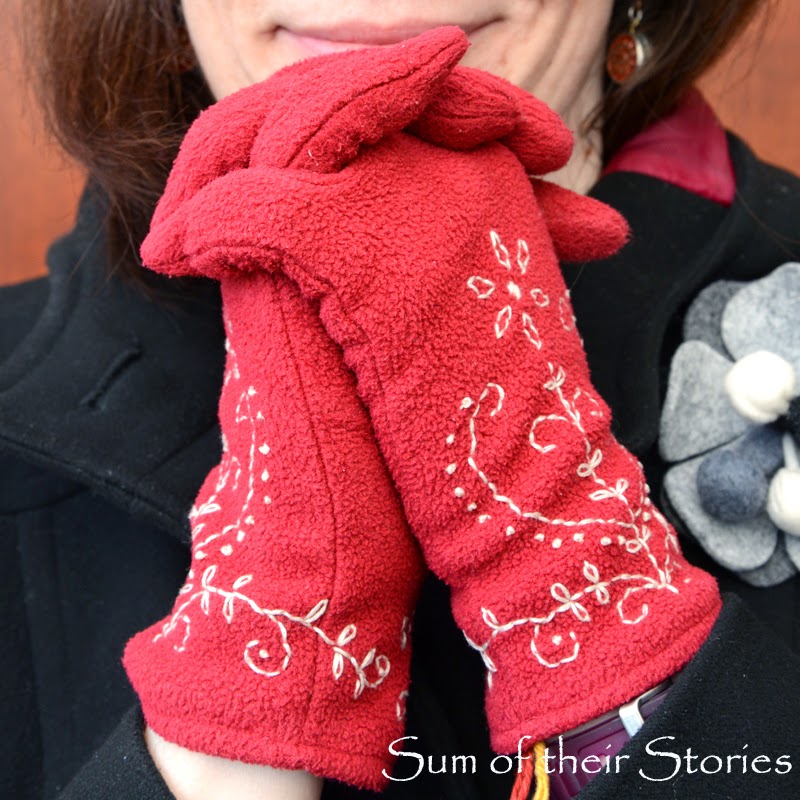
Embroidered Gloves
Embroidered Gloves
Making Toys from Kids Drawings
Cross Stitch Planter
Simple Embroidered Bag
I'll be linking up at these great link parties


read more

Sunday, 5 March 2017

Handmade Monday #15

Hello and welcome to Handmade Monday, our weekly craft linky.
Come and join us, share your makes, bakes and other handmade craft ideas or just find some new inspiration.
We are a super friendly bunch here and most who join are ready, willing and able to come by and visit your blog, leave a comment, share on some sort of social  media etc. Sometimes leaving a comment can be a problem though, it seems to depend on what platform you are using. One of our members was kind enough to let me know last week that she can't always leave a comment when she visits some sites. (name/URL isn't an option on the drop down list apparently) Just bear that in mind, no comment doesn't always mean no visit! 

What have you been making this week? I've just treated myself to a subscription to Mollie Makes magazine (there was an offer, I couldn't resist!) so I had fun trying out the little mini weaving kit that came with the March issue.

It was all very fiddly so I'm not sure I'm going to suddenly become a weaver but it was fun to play with. I actually know 2 amazing young weavers whose work is well work checking out if you are interested Woven by Laurence and Sophie Graney. What they do is worlds away from my little wall hanging and they both have Instagram feeds full of beautiful inspiration. 

Here are the features from last week's Handmade Monday, this week it's all about learning new skills.

There is nothing quite like having an expert show you exactly how to do something properly - for example this clear tutorial from Made by ChrissieD on joining diamonds for your quilt making or patchwork. Just check out her perfect points! 

Have you ever made a purse or bag with a purse frame? I've always thought it would be complicated but Tea and a Sewing Machine takes us though the steps, I think I could actually do this!
 
Congratulations, here is a "Yay! I was featured" button for your blog.


Instructions: Select all code above, copy it and paste it inside your blog post as HTML

We have a Handmade Monday Facebook Group where here we share tips and ideas. If you like to link up here regularly you are welcome to join us, just send a request. Every entry to Handmade Monday gets pinned onto our Handmade Monday pinterest board too, send a request to join this group board if you love to pin.

The rules for Handmade Monday are simple:
  • Did you make it? Yes - hooray, we'd love to see it!
  • Add the link to a specific blog post, not your main site URL.
  • Link up to 3 posts each week.
  • Mingle - visit some of the other links - comment - sharelet's support one another and grow our craft community.
If you're not sure, more information can be found here.


read more

Wednesday, 1 March 2017

Button Clutch Bag

Cover an old clutch bag with buttons for a whole new look.
Clutch Bag covered inbuttons
I am SO excited to have this ready to share with you all today. This has been a long old time in the making! 
I first thought I'd like to cover a bag wth buttons several years ago. I keep my eyes open in charity shops thinking I might see something suitable, then thought maybe I should just make a cloth bag myself. Then in April 2015 I took a long haul flight in premium economy. Premium economy was fab, well worth the small amount extra it worked out....but this is not a travel review. On the overnight flight we were given little bags with a few toiletries. Very nice, very handy and a nice little clutch bag to take home and transform!
button clutch bag before
It was a grey felt with a button fastening and fully lined on the inside.
button clutch bag before

Next I needed to decide what buttons to use. I thought about nice bright ones.

Then maybe metallic buttons, which I liked but I didn't have anything like enough. Also most were buttons with shanks which would make the little clutch bag too bulky.
So I settled on pastel coloured pearl type buttons. I had loads and most are the inexpensive kind that had come off old shirts. 

This is a pretty simple makeover / refashion.
You simply sew the buttons on.

Ha ha! So quick to type, SO time consuming to do!
Button bag refashion
The main things I learnt, ie my top tips are: 
  • You will need WAY more buttons than you would think. I thought I had loads but ran out and had to wait to source some more from old garments and charity shop purchases. 
  • Use regular sewing thread but have it double for strength.
  • Don't have your thread too long, it will catch on the buttons. Just accept you will have to cast off and start a new length of thread often. 


Button Clutch Bag

  • It's a little tedious, so sew the buttons on whilst watching tv. 
  • This is not a quick craft, it will take ages. That's ok, not everything has to be instant, not all crafts are quick.
  • My bag had an elastic loop to secure it. I simply swapped the button it fastened to for one with a shank.
  • Your bag will be significantly heavier with all those buttons attached.
Button Clutch Bag
Just the right size for my phone, lippy, cash and keys. Perfect for a night out.
I did cover both sides of the bag, the back is the same as the front. I think I've mentioned before I like the back to have pattern or design too otherwise I feel cheated. I guess that may be why it took so long and used so many buttons! I guess if you are not so fussy and are happy with a plain back then this would be both quicker and use less buttons.
Even quicker would be to just cover part of a bag, maybe just the flap, or a panel if your bag had one. Or you could just add buttons in a strip either to one side or down the centre. 
Button Clutch Bag
After all this time, and it's been about 2 years in all, I am super pleased with my button clutch bag. It's very reminiscent of the amazing outfits of Pearly Kings and Queens from London.

read more