Wednesday 30 September 2015

My Lettering and Doodle Adventure

Anyone who follows me on instagram will have noticed I've been taking part in a Lettering and Doodle Challenge this September.
Lettering and doodle challenge
I have had way more fun than I thought I would and have produced little doodles and lettering that are much better than I thought I would ever be able to do. The challenge was set by the lovely (and super talented) Dawn Nicole. I've been a big fan of her beautiful handlettered work for some time so when I saw her instagram challenge with it's daily word prompts for either a doodle or lettering it seemed like a fun thing to join.
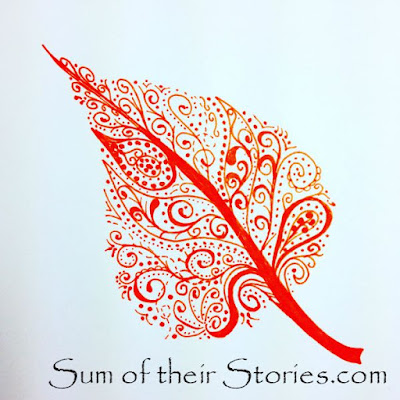
Swirl and dots leaf doodle
I didn't manage every day, but I kind of knew that would be impossible before I started and am pretty pleased with the 19 out of 30 that I did.
Shine Bright doodle
Half way through the month Dawn started a Facebook group too where she gives us hint, tips, lessons and homework as well as links to resources and loads more. Check out Dawn's facebook page for more details.

I haven't rushed out and bought any special equipment (yet!) This is what I used through the month.


I used the thinner supermarket sketch book for my "sketches and ideas" phase then did most of my "proper" versions on the better quality drawing paper. For some though, I just used the thinner paper, usually when the initial sketch was turning out ok and I had no time for a do-over! 
Most of the lines were either with the Stabillo fine liner pens or the ultra fine or fine Sharpies. 
The most expensive thing in my collection are the lovely ProMarker coloured pens which I used for this "Circles" doodle,
Circles doodle Lettering and doodle challenge
 and this "Wild and Free" lettering 
Wild and free handlettering

I was given them about 3 years ago and they are still going strong and blend beautifully. They do also bleed through all the papers I've tried them on, but you win some you loose some! 
I'll just treat you to a special close up of my awesome eraser. I think a new one is long overdue, but this one does rub out pretty well without leaving streaks or marks on the page.

Dawn has recommended a good brand so I'm going to check that out.

Most of my (almost) daily doodles were several to a page.
I had issues with my first version of the "Steam Punk Cogs" doodle - and on the good paper too :-(
Garlands Lettering and doodle challenge
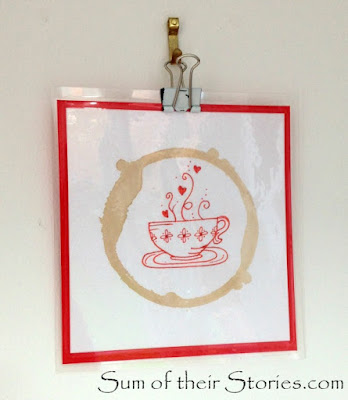
I have turned some of my doodles into greeting cards, and the "Teacups" doodle which was Day 1 I've mounted on card, laminated and it's hanging on the kitchen wall as part of my ever growing but not yet finished gallery wall.
Teacup doodle
Some days I sketched a few ideas last thing at night, other times I did 3 or 4 at the same time in advance when I had a minute. It was really therapeutic to just switch off from everything for a short time and loose myself in a little light doodling.
The instagram participants are super supportive, lots of people dipping in and out as they can, no pressure. Lots of different ages and levels of experience from all over the world, all just enjoying sharing their arty endeavours.
The October prompts are ready now if you fancy joining in. I don't think I'll have time to participate as much this month but I will certainly be dipping in now and again. I'd love to be able to do beautiful lettering of my favourite quotes to put up on the wall, or turn into cards - practice, practice!
read more

Friday 25 September 2015

Framed Doily

Framing a pretty doily is a simple and inexpensive way to make art for your wall.

A treasure I unearthed when we moved house was a handmade lace doily. I inherited it from my Mum. I'm sure I remember her telling me she had bought it in Belgium or it might have been Holland. What I can remember is that she had visited a place where ladies were making the lace using traditional cushions, pins and bobbins and bought it directly from them. 
The doily had been used as a tray cloth and has a couple of tea stains. I gave it a gentle wash but the stains are old and seem fixed, I don't want to try anything harsh on the delicate lace. I've decided that the stains give it character and history!
Today I'm joining this month's Pinterest challenge, where a group of bloggers share something they've made, inspired by Pinterest.

I've pinned a few ideas for art made from doilies. 
This from Shey B where a doily has been used as a stencil:

and this from Allison Kreft where rub on transfers have been layered up on a canvas:

Two lovely ideas, but I wanted to display my doily without damaging it at all.
I took an old wooden picture frame, removed the back and the glass, then gave it a couple of coats of gold spray paint (this is going in our cream, white and gold bedroom, the other projects for this room are here, here and here
I laid the doily on a towel and very gently pressed it with a warm iron, just to smooth and even it out. I'm hoping that is not a terrible thing to do - it seems fine and I was very gentle.
Next I took a piece of acid free drawing paper and cut it to the size of the picture frame back.
I cut a piece of thick card to the same size.
I layered up the picture frame back, the card, the acid free paper then laid the doily out on the paper centrally. Finally I popped the clean glass on the top then put the doily sandwich back into the frame. 
The extra layer of thick card helped to push the doily tight up against the glass so it doesn't move even though it's not secured in any way.
The frame was one that everything just slides into so I taped up the open top edge. I don't want dust getting in and onto the doily.

And that's it! It's up in the wall, another piece of art for our bedroom, along with the Geometric DIY art and the butterfly specimen picture.
I'm not sure these photos do it justice, even though it's pressed flat up to the glass, the texture of the lace really shows. 

For more Pinterest inspired projects don't forget to visit the other participants in this month's challenge.


read more

Monday 21 September 2015

My Handmade Fair Highlights

I spent this Sunday at the Handmade Fair 2015 at The Green, Hampton Court Palace.
The weather was great which made the whole marquee based event SO much nicer than it would have been in the rain.
The place was an absolute bunting/garland fest! They were EVERYWHERE and very cute and pretty they were too.
I hadn't signed up for an of the workshops so we just ambled round looking at all the lovely stalls selling beautiful things. Here are just some of my highlights:
Fabric fabric everywhere - so tempting!
These bead and wire chickens from BOA are so fun!
These fab pineapples are from acorn and will. I really kind of love these - I'm sure my nan had something similar when we were kids!

This giant decoupage cat is both super cute and a teeny bit scary!
This absolutely beautiful thick matt wrapping paper is from Imprint, they had the most gorgeous note books too.
They had such cute actual teddy bears as well as these kits on the stall from Amazing Craft and the lovely lady on the stall gave me some advice to fix the bear I made as a teenager whose arms ended up on backwards. 
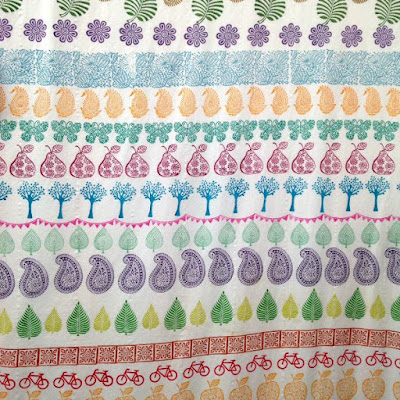
I really like the idea of fabric printing with carved wooden blocks like this from The Art Crafty Place.

This photo really doesn't do justice to these amazing little pieces of art. They are by Sarah Westwood and somehow she layers up paper and wax to create the most lovely textured blocks and pictures. 

That's just a tiny selection of everything that we saw. It was a great day out, the only negative was the dreadful traffic we got stuck in both on the way there and the way home. But all was well, we got home in good time for the first of the new series of Downton Abbey! (which, if you haven't seen it yet, is everything you want it to be - I won't say any more - spoilers!)

read more

Saturday 19 September 2015

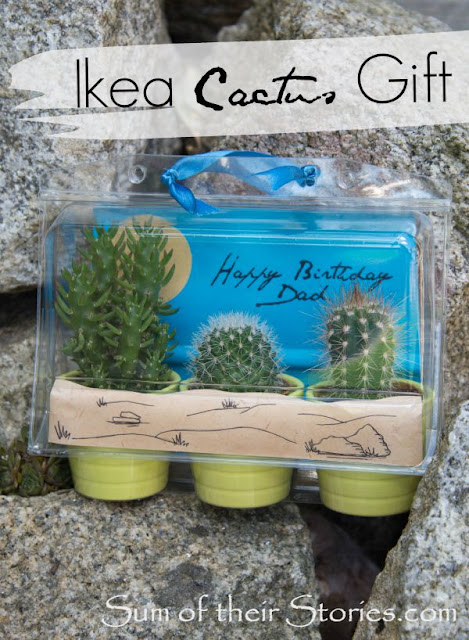
IKEA Cactus Gift Wrap

When I bought a cute little gift box trio of cacti in IKEA for my Dad's birthday I knew the packaging was perfect for a little fun gift wrapping.
Ikea cactus trio gift wrap idea
First I want to apologise if this little trio of plants is not available in IKEA where you live. I've been trying to work out on-line which countries they have these in. If you don't have them yet, maybe just pin for later ?!? 

Anyway, I bought a trio for my Dad for his birthday and didn't just want to wrap them in paper, in case he tipped it the wrong way up, and just a bow didn't seem to quite cut it. The cactus is a desserty kind of plant so I thought a little dessert scene would be fun.

First I removed the prickly plants from the packaging and removed the label.
Oh IKEA, why such sticky glue for your labels? I have some great stuff called "Sticky Stuff Remover" which worked a treat, but I've heard people use peanut butter, baby oil or nail varnish remover.
Next I popped on over to Picmonkey and made a Happy Birthday Dad picture, in a font which I think is called Santes Durnant or maybe Dumant???

I printed that onto bright blue paper.

I've shown a couple of different yellow scrap book papers here, I didn't use them all in the end, these were just my possibles.

I cut the blue paper roughly to fit in the plastic packaging, then just pushed it into place, scoring with my fingers to get a good fit.
Once the blue paper was trimmed to size I glued on a yellow paper circle to be the sun. Then I secured the blue paper on the inside back of the packaging with glue dots.
I trimmed another piece of sandy coloured scrapbook paper to be a deserty bit on the front, added a few doodles which are supposed to look like rocks, sand dunes and dessert type plants and then attached that to the packaging front again with glue dots.
To finish I popped the plants back in, punched a couple of holes in the very top and threaded a length of blue ribbon to make a handle. It needed double knots to secure it, a longer length of ribbon forming a double handle might have been better on reflection!
Ikea cactus trio gift wrap idea


All the top quality photos in this post were taken by our daughter, you can find her website here
You might also be interested in:
Succulent Cuttings
Succulent Cuttings
Recycled Gift Wrap Ideas
Plastic Tub to Planter
Cake Making for Absolute Beginners
I'll be linking up at these great link parties

read more

Wednesday 16 September 2015

Kitchen Art from my Nan's Recipe

When I found a recipe in my Nan's handwriting tucked in an old recipe book I knew I wanted to display it somehow.
I'm over at The Pinning Mama today sharing a tutorial to make this super easy bit of kitchen art.
The idea to use plastic cutlery came straight from pinterest (I've pined a few variations on the idea here) and I think my Nana's recipe makes a perfect personalised background.
Our kitchen has red accents now so this is forming part of a "work in progress" gallery wall. The "Share a Coke with" picture I made ages ago finally has a place where it fits properly alongside this new cutlery/recipe art.
I'm not quite ready to show the whole gallery wall yet, it's a little lopsided, but I'm still adding to it. I keep finding lovely red/kitchen based art ideas on pinterest that I want to try. I will share, once it's reasonably balanced - promise!

read more