Showing posts with label buttons. Show all posts

Wednesday, 1 March 2017

Button Clutch Bag

Cover an old clutch bag with buttons for a whole new look.
Clutch Bag covered inbuttons
I am SO excited to have this ready to share with you all today. This has been a long old time in the making! 
I first thought I'd like to cover a bag wth buttons several years ago. I keep my eyes open in charity shops thinking I might see something suitable, then thought maybe I should just make a cloth bag myself. Then in April 2015 I took a long haul flight in premium economy. Premium economy was fab, well worth the small amount extra it worked out....but this is not a travel review. On the overnight flight we were given little bags with a few toiletries. Very nice, very handy and a nice little clutch bag to take home and transform!
button clutch bag before
It was a grey felt with a button fastening and fully lined on the inside.
button clutch bag before

Next I needed to decide what buttons to use. I thought about nice bright ones.

Then maybe metallic buttons, which I liked but I didn't have anything like enough. Also most were buttons with shanks which would make the little clutch bag too bulky.
So I settled on pastel coloured pearl type buttons. I had loads and most are the inexpensive kind that had come off old shirts. 

This is a pretty simple makeover / refashion.
You simply sew the buttons on.

Ha ha! So quick to type, SO time consuming to do!
Button bag refashion
The main things I learnt, ie my top tips are: 
  • You will need WAY more buttons than you would think. I thought I had loads but ran out and had to wait to source some more from old garments and charity shop purchases. 
  • Use regular sewing thread but have it double for strength.
  • Don't have your thread too long, it will catch on the buttons. Just accept you will have to cast off and start a new length of thread often. 


Button Clutch Bag

  • It's a little tedious, so sew the buttons on whilst watching tv. 
  • This is not a quick craft, it will take ages. That's ok, not everything has to be instant, not all crafts are quick.
  • My bag had an elastic loop to secure it. I simply swapped the button it fastened to for one with a shank.
  • Your bag will be significantly heavier with all those buttons attached.
Button Clutch Bag
Just the right size for my phone, lippy, cash and keys. Perfect for a night out.
I did cover both sides of the bag, the back is the same as the front. I think I've mentioned before I like the back to have pattern or design too otherwise I feel cheated. I guess that may be why it took so long and used so many buttons! I guess if you are not so fussy and are happy with a plain back then this would be both quicker and use less buttons.
Even quicker would be to just cover part of a bag, maybe just the flap, or a panel if your bag had one. Or you could just add buttons in a strip either to one side or down the centre. 
Button Clutch Bag
After all this time, and it's been about 2 years in all, I am super pleased with my button clutch bag. It's very reminiscent of the amazing outfits of Pearly Kings and Queens from London.

read more

Friday, 18 December 2015

Crocheted Holly Garland

This might be a bit late to share for this year, but could be perfect for next year! A crocheted holly garland, my last Pinterest Challenge for 2015.
holly leaf garland crochet with link to free pattern
I fell over a free pattern to make holly leaves on pinterest a while ago. The link took me to an amazing blog that I'm pretty sure most crocheters already know (if you don't then you are in for a treat) Attic24

I found the written pattern a bit confusing to start with, but the super talented Lucy from Attic24 has provided brilliant clear step by step photos so with my ipad on my lap I was able to make a whole heap of holly leaves with some green yarn from my stash.

I used some green DK yarn and a 3mm hook, I think this could be a case of use what you have and it will probably be fine. Each leaf only takes about 15 minutes once you get the hang of them so you can afford to experiment.
Crocheted Holly leaf garland
Once I had 10 leaves I attached them to a chain. To do this I chained about 36 cm (14") then held 2 leaves at an angle to one another and slip stitched through both. I did 2 slip stitches as I found this helped to hold the leaves at an angle. Then I chained another 10cm (4") and repeated with another 2 leaves and so on. I finished off with another 36cm (14") chain. 

I blocked the garland, experts will be able to see I'm not especially good at blocking but in my defence this was a yarn which had been knitted up into a mistake before and frogged so it was a bit wavy! 
Basically to block you just wet the whole thing then pinned it out flat on a thick towel doubled up and leave it to dry.
crochet holly leaves with button berries
I finished it off with a red button stitched on the join of each pair of leaves.
Crochet Holly leaf garland

You can make a garland as long as you like with this pattern, the leaves could be different shades of green to use up your yarn stash, you could make little red pom poms to use instead of buttons, or circles of felt.
I also think just one leaf with a plain card gift tag would be SO sweet on a present (I might do that next year, this year I've made these paper napkin poinsettias for gift wrapping) 


December pinterest challenge
Don't forget to check out the other Pinterest inspired projects from these other amazing blogs, just follow the links below.


read more

Wednesday, 10 June 2015

Button Envelope

Here is a cute way to give a gift card - make a button fastened envelope for it from lovely craft paper.
button close envelope tutorial
Some of the products I used to make this envelope were provided by Pandahall.com
You will need:
A gift card
Your choice of craft paper (mine is a lovely handmade paper I've had for years with real petals somehow mushed into the actual paper)
2 Buttons - these pretty wooden tree design ones are from Pandahall
Embroidery thread
Scissors, needle & glue


DIY button close envelope tutorial
  • Lay the gift card centrally on the paper and fold around it in all directions
  • Cut away the corners as shown in the 2nd photo
  • Fold the envelope up and mark in pencil where the two buttons will go (the red blobs are just so you can see them!)
  • Cut or punch 2 circles of the paper (from the corner scraps) to reinforce the buttons on the inside
  • Using 2 strands of embroidery thread sew on the buttons, Only make two holes in the paper, make sure you use the same hole each time - you don't want to perforate the paper too much
  • For the lower button just tie off the thread ends and trim
  • For the button on the flap, leave one long end of thread, tie off as before to secure then carefully poke the thread back through one of the holes to the front of the envelope - this will be to wrap round the buttons and seal the envelope
  • Glue the side flaps of the envelope and fold it up
Pop your gift card inside then seal up the envelope by wrapping the long thread round and round the two buttons.

button close envelope tutorial

I love the wooden tree buttons with the textured paper, you could try any combination of papers and buttons and get a totally different look. 
This worked well for a birthday present last week when I just didn't have time to make a separate birthday card, it made the shop's gift card feel just a little bit more special. 
You might also be interested in:
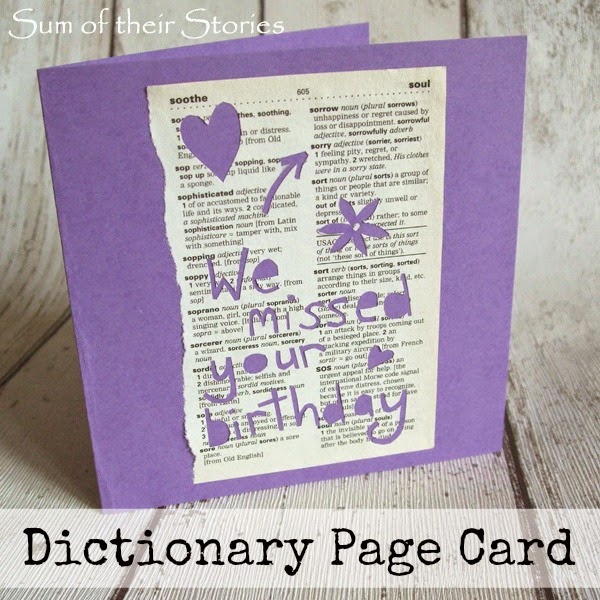
Dictionary Page Card
Circle Card Crazy
Circle card Crazy
Simple Speech Bubble Cards
Photo Earring Gift Card
I'll be linking up this project at these lovely link parties.

read more

Saturday, 25 October 2014

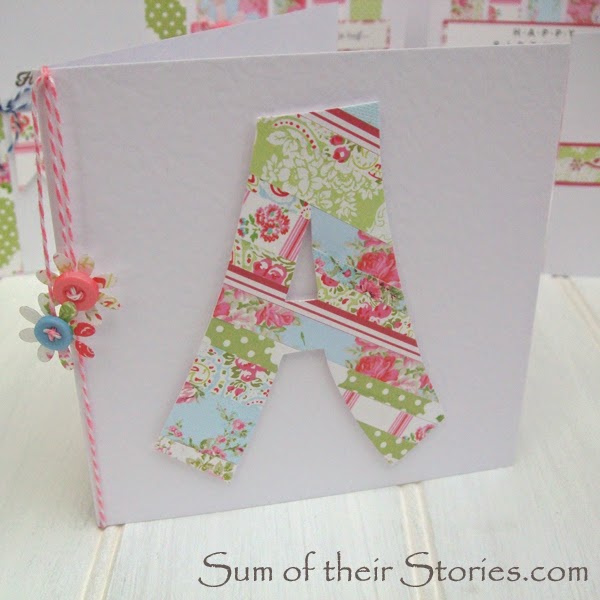
Flowery Letter Birthday Card

Tutorial for initial birthday card
This is my last post (for now anyway) about the contents of my Crafty What Nots box. You can read all about the box, what's in it and how to get one here.

Surely anyone who enjoys any sort papercraft is bound to have a whole heap of little bits. Too good to throw away but kind of tiny to make anything with. I had these sort of bits left.
It's my niece Anya's Birthday soon so I thought I could get all ahead of myself and make a pretty card for her with her initial.

I used:
a 6" square card blank
A piece of scrap cardboard about 6" square - not too thick
Scraps of pretty paper
Foam pads
Bakers twine
2 buttons
2 die cut paper flowers 
Everything except the card blank was from the Craft What Nots box

First I drew a big chunky A on the scrap cardboard
Then I held it up to the window and drew it on the back of the card as well. This just made it easier to cut out later.
Then I just started glueing paper strips over my A.
When I finished it looked like this.
I turned it over and cut it out with scissors.

When I got to this point I had to switch and use my craft knife to finish off.
I attached it to the card blank with the foam pads. Then I tied a length of bakers twine round the card and threaded buttons on each end.
I slid the pink button up so they hang at different lengths and then trimmed the twine off close and fixed it with a blob of pva.
I fixed the two dies cut flowers to the buttons whilst the pva was still wet.
button and flower trim

Ta Dah!
Tutorial for initial birthday card

Easy, pretty and it's another one of those "options are almost endless" ideas. Any sort of different papers would give a totally different effect. Most of all though I love saving those scrappy bits from the bin.
You might also be interested in:
Paper Cutting First Attempt
Paper Cutting first attempt
Flower Collage Canvas
Washi Tape Berry Baskets
Flowery Papercrafting
Floral Papercrafting
Linking up at all these lovely link parties

read more

Friday, 26 September 2014

Tassel Button Key Ring

How to make a keyring with nylon thread and ombre buttons
This is the 3rd and last of my Button Key Rings. Made with ombre buttons and finished with a tassel. 

To make it you will need:

Synthetic Cord (same stuff that I used for the thread and chain bracelet and the pink cord bracelets)
Buttons in graduating colours
A metal ring (not photographed)
Cut two lengths of cord approx 12" or 30cm, seal the ends either with nail varnish or a flame and fold in half. I've got much braver with this stuff the more I use it and just carefully melt the ends in the flame of the gas hob now.
Arrange your buttons in the colour order you want. All your buttons must have 4 holes. In the photo there is one with just two hole but that was just a mistake.

Thread the buttons onto one of the cords, starting with the darkest through to the lightest. Then thread back in the other direction going through the opposite hole in each button. 
Line your button holes up carefully so the buttons stay lined up nicely. 
Now take the second cord and do the same again in the remaining holes.
Attach the metal ring to the loops - just watch that you don't let the buttons slide off whilst you do this.
Now you can push the buttons up about 1 cm from the metal ring. Tie a knot in the cords on the other end.
DIY tassel button keyring
Now add a tassel. This was a bit fiddly, there might be a better way, but this is how I did it.
I took a longer length of cord, about 70" and looped it through the gap between the bottom button and the knot over and over - as shown in the photo:
How to make a tassel button keyring
I pulled it down neatly to cover the knot and then tied it with another short piece of cord.
diy tassel button keyring

I wrapped that short cord round a few times, knotting it again and the securing with a dot of super glue.

diy tassel button keyring
Then I just trimmed the ends of the short cord close to the super glue.

How to make a tassel button keyring
Then I chopped the bottom of the tassel so all the cords were level. To finish off I sealed the ends of the tassel by melting them quickly in a flame.

How to make a keyring with nylon thread and ombre buttons

How to make a keyring with nylon thread and ombre buttons
This bright pink makes them perfect for Breast Cancer Awareness Month. Maybe you could give one to a friends with a Breast Awareness Printout from Breast Cancer Care that you can download from here.
You might also be interested in:
Giant Sparkly Button Key Ring
Giant Sparkly Button Keyring
Patchwork Gift Box
Patchwork Gift Box
Button Cluster Key Ring
Special DAte Coin Keyring
Special Date Coin Keyring
I'll be linking up this project at all these lovely link parties, pop over for a look at loads of projects from other blogs

read more