I love a home made cake, it always tastes SO much nicer than shop bought. Decorating them doesn't have to be difficult really - honest!
This post contains affiliate links, if you do decide to click through and make a purchase using these links the cost to you is the same but Sum of their Stories will be paid a small commission.
Over the years I must have made hundreds of cakes, for birthdays, Easter, Christmas, fathers day, mothers day, visitors coming round, "well done" for school reports/passing exams/being star of the week!
Here is a section of the ones I've made over the years with just a word or two about how to make them. They are home made, they are not professional, I don't work for Charm City Cakes, some are a little lopsided now that I see them in a photo. I promise you in real life they looked fine and tasted great too.
I'm hoping you will be inspired to have a go.
Lesson 1: You can achieve a lot with sweeties
Chocolate buttons. minstrels and maltesers.
(The recipe for this chocolate cake & icing with step by step instructions, can now be found here)
This was a whole family effort from a few years ago now. We found it hard to break up and eat because it was soooo beautiful!
Can't go wrong with smarties and jelly babies
More smarties. I crushed them and put them in the cake mix too - very nice!
The internet is full of this cake in various forms with various sweets. It really is dead easy, I used chocolate finger biscuits round the edge rather than kitkat as we like them better. The Aero bubbles were a surprise when I opened the packet, I was expecting them to be all brown! Still I had brought 3 bags so after than kind of investment there was no way they weren't all going on the cake.
Lesson 2: Ready made icing gives a better finish (but I don't think it tastes as good)
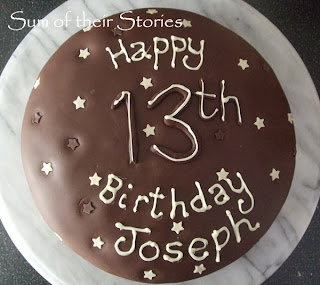
I'm not sure this needs any explanation, chocolate ready made icing, chocolate stars and a little bit of piping that's as neat as I can do. You can find the chocolate cake recipe I always use here.
Buttercream in chocolate and vanilla with milk and white chocolate buttons. This didn't look so sunk in the middle in real life, and now I look at the photo I really could have put it on a better board! (and yes I know its the wrong number of squares, but the buttons were a bit on the big side)
This was kind of easy, the nice bright red was ready made fondant. I stuck the triangles on to the cake then piped little white dots, you might find it easier to pipe them first. I also tried piping the streamers and bows but in the end I rolled long thin sausages of fondant and stuck them on with just a little bit of water.
Lesson 3: It doesn't have to be perfect to be perfect
To make the batarangs I printed a picture from the internet as a template and cut it out. Then rolled the ready made black icing out quite thick, laid the paper template on top and cut round with a little knife. I cut some in half and poked a cocktail stick half in them whilst they were still soft and then gave them about 24 hours to dry out a bit and harden. I sprayed them silver with Dr Oetkers silver cake decorating spray and let that dry, they needed a couple of coats really.
He's a little bit short and slightly lopsided but is still one of my favourite cakes ever. I made a couple of cakes in a regular tin to cut up and one in a small pudding bowl for the top.
Just printed a picture from the internet and did my best. Not epic but at least recognisable!
Easy peasy. The hardest thing is getting a good red food colouring so it's not a bit pink!
We needed two cakes one year, one for the party day(when they watched one or other of the Transformer films - I don't remember which) and one for the actual birthday so this seemed like a plan. I ended up printing a full sized image of each face thingy from the internet, cutting it out and laying it on the rolled out icing so I could cut round it. I did have to do a little bit of simplification.
More star wars, little lightsabers just rolled out from ready made icing.
He's quite cute...
......he's even cuter!
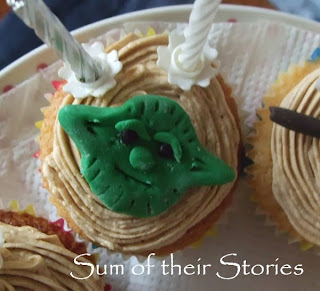
My, my Yoda, what big ears you have! "To hear you with all the better, humh"
Lesson 4: If your friend has a beautiful cake stand, try to borrow it
Pretty paper cases, a swirl of buttercream and a few little chocolate stars
Lesson 5: Little balls of icing round the bottom are dead easy and hide any unevenness at the bottom
This was one of the first "fancy" cakes I made for a friend's daughter's 18th Birthday Party. The little decorations on the top of the wires are just paper so that they are not too heavy, I thought they might slide down the cake throughout the party but they stayed put.
This is ready made fondant icing, I thought I could roll out the pink icing and add the white dots before I put it on the cake. Don't do that! The dots all stretch into ovals. I had to cover each one up with another white dot.
Lesson 6: Piping with melted chocolate is difficult
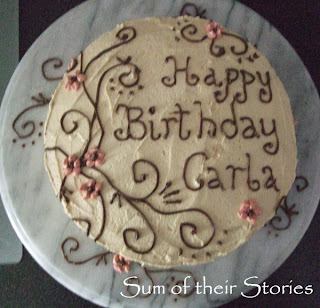
This is just a regular sponge cake covered in buttercream and piped with chocolate. Chocolate is a pain to pipe with. You have to be REALLY QUICK as it solidifies as you pipe. On refection I would recommend making some sort of chocolate icing. This is something I always forget until I am half way through and all the half melted chocolate is blocking up the end of my piping bag!
Lesson 7: Fancy or Simple, both are lovely!
This is probably the most impressive cake I've ever made, it was for my friend's son when he went into the Forces. I wont pretend this was simple - it wasn't! I'm just showing off really, sorry!
And sometimes really simple is just fine. This is banana cake with lemon icing to celebrate my daughter passing her driving test.
(Rock 'n Roll lifestyle in our house - living large!)
You might also be interested in:
 |
| Cake Making for absolute beginners Part 1 |
|
 |
| Chocolate Fudge Dip |
|
 |
| My Nan's Shortbread Biscuits |
|
 |
| Christmas Pud Sweets from Chocolate Buttons |
|


Hi Julie, I know you want to encourage others to try some of the lovely ideas that you blog about but don't put yourself down along the way. You are a very talented lady with a warm chatty style. I for one will be having a go or adapting some of your ideas so thank you. Love your blog and will be following you with great interest. I've thought about starting a blog for some time so I might be pinching some ideas, lol. Pam B
ReplyDeleteThanks Pam, I tend to write as if I knew you all in real life, I don't think I could do any other way. I think the main message of this post was supposed to be "Have a go!" It really doesn't have to be perfect to be perfect! If you do start a blog let me know, I'd love to see your ideas too.
DeleteYou are amazing! So many talents! I think it is so sweet how you make this sound so easy! I am not a baker, but you make me feel like maybe I could make one of those. I'd love to make my children a homemade cake now and then. I've come to realize that any effort I make to MAKE them something..even a lopsided cake, means so much to them! Thanks for the encouragement. I pinned some of the chocolate ones..of course! I really like the pink girly ones with the dots and balls. I had no idea you could by ready made fondant icing. I know nothing about it. I'll be watching for a tutorial on one of these! And that boot WAS amazing! I'd love to know how you did that just out of curiosity. Sorry this was such a long comment!! I'll go away now!
ReplyDeleteI am trying to get a cake making 101 type set of tutorials together, easy step by step for basic cake & icing - just what my Mum showed me when I was a kid. It's just taking a while, it's hard to take photos as you bake!
DeleteThe boot was a stack of cakes that I carved into a bootish shape then covered with the ready made black fondant. I then fiddled around for the best part of a day adding the trim /laces etc. I remember making the lace holes with straws but it was a while ago now.
BTW I love long comments!
What fun options! Well done, indeed! -Marci @ Stone Cottage Adventures
ReplyDeleteThank you Marci - I've just been looking at all your mouthwatering recipes.
DeleteI just loved looking at all of your beautiful homemade cakes. I think homemade is always best. I'm looking forward to learning some decorating tricks from you. That's the part that I need help with! Thanks so much for stopping by An Alli Event. So glad we connected!
ReplyDeleteThat's lovely Ali, I've started to photograph practically every thing I do now, with the hope of making it into a tutorial one day - my family think its hilarious! I feel so privileged to have had a mum who spent so much time encouraging me, showing me little hints and tips, I'd love to be able to share them.
DeleteThose transformer cakes look fantastic!
ReplyDeleteThanks Jill, they were a good compromise between buttercream (tasty) which was spread all over the cakes underneath, and roll out icing which looks better, and made the background and faces.
DeleteThe birthday boy was happy, which is the main thing!
You've made a lot of wonderful cakes and cupcakes! I LOVE the red, polka dot bunting, and the boot is AWESOME!
ReplyDeleteThe red polka dot was for my daughters 18th last year, the whole party was red/white polka dot. It was actually dead easy. I had originally thought about making a little paper bunting line, on two sticks to go across the top as well (there's loads of pictures like that on pinterest) but ran out of time! Turned out fine - no one knew anything was missing - until now, darn it!
DeleteWe love all of you cakes. They are so pretty. I have been afraid to use fondant so fare, but I may give it a try. Thanks for the tips.
ReplyDeleteDebi and Charly @ Adorned From Above.