Wednesday, 30 August 2017

Sunday, 27 August 2017
Massive thanks to everyone who has linked up over the last couple of weeks. I've been on holiday and only had sporadic wifi so I've only been able to stop by and comment on and share a few of your fab project. Normally I like to get round to visit you all!
Here's just a tiny flavour of our holiday:
That's why there were no features last week either. I didn't want to say until I was back, I don't like advertising online the fact we are away of course.
So to make up for being MIA I've picked some extra features from the last 2 weeks to showcase today.
The Crafty Lumberjacks have been playing with a fun looking product called marbling medium and getting some very classy looking results.
Have you ever tried making underwear? I know they made bras on Sewing Bee last year and I've seen kits to give them a go but it's not something I've ever attempted. Sewing Green Lady from Sew, Create and Recycle has been having a go and has loads of hints and tips.
Dianne from Deanie's Stash has been showing us lamps made by her Mr Deanie over the last few weeks. This steampunk one is so quirky.
Liz from Howling at the Moon made this gorgeous peacock crocheted mochila bag. Isn't it stunning?
Congratulations to you all, here is a "Yay! I was featured" button for your blog.
Handmade Monday is all about building a craft community, please so take a few minutes to visit some of the other links, leave a comment, and maybe share your favourites on the social media of your choice if you can.We have a facebook group where we share useful or interesting things so send a request if you'd like to join us.
The rules for Handmade Monday are simple:
- Did you make it? Yes - hooray, we'd love to see it!
- Add the link to a specific blog post, not your main site URL.
- Link up to 3 posts each week.
- Mingle - visit some of the other links - comment - share - let's support one another and grow our craft community.

Wednesday, 23 August 2017
A quick fix for a cardigan with a hole.
Visible mending is very popular right now, hand stitching over patches of contrast fabric. I absolutely love the effect and I really love the principle of mending what we have rather than immediately buying new all the time.
For our daughter's black cardigan that she wears for work however, visible mending wasn't suitable, it's plain black needed all the way. Invisible mending seemed too much of a stretch so we did a quick repair that is half way between the two. I'm giving it the catchy title of "slightly visible mending", do you think it will catch on?!
This repair took about 5 minutes, it actually took longer to get the sewing machine out and then put it away after, than it did to do the repair.
The hole was near the elbow, originally I was thinking elbow patches, no need to reinvent the wheel here.
But the hole was in fact just below the elbow so unless an elbow patch was enormous it wasn't going to work. Also the cardigan is a fine knit and I couldn't think how to make elbow patches that wouldn't be too bulky and weigh the elbows down and pull them out of shape.
All I needed was a small rectangle of thin jersey knit fabric (this is actually a pair of one of the boys boxer shorts that had worn completely threadbare at the top so the elastic was in danger of falling out, just don't tell anyone I used underpants for this repair!) and some black thread.
I slid the sleeve, inside out, onto the free arm of the sewing machine.
Then I laid the rectangle of knit fabric on top and stitched all over it.
Because the sleeve fitted snugly on the free arm there was no turning it round so I stitched forward, then backwards but at a very slight angle, then forwards again and so on. It made a big zig zag of stitches.
I removed the sleeve from the free arm, trimmed any excess fabric, then slid it back on right side out.
I then repeated the process on the right side, that way I could make sure I was covering the largest hole really well.
The finished repair is pretty hard to see, doesn't feel overly rough on the inside and is not heavy or too lumpy.
Success!
Maybe not an idea for your best togs, but to make a work cardie last a little bit longer - perfect.
Visible mending is very popular right now, hand stitching over patches of contrast fabric. I absolutely love the effect and I really love the principle of mending what we have rather than immediately buying new all the time.
For our daughter's black cardigan that she wears for work however, visible mending wasn't suitable, it's plain black needed all the way. Invisible mending seemed too much of a stretch so we did a quick repair that is half way between the two. I'm giving it the catchy title of "slightly visible mending", do you think it will catch on?!
This repair took about 5 minutes, it actually took longer to get the sewing machine out and then put it away after, than it did to do the repair.
The hole was near the elbow, originally I was thinking elbow patches, no need to reinvent the wheel here.
But the hole was in fact just below the elbow so unless an elbow patch was enormous it wasn't going to work. Also the cardigan is a fine knit and I couldn't think how to make elbow patches that wouldn't be too bulky and weigh the elbows down and pull them out of shape.
All I needed was a small rectangle of thin jersey knit fabric (this is actually a pair of one of the boys boxer shorts that had worn completely threadbare at the top so the elastic was in danger of falling out, just don't tell anyone I used underpants for this repair!) and some black thread.
Black things are hard to take photos of - just saying!
I slid the sleeve, inside out, onto the free arm of the sewing machine.
Then I laid the rectangle of knit fabric on top and stitched all over it.
Because the sleeve fitted snugly on the free arm there was no turning it round so I stitched forward, then backwards but at a very slight angle, then forwards again and so on. It made a big zig zag of stitches.
I removed the sleeve from the free arm, trimmed any excess fabric, then slid it back on right side out.
I then repeated the process on the right side, that way I could make sure I was covering the largest hole really well.
The finished repair is pretty hard to see, doesn't feel overly rough on the inside and is not heavy or too lumpy.
Success!
Maybe not an idea for your best togs, but to make a work cardie last a little bit longer - perfect.
Sunday, 20 August 2017
It's just a short post from me today, so no features this week I'm afraid. Normal service will be restored at next week's link up - there'll be some extra features then to make up for it!
We have a facebook group where we share useful or interesting things so send a request if you'd like to join us.
The rules for Handmade Monday are simple:
- Did you make it? Yes - hooray, we'd love to see it!
- Add the link to a specific blog post, not your main site URL.
- Link up to 3 posts each week.
- Mingle - visit some of the other links - comment - share - let's support one another and grow our craft community.

Wednesday, 16 August 2017
Stitch the gap in the lining closed (on the machine or by hand) then give everything a nice press with the iron.
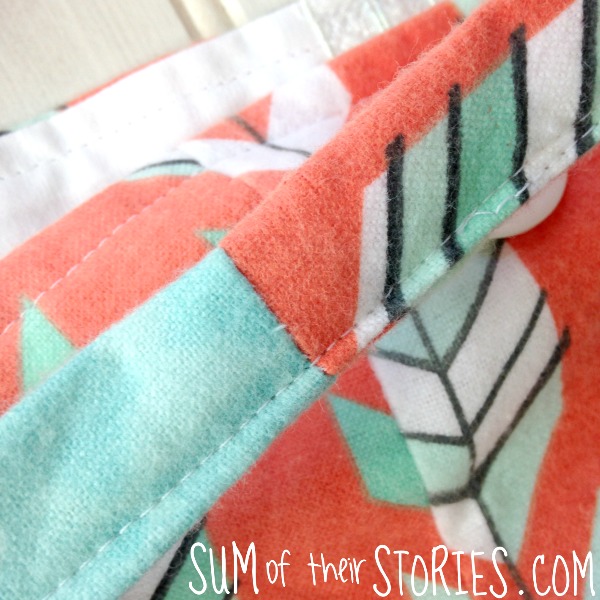
Push the lining inside the bag then top stitch the top edge to keep everything neat and tidy. Again, go slowly over where the handle loops are, that's a lot of layers of fabric for your machine to deal with.
Now thread your handles through the handle loops. One handle through the loops on the front of the bag and one through the loops on the back.
Join the handles up by placing the right sides together on those open ends and stitching across. You can see in this photo I only left about 1.5" at the ends and it was a bit of a fiddle, I think leaving 2" would make this easier!
Turn the raw edges inside and top stitch to close.
Finally, add a button to the centre of the bag front. If like me you forgot to add the ribbon loop, just sew it on now as neatly as you can.
You could use a popper or velcro instead or leave a fastening off altogether.
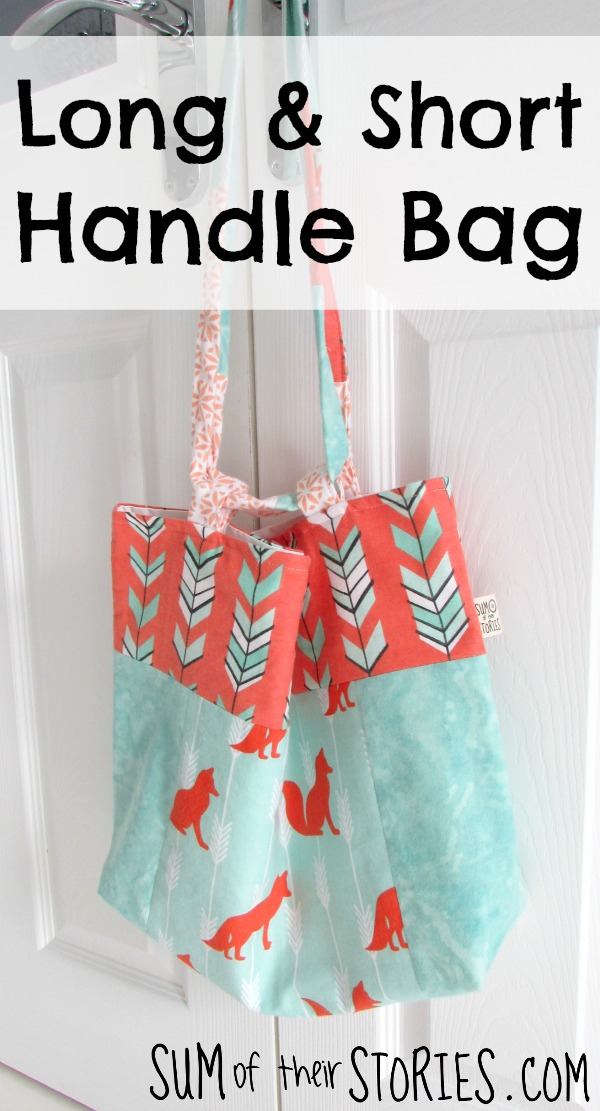
Your bag is complete! You can use it with the handles pulled up double to carry it in your hand or as a shoulder bag with the handles long.
I went for a floppy sort of bag feel but if you wanted your bag to be more substantial you could add an interfacing of some sort quite easily too.

To shop Amazon USA:
Sunday, 13 August 2017
I'm still crocheting away on the Tea on the Green CAL, this week's new block is C2C (corner to corner).
I've seen it everywhere but never tried it myself - until now - I am blown away! It's quick and it's easy! I'll be doing more of this in the future, that's for sure.
Here are the features from last week's Handmade Monday:
Lina from Sew Historically made this beautiful be-pom-pomed bag from a straw place mat - what a great idea. So ingenious!
This bottle holder idea is from Let's get Sewing, it's a great, clear tutorial with both velcro and popper options.
Congratulations to you both, here is a "Yay! I was featured" button for your blog.
Handmade Monday is all about building a craft community, please so take a few minutes to visit some of the other links, leave a comment, and maybe share your favourites on the social media of your choice if you can.
We have a facebook group where we share useful or interesting things so send a request if you'd like to join us.
The rules for Handmade Monday are simple:
- Did you make it? Yes - hooray, we'd love to see it!
- Add the link to a specific blog post, not your main site URL.
- Link up to 3 posts each week.
- Mingle - visit some of the other links - comment - share - let's support one another and grow our craft community.

Subscribe to:
Comments (Atom)
Labels
Air Hardening Clay
Blogging
Christmas
Clever ideas
Craft show
Crochet
Doctor Who
Easter
Felt
Geekery
Gift Wrap
Gifts
Hand Lettering
Handmade Monday
Home Decorating
Kids activities
Knitting
My Favourite Finds
Needle case
Party ideas
Pattern review
Pinterest Challenge
Sewing my Stash
Silent Sunday
Valentine
Wedding
accessories
art
bags
buttons
cakes
cooking
cushions and pillows
doodle
embroidery
gardening
gift ideas
greeting cards
jewellery
organising ideas
papercraft
papercutting
pretty ideas
recipes
recycling/repurposing
refashion
sewing
their stories
thrifty tips
tutorials
what can go wrong


