I had a lovely new sewing machine for my birthday last year. It's a Janome 525s which is a fairly basic one, nothing too complicated, but with a few fancy extras and a selection of decorative stitches which I was just not using at all.
I saw this beautiful bag and felt inspired. It's a guest post from Patchouli Moon Studio on Handmade by Mrs H.
It's such a gorgeous fabric embellishment technique, I knew I'd need to try it out and get to know my machine a little better.
Quite a few months passed, but now I've finally been able to spend a little quality time with my machine and find out how it's pretty stitches actually turn out.
My version turned out really quite different to the original inspiration but that is often the way.
You need fabric, sewing thread in various colours and some yarn, lace or other haberdashery trimmings as take your fancy. Some of these threads have been in my sewing box for quite a long time, they don't make wooden reels anymore do they?
I took a piece of textured cream fabric that was 53cm(21") x 61cm(24"). It was already in my stash but you could use a different size if you like. You could even use a ready made cover but you would need to unpick the side seams in order to be able to embellish the fabric with your sewing machine.
This is a shocking photo, I'm not even sure why I've included it. I'm pretty sure you all know what a piece of fabric folded in half looks like! It gets dark here pretty early this time of year so most of my chance to make things is in artificial light - that's my excuse and I'm sticking to it!
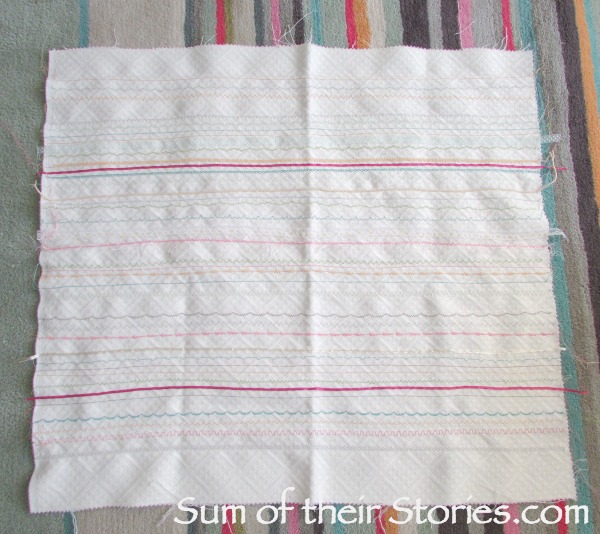
My fabric has a slight woven pattern in it so I found myself stitching in straight lines, following the pattern in the fabric, instead of the wavy lines in the inspiration bag. That just happened so I went with it.
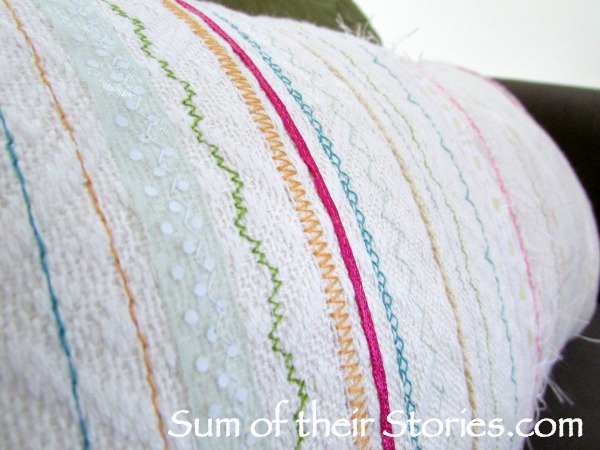
It's really easy, you just pick a decorative stitch on the sewing machine and stitch a line across your fabric.
Then pick another stitch you'd like to try and stitch another line. Try different widths and stitch lengths as takes your fancy.
Keep going until one of two things happen. A) You think that's enough of that colour or B) you run out!
Then thread up your machine with a new colour and repeat as much as you like.
I also added a few lines of lace, eyelash yarn and other haberdashery trims that were in my sewing box. Just stitch over them. The tutorial on Handmade by Mrs H has lots more detail and tips about doing this if you need help.
I just stopped when I thought it was enough. You could add more or less or the same, more texture or less, whatever you think looks best.
I laid it on our living room rug here to explain my colour choices of thread and ribbons.
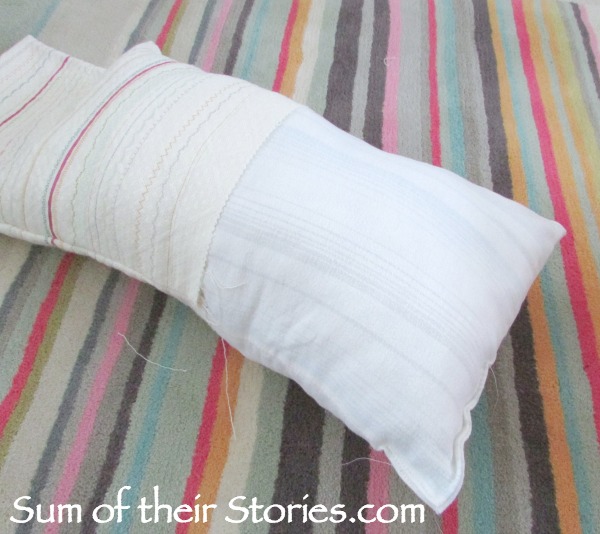
To turn this piece of fabric into a cushion cover simply fold it in half right sides together and stitch along the long side and one short side. Turn it out, slip a cushion pad inside and slip stitch the remaining short side.
My cushion did not turn out standard cushion pad size - I didn't think that far ahead when decorating my pieces of fabric - so I just made one from an old pillow case and stuffed it with the insides of 2 old and slightly flattened cushions, fluffing the stuffing up as I went.
It looks pretty along side the running stitch embroidered cushion I made a while back.
|
|
|
|


Julie your cushion mirrors your rug perfectly! I can tell it was a fun project for you to make and now use and admire. I'm so glad my bag and tutorial inspired you to play with all your machine stitches too. I had to laugh about you liking a pattern on both sides of the cushion and clothing , because I am the same way,lol!!!! I did stitch fancy stitches on both sides of my bag, adding a second pocket to the other side in order to do that. I hope you continue to use other stitches on your machine from now on. Happy stitching!
ReplyDeleteHi Daryl, I'm so pleased you approve of my version. I still think maybe I'll make something else with the wavy look of your bag and the thicker stitched lines but for now I am very happy with the cushion. Thanks so much for stopping by to see it and give it your blessing!
DeleteIt is a great way to try out your machines features. At my sewing classes we made a Christmas stocking and use different stitches for the turnover on the top for the same reason. It was a good way to show people stitch length and width using the zig zag. Are you going to CHSI? Jo x
ReplyDeleteIt was lots of fun to make, the Christmas Stocking idea sounds lovely.
DeleteYes, I'm going on the Monday to CHSI, I'm looking forward to it, maybe see you there?
Such a great variety of stitches. What a splendid idea!
ReplyDeleteThanks Caroline, it was fun and all joking aside I do feel like I know my machine a little better now.
DeleteThis is a great way to get to know some of the embroidery stitches on your machine, Julie and make something practical and pretty in the process. Such a good idea to match your cushion colours with those of your rug.
ReplyDeleteThanks Pam, it does look nice in the living room on the sofa so I'm really pleased.
DeleteI love it! I think it would look cute along the bottom of a little girls sundress, too. I'll have to keep this idea in mind when I start working on my girls' summer clothes. :)
ReplyDeleteOh yes, that would be lovely. My nan used all the stitches her machine did, she used to edge everything with something pretty, but I've never really got into it. I was pleased how simple it all was and some I'm definitely to use again soon.
DeleteWonderful pillows. I have not done a sampler on my machine for years and makes me think I should do just that, always forget all the wonderful patterns to stitch out
ReplyDeleteThanks Caroline, I know you are very familiar with your machine as I've seen your beautiful machine embroidery. A sampler sounds wonderful.
DeleteThis is so pretty. I will need to give this a try. And I have a Janome machine also and it is the best sewing machine I have ever had and I have had plenty.
ReplyDeleteGlad you like it Debra. I'm only on my 2nd machine ever, (I like to make things last well past their best I think!) my first was a 21st birthday present and that was quite a while ago!!
DeleteThat's brilliant! I'll keep this in mind for our bedroom refresh!
ReplyDeleteIt's an inexpensive way to give a new look to an old cover too, so it might work well for your budget room refreshing challenge.
DeleteWhat a great idea, I must give it a go and try out all those stitches on my machine that I've never used.
ReplyDeleteIt's really fun, i recommend it! And it was nice to make soemthing pretty at the same time.
DeleteI'm all in favour of getting to know your sewing machine, and particularly your decorative stitches, better. Cushion looks fab and you know I love a good cushion ;D
ReplyDeleteThanks Chris, but this is the one with the slight bunny ears. I have re-read your tutorial on how to get rid of them so I will have a look at fixing that when I get a moment. I think of you as the queen of cushions!
DeleteOH I love your collection of thread, but I do agree about getting to know your sewing machine a lot better!
ReplyDeleteThanks Agy, I've had some of them a long time and before that they belonged to my mum or nan. It's all been kept in a sewing box so in the dark and is still perfectly fine to use. You know me, waste not want not!
DeleteJulie I love how you created the patterns on the fabric using your new machien and the thread. The skys the limit as to what you can create now!
ReplyDeleteI like that Mary - the sky's the limit!
DeleteThis is such a good idea! My sewing machine does all kinds of pretty stitches that I might use if I had little girls but I'm not likely to with a houseful of boys! I could try them all out on a cushion :)
ReplyDeleteThanks Anna, a cushion seemed like a practical use for my pretty stitched fabric to me, although the original inspiration on a bag is also a lovely idea. You could just make something fabulous for yourself!
DeleteOh that's such a great idea. I never use the decorative stitches on my machine! I featured you at the Creatively Crafty link party this week!
ReplyDeletewww.ourdailycraft.com/2017/02/23/creatively-crafty-link-party-week-55/
Thanks Sarah, that's lovely news. I think there are 2 types of sewing machiners, those who use all the stitches and those who only straight and zigzag. I was definitely the latter until this project!
DeleteCongrats on the new sewing machine! I love sewing and these pillow cases are great. Thanks for sharing at the Wednesday Showcase party.
ReplyDeleteThanks Kati, I'm lovely my sewing machine upgrade, I wonder how long I will call it my new machine for? - 2 or 3 years I guess!
Delete