Wednesday, 27 September 2017

Little House Lavender Bags

Use an old sweater and a little embroidery to make pretty little house lavender bags.
felt house lavender bags
With autumn well and truly on us, we've been looking out our warm cosy clothes. Several wool jumpers had got past the repair stage and so I've been experimenting doing a little felting.
One cream coloured jumper was a pretty small size to start with but after a hot wash in the machine it shrunk up to next to nothing. This jumper needed to be made into some thing small!
I almost forgot to take a before photo, it did have 2 sleeves! The original jumper was quite fine so the felted material was not especially thick. I had so much fun making some little house shaped scented sachets filled with lavender.

To make your own you will need:

Felt, an old felted jumper/cardigan or shop bought
Scraps of fabric - something with small patterns work best
A length of ribbon about 5.5"/14cm
Embroidery thread and needle
A sewing machine and thread
Scrap paper

First you need to make a house shaped pattern and a roof pattern.
felt house lavender bag pattern
Cut 2 houses from felt and 1 or 2 roofs from patterned fabric. Originally I wanted to have the patterned roof front and back, it's possible but it is tricky to stop the fabric on the back puckering and catching when you stitch. It's your choice, but having tried both ways I'd recommend only putting a fancy roof on the front.
Cut a tiny door from patterned fabric about 3cm x 2cm
Pin the fabric pieces in place then machine stitch the roof onto one felt house piece just along the bottom, and stitch round the door on 3 sides as shown.
Using 2 strands of embroidery thread, stitch a little window and some plant life. I used simple straight stitches, lazy daisy stitches and french knots.
embroidery on a felt house lavender bags
When you are happy with your embroidery, layer the 2 felt house pieces wrong sides facing and pop the ribbon in the top folded in half to form a hanging loop. Pin it all carefully as the felt has a tendency to move once you start stitching. Stitch round all the sides apart from the bottom. Go slow and take care as you sew through the fabric roof, I found it liked crease a little bit and catch on the stitches.
making felt house lavender bags
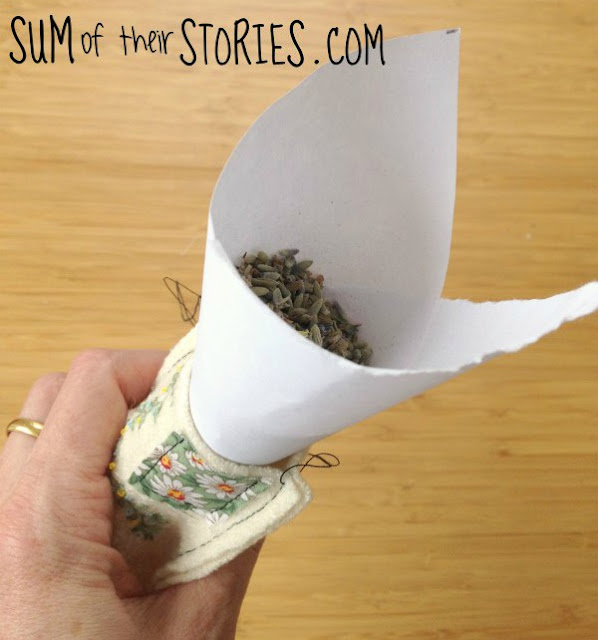
Make a funnel with a piece of scrap paper and use to fill the house with lavender. I found 3 good pinches was about right.
filling felt house lavender bags
Stitch the bottom of your house closed.
felt house lavender bags
Tidy up the threads, I am a bit obsessive and like to sew the top thread through to the back, knot them and then sew them into the bag. you could just risk it a snip them off. 
felt house lavender bags
Now make loads more!! 
felt house lavender bags
If you don't want to make your own, these little lavender bag houses are now listed in my brand new Etsy shop.

read more

Sunday, 24 September 2017

Handmade Monday #44

Welcome to Handmade Monday, our weekly craft link up. 
This is the place to share your makes, bakes and other handmade craft ideas and find some new inspiration.
As the weather had turned pretty autumnal here (except this weekend, which has been lovely, go figure!) we had been sorting out clothes, getting the warmer, cosy stuff out. We found a few wool jumpers with holes a little past repair so I had a week of felting. 
What I learnt was that not all jumper shrink down in the same way, some end up much smaller and thicker than others. It's been fun to see what I get and then think what it can be made into.
I'll share my makes over the next few weeks, mostly bags, broaches etc. I'm trying to use every bit! I only have teeny tiny scrappy pieces left of the thinner cream coloured jumper, I'm wondering if they would make pin cushion stuffing if I chop it up smaller, what do you think? 

Now it's time to look at the features from last weeks Handmade Monday:
Sticking with the felted jumper theme I just had to pick this lovely patchwork blanket from Pillar Box Blue.

Ginx crafts showed us a beautiful fair isle knitted beret and waistcoat. I love fair isle, makes me think of Neville Longbottom!

Neli Designs took a pretty spring wreath and with minimal spend turned it into a perfect wreath for autumn. Pretty, practical and inexpensive, what's not to like! 

Congratulations to you all, here is a "Yay! I was featured" button for your blog.


Instructions: Select all code above, copy it and paste it inside your blog post as HTML
Handmade Monday is all about building a craft community, please so take a few minutes to visit some of the other links, leave a comment, and maybe share your favourites on the social media of your choice if you can.
We have a facebook group where we share useful or interesting things so send a request if you'd like to join us. 

The rules for Handmade Monday are simple:
  • Did you make it? Yes - hooray, we'd love to see it!
  • Add the link to a specific blog post, not your main site URL.
  • Link up to 3 posts each week.
  • Mingle - visit some of the other links - comment - sharelet's support one another and grow our craft community.
If you're not sure on anything, more information can be found here.


read more

Wednesday, 20 September 2017

Inspired by - Clasp frame Purse

Today I've got another project I've tried which was inspired by another blogger - sewing a clasp frame purse.
Sewing a purse with a clasp frame always looked kind of complicated to me so I'd never given it a try. Then about 6 months ago the lovely and very talented Anna from Tea and a Sewing Machine shared a tutorial which made it look quite do - able.
I picked up a couple of clasp frames inexpensively from the Stitching, Sewing and Hobbycrafts show in July so I could have a go.
Things don't always happen very quickly round here so it wasn't until last weekend that I finally got round to facing my fears and making a purse with a clasp frame.
I used some scraps of left over polka dot fabric and an old yellow shirt for the lining. I did a little embroidery on the polka dot fabric first, before making it into the purse.
It's the same style as the embroidery I did earlier in the year on this tote bag.
Then I just followed Anna's instructions to make up the purse and attach the purse frame. 
It was a bit fiddly but not as complicated as I had feared. 
I kept getting my thread caught on the clasp which slowed me down and finishing off the thread was tricky as the clasp was in the way, but I managed.
The inside of my purse is not quite as neat as I might have liked but over all it's pretty cute. Because of the spacing of the holes in the frame my stitches seem large to me and casting off was tricky as the frame is in the way. Any tips - please leave them in the comments!
All in all this was a fun little make, i
f you fancy having a go I'd say 'go for it!' 
Head over to Tea and a Sewing Machine for all the details, Anna show how to create your own pattern from whatever sized clasp you have and then breaks it down step by step. 
Shop this Post: These are affiliate links, so if you make a purchase after clicking through the cost to you will be the same but Sum of their Stories will receive a small commission

read more

Sunday, 17 September 2017

Handmade Monday #43

Welcome to another Handmade Monday, our weekly craft link up. 
Handmade Monday is a place to share your makes, bakes and other handmade craft ideas and find some new inspiration.


I've been doing a bit of this and that this week, including making some 'Daisies for Vicky':

Two of my bloggy friends, Lynda's Craft Room and The Wee House of Crochet, are holding a crochetathon in Warrington on 21st October and are asking for donations of squares in this pattern from people who can't go along on the day. It's a fundraiser for Victim Support in memory of their friend Vicky Wynne-Jones. If you are interested in joining in, details about the crocheting can be found on The Wee Hookers facebook page and the page to donate - with a chance to win one of the daisy blankets they are making - is here.

Now here are the features from last weeks Handmade Monday:
I love a beautiful handmade card and Linda from Paper Seedlings often shares a fun new technique. I love how she's given these stamps a bandana look just using a gel pen. She explains it all here.

Julie from Julie's Creative Lifestyle has crocheted some lovely little dishcloths and shared the pattern links to. I must put these on my to do list. 

Congratulations to you both, here is a "Yay! I was featured" button for your blog.


Instructions: Select all code above, copy it and paste it inside your blog post as HTML
Handmade Monday is all about building a craft community, please so take a few minutes to visit some of the other links, leave a comment, and maybe share your favourites on the social media of your choice if you can.
We have a facebook group where we share useful or interesting things so send a request if you'd like to join us. 

The rules for Handmade Monday are simple:
  • Did you make it? Yes - hooray, we'd love to see it!
  • Add the link to a specific blog post, not your main site URL.
  • Link up to 3 posts each week.
  • Mingle - visit some of the other links - comment - sharelet's support one another and grow our craft community.
If you're not sure on anything, more information can be found here.


read more

Saturday, 16 September 2017

Autumn Apothecary Jars for free

Introducing just a little autumn or fall decor into your home for free (or almost free)
Today I'm delighted to be joining a lovely group of creative bloggers to bring you the We are Pinnable Blog Hop - Celebrating Fall. More of that later.
I'm not much of a one for lots of 'changing with the seasons" decor. We have Christmas decorations that go up each year and until recent that was about it. Then I was given a glass jar from Ikea which I assume is supposed to be for spaghetti and thought it might be fun to have a little seasonally changing apothecary style arrangement for the dining table. I sourced a couple more jars very cheaply (charity shop and old sweet jar) and this summer they have looked quite pretty in a floral sort of way.
I was very inspired a couple of weeks ago by Leanne from Faeries and Fauna who had shared a whole load of Autumn/Fall ideas to fill jars like these. Check all those ideas out here.
I wanted to fill my jars for free if possible and I almost managed it!
First I went on a foraging mission. We have a small wood nearby so me and my carrier bag went for a walk. I was hoping for conkers but this wood has no horse chestnut trees apparently. Never mind, what it does has is a whole load of oak trees so there were acorns everywhere. I also found some pine cones, not quite as many as I had hoped but some at least.
Things like this can be full of bugs so I spread them all out on a foil covered baking tray and gave them 30 minutes in a hot oven (200c) 
The smell is not as pleasant as you might hope! Not awful but not delightful either. 
The green acorns went a little bit brown in the heat and all the cups fell off.
I threw away the ones that had split and, feeling a bit ridiculous (and hoping no one in the family would walk in and see what I was doing) I used my hot glue gun to stick the cups back on to the acorns.
It worked though, they look cute and very Autumnal! 
As I didn't manage to collect enough pinecones I just mixed them in with some leafy looking pot pourri I already had. I might go on another pine come quest again later. Next time we have some really windy weather I pop out and see what has fallen.
2 down, 1 to go!
My original idea had been pinecones in the tall jar, conkers in the short fat jar and acorns in the little jar. With slim picking of pinecones and a total lack of conkers it was time for a new idea.
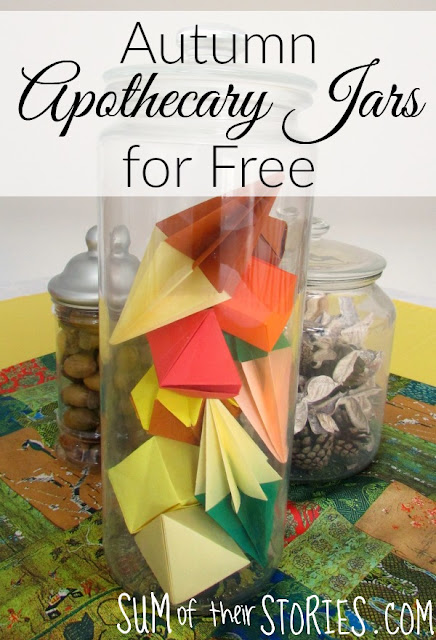
I'd been teaching our middle son to make origami cranes the other day and on the TV show Create it Yourself they had filled a Bell jar with origami shapes, so autumnal geometric origami seemed like a plan.
I used coloured paper from old envelopes, I just trimmed them to squares of various sizes.
I used a whole load of Youtube tutorials, some were easier to make than others.
OctahedronCubePaper Diamond (this one is in French and I got in a bit of a hot mess with the glueing but I think that was more me than the tutorial!)& Pyramid.
This one is called Diamond and I found the first one was tricky to put the two colours together, but once I got the hang of it, it was super easy and one of my favourites.
My other favourite is this one, the Fox Box. It uses 3 little squares and was really easy.
Once you start looking on YouTube you can find dozens of great tutorials, these are just the few I found with a quick 'geometric origami' search.
So there it is, I managed to fill these 3 jars ALMOST for free! 
I'm on the lookout for fancier apothecary jars each time I visit a charity shop as these are pretty basic looking. But we are doing this for free/almost free, using what we have instead of always buying new so for now I'm happy!
Update & what can go wrong: 
I found some conkers, just bunged them in the pinecone/pot pourri jar as they were and a day later this had happened:
Turns out drying these kind of things out in the oven first is really important! Especially if you have jars with lids. I've since dried them in the oven in the same way as the acorns and all is well.

Now it's time to see all the other 'Celebrating Fall' projects and ideas:

read more