I love reusable shopping bags, I simultaneously have loads and never enough - how does that work?
Sometimes we get lucky and are given them at open days and events and though it's nice to have another bag they are not always the prettiest things on the planet. To fix this I have a cunning plan and a stash of fabric scraps that I keep "just in case".
In the past I have just covered the fronts with a piece of fabric or two.
See how the fabric covers the writing, I don't mind about the inside!
Can I just point out here I would never cover something promoting a charity or the like, if a bag was sold to raise money and awareness I would use it with pride. Government departments, not so bothered!
The one I have had most compliments on is this one with the ruffles.
So when this bag came my way (and obviously I have nothing against the Centre for the History of Medicine at Warwick Uni but do I want it on my shopping bag?) I thought I could given it a makeover and redo the ruffle idea.
What to make one? It's not difficult! This is what you will need:
A plain or unexciting shopping/tote bag
Scraps of fabric
Sewing machine
Thread
About 30 minutes
First rip the fabric into long strips each about 1.5" wide. Ripping is fine, at least the strips will be straight and the fraying will add to the shabby chic look!
Make a straight line horizontally on your bag where you want to ruffles to start from the bottom. Pencil is fine, no one is going to see it (mine had the box round the writing so I used that as a guide and didn't need to draw a line)
Get the handles out of the way, I pined mine up so they didn't get caught in the sewing.
Pop the bag under the sewing machine needle, right side facing, starting at a side seam. Line up with your pencil line, grab one of your strips of fabric, pop it under and do just a few stitches to hold it in place.
Now you just pleat as you go, the photos show it best.
I folded under about 1/4 inch every inch or so, you can do more or less, it's up to you. The more you fold the more strips of fabric you will need, and the more frilly the bag will end up.
When you get to the end of a strip, just pop another one under with a bit of an overlap and carry on.
When you get back to the beginning, just cut off any of the fabric strip remaining and get ready to join the next layer along side.
I overlapped the strips very slightly as you can see. I kept the same thread colour, for speed and because I think it looks quite nice!
That's it, just keep going round and round as many times as you want. I stopped when all the writing was covered.
It was completely unintentional but when it was finished I thought this bag had a bit of a "Cornishware" look to it.
I love Cornishware, so much that I have a pinterest board dedicated to it! When I was little we went to Cornwall most years on holiday and I remember visiting a pottery factory, maybe that's why.
I doubled up my blue and cream fabric strips, tied a knot and just started twisting and glueing, following Paige's tutorial. This is pretty easy and fun but do be careful as glue gun glue gets REALLY hot - obvious I know, but when you are concentrating on the twisting apparently it's easy to forget!
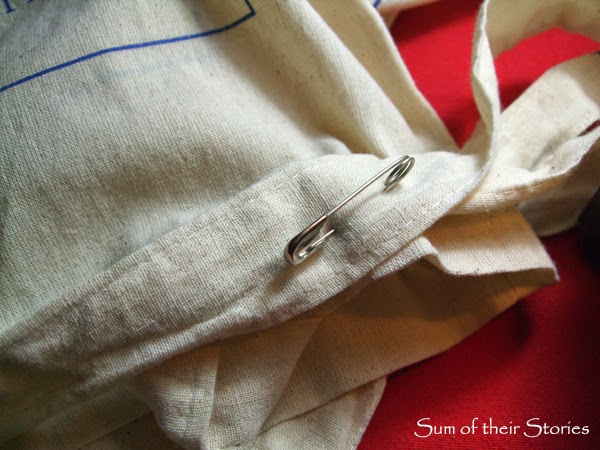
I attached a safety pin on the back and now have a removable flower to add more shabby chic charm to my shopping experience!
The bag was a freebie, the blue fabric was from an old shirt and the cream fabric was a old duvet cover that had trim which had gone all bobbly. My lovely new bag didn't cost me anything but time and a bit of sewing thread, whoop whoop!
You might also be interested in:
 |
| Lace Top Refashion |
|
 |
| Infinity Loop Scarf |
|
 |
| Easy to Sew Top |
|
 |
| Tea Towel Totes |
|
I'll be linking up to all these great link parties, why not go and have a look!


Love this idea! What a great tute. I'd love to see you join us at the Inspire Us Thursdays link party on www.theinspiredwren.com.
ReplyDeleteThanks Ren, I'll pop by on Thursday.
DeleteI wish I'd thought of that before! I had a ton of bags from banks and such and could have saved them instead of giving them away. Maybe I still have a few...
ReplyDeleteYou'll have to dig through the boot of the car, or bottom of your wardrobe, see if you can find an odd one or two that escaped the big give away!
DeleteVery cute and a great way to make a basic bag look so much more interesting than the normal ones. Thanks for sharing with Countdown in Style!
ReplyDeleteWhat a lovely bag-the Cornishware design is fantastic. Great job re-purposing something that might otherwise have been thrown away.
ReplyDeleteMy weekly Say G’Day linky party is on now so please pop by and join in if you have a minute. This post would be a fabulous addition!
Best wishes,
Natasha in Oz
Thanks Natasha, I've called by and linked up.
DeleteSO super cute! I love how you showed how to make the pleats. That's what I was curious the most with. Great job!
ReplyDeleteI'm sure there are fancier ways of making pleats but as this is,after all, just a shopping bag I didn't want to spend all day making them. Once you get a roll on it is pretty quick and easy. Glad you like it.
DeleteGorgeous bag and lovely idea! Thanks for sharing!
ReplyDeleteHave a fabulous week!
Hugs from Portugal,
Ana Love Craft
www.lovecraft2012.blogspot.com
Very cute! I would love it if you joined and contribute your awesome posts at my link party at City of Creative Dreams on Fridays :D Hope to see you there at City of Creative Dreams Link Party
ReplyDeleteSuper idea, we all have those scraps and bits of leftovers, and those bags are just so in need of cheering up x
ReplyDeleteWhat a great idea to spruce up the freebie bags and for sharing how you did it too (I may have to try that soon) Have a good week.
ReplyDeleteSo super cute! I will have to give this a try. Love the little rosette. You do have to remember that hot glue is well...hot. I have burned my fingers many times! Have a wonderful day!
ReplyDeleteHa ha Robbie, yes it was a bit of a "DOH" moment. Normally I'm pretty careful, but my cute little flower was appearing before my very eyes and I just lost concentration for a minute there!
DeleteWow you could sell those on Etsy! I definitely wouldn't have thought it was the bag you started with. So beautiful and creative those ruffles you added on there! Thanks for sharing this one with us at Countdown in Style, too!
ReplyDeleteI love how you up-cycled a plain printed bag into something sooooo worthwhile! Everyone should do this! We should have a party..... :)
ReplyDeleteThanks so much for sharing your inspiration......
“hugs” Crystelle
Crystelle Boutique
I so love a great repurpose, and these bags are great! Love all the pretty additions, And they inspire others to bring their own over plastic, Who wouldn't want to use one after seeing these!
ReplyDeleteOhh, I love a bit of upcycling and this idea is super cute! Thank you so much for sharing a fantastic idea x
ReplyDeleteThanks Brenda, I do much prefer a reusable bag and they can just bung in the washing machine too. I try to roll one up in every handbag so I don't end up with that horrible situation when you've just popping in to the shops for a few bits and realise you have no bags with you and are forced to take a plastic one - how annoying is that?!
ReplyDeleteI love, Love, LOVE this idea! You are so right that we get all kinds of bags which really aren't fun to use. My Hyundai and insurance company bags just don't make it. But you have totally brought these bags to a whole new level and they would be so much fun to make! Pinning!
ReplyDeleteThanks Thea. I agree, you don't necessarily want to rock an Insurance company bag round the supermarket or farmers market do you! Cover it up with something pretty!
DeleteThis is too stinkin cute!!!! I pinned it to our DIY Sunday Showcase Talent Board!!! Thanks for sharing with us!
ReplyDeleteShelly-minettesmaze.blogspot.com
This is so cute and a great way to use up some scraps of fabric. Pinning this now.
ReplyDeleteOoo Kimberlee, now you've said that I'm picturing one all muticoloured with all sorts of different fabrics, I'll just add that to my "to do" list! Great idea!
DeleteLove this! I too can never have enough of the reusable bags and would love to dress mine up! Thanks for the inspiration and for sharing at The Makers!
ReplyDeleteCorey @ TinySidekick.com
This is adorable! I'm so glad you found my tutorial helpful! I wish I could learn to sew. I tried with my sewing machine and it was a disaster. lol.
ReplyDeleteHello Paige, I'm so pleased you stopped by the see the flower you inspired/taught me how to make.
DeleteCute bag!
ReplyDeleteWow, super idea and very pretty!!
ReplyDeleteThis is too cute!
ReplyDeleteI love the colors!! Thanks for linking up to Create LInk Inspire, you are featured today! I've spread the word all over my social media and tagged you where possible! WOuld love a reshare or the like ;o) Happy Weekend. Emily
ReplyDeleteThanks so much Emily, I've been busy sharing as much as my limited social media skills allow!
DeleteI love the colors you chose, this bag is adorable!
ReplyDeleteNancy at Hungry Enough To Eat Six
Oh I absolutely love this! Thanks for linking up and I'm pinning to the Trash 2 Treasure Tuesday Highlights Board. :)
ReplyDeletewww.kammyskorner.com
Thanks Kammy, I'm so glad you liked it.
Deletethis is so cute I want one thanks for sharing.
ReplyDeleteThat bag turned out great! I think I might be able to make one of those!
ReplyDeleteSuch a lovely bag. I adore those ruffles!
ReplyDeleteLove this !! Thank you for linking up @ Monday Handmade Linkup Party!!!
ReplyDeleteWonderful blog, and great product. I will put a link to this product from my site www.canvasetc.com. we sell cotton duck both natural and dyed that would work well for this.
ReplyDeleteYou can use coupon code ce07242015 for additional 5% off
Chuck