I love a home made cake, it always tastes SO much nicer than shop bought. Decorating them doesn't have to be difficult really - honest!
This post contains affiliate links, if you do decide to click through and make a purchase using these links the cost to you is the same but Sum of their Stories will be paid a small commission.
Over the years I must have made hundreds of cakes, for birthdays, Easter, Christmas, fathers day, mothers day, visitors coming round, "well done" for school reports/passing exams/being star of the week!
Here is a section of the ones I've made over the years with just a word or two about how to make them. They are home made, they are not professional, I don't work for Charm City Cakes, some are a little lopsided now that I see them in a photo. I promise you in real life they looked fine and tasted great too.
I'm hoping you will be inspired to have a go.
Lesson 1: You can achieve a lot with sweeties
Chocolate buttons. minstrels and maltesers.
(The recipe for this chocolate cake & icing with step by step instructions, can now be found here)
This was a whole family effort from a few years ago now. We found it hard to break up and eat because it was soooo beautiful!
Can't go wrong with smarties and jelly babies
More smarties. I crushed them and put them in the cake mix too - very nice!
The internet is full of this cake in various forms with various sweets. It really is dead easy, I used chocolate finger biscuits round the edge rather than kitkat as we like them better. The Aero bubbles were a surprise when I opened the packet, I was expecting them to be all brown! Still I had brought 3 bags so after than kind of investment there was no way they weren't all going on the cake.
Lesson 2: Ready made icing gives a better finish (but I don't think it tastes as good)
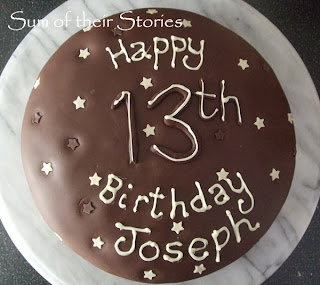
I'm not sure this needs any explanation, chocolate ready made icing, chocolate stars and a little bit of piping that's as neat as I can do. You can find the chocolate cake recipe I always use here.
Buttercream in chocolate and vanilla with milk and white chocolate buttons. This didn't look so sunk in the middle in real life, and now I look at the photo I really could have put it on a better board! (and yes I know its the wrong number of squares, but the buttons were a bit on the big side)
This was kind of easy, the nice bright red was ready made fondant. I stuck the triangles on to the cake then piped little white dots, you might find it easier to pipe them first. I also tried piping the streamers and bows but in the end I rolled long thin sausages of fondant and stuck them on with just a little bit of water.
Lesson 3: It doesn't have to be perfect to be perfect
To make the batarangs I printed a picture from the internet as a template and cut it out. Then rolled the ready made black icing out quite thick, laid the paper template on top and cut round with a little knife. I cut some in half and poked a cocktail stick half in them whilst they were still soft and then gave them about 24 hours to dry out a bit and harden. I sprayed them silver with Dr Oetkers silver cake decorating spray and let that dry, they needed a couple of coats really.
He's a little bit short and slightly lopsided but is still one of my favourite cakes ever. I made a couple of cakes in a regular tin to cut up and one in a small pudding bowl for the top.
Just printed a picture from the internet and did my best. Not epic but at least recognisable!
Easy peasy. The hardest thing is getting a good red food colouring so it's not a bit pink!
We needed two cakes one year, one for the party day(when they watched one or other of the Transformer films - I don't remember which) and one for the actual birthday so this seemed like a plan. I ended up printing a full sized image of each face thingy from the internet, cutting it out and laying it on the rolled out icing so I could cut round it. I did have to do a little bit of simplification.
More star wars, little lightsabers just rolled out from ready made icing.
He's quite cute...
......he's even cuter!
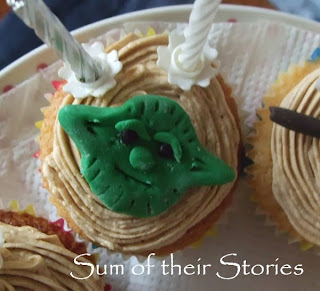
My, my Yoda, what big ears you have! "To hear you with all the better, humh"
Lesson 4: If your friend has a beautiful cake stand, try to borrow it
Pretty paper cases, a swirl of buttercream and a few little chocolate stars
This was one of the first "fancy" cakes I made for a friend's daughter's 18th Birthday Party. The little decorations on the top of the wires are just paper so that they are not too heavy, I thought they might slide down the cake throughout the party but they stayed put.
Lesson 6: Piping with melted chocolate is difficult
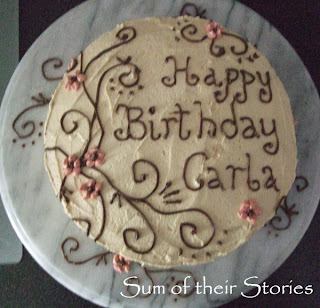
This is just a regular sponge cake covered in buttercream and piped with chocolate. Chocolate is a pain to pipe with. You have to be REALLY QUICK as it solidifies as you pipe. On refection I would recommend making some sort of chocolate icing. This is something I always forget until I am half way through and all the half melted chocolate is blocking up the end of my piping bag!
Lesson 7: Fancy or Simple, both are lovely!
This is probably the most impressive cake I've ever made, it was for my friend's son when he went into the Forces. I wont pretend this was simple - it wasn't! I'm just showing off really, sorry!
And sometimes really simple is just fine. This is banana cake with lemon icing to celebrate my daughter passing her driving test.
(Rock 'n Roll lifestyle in our house - living large!)
You might also be interested in:
|
|
|
|
I'll be linking up with all these amazing Link Parties, you should check them out.


