Wednesday, 9 August 2017

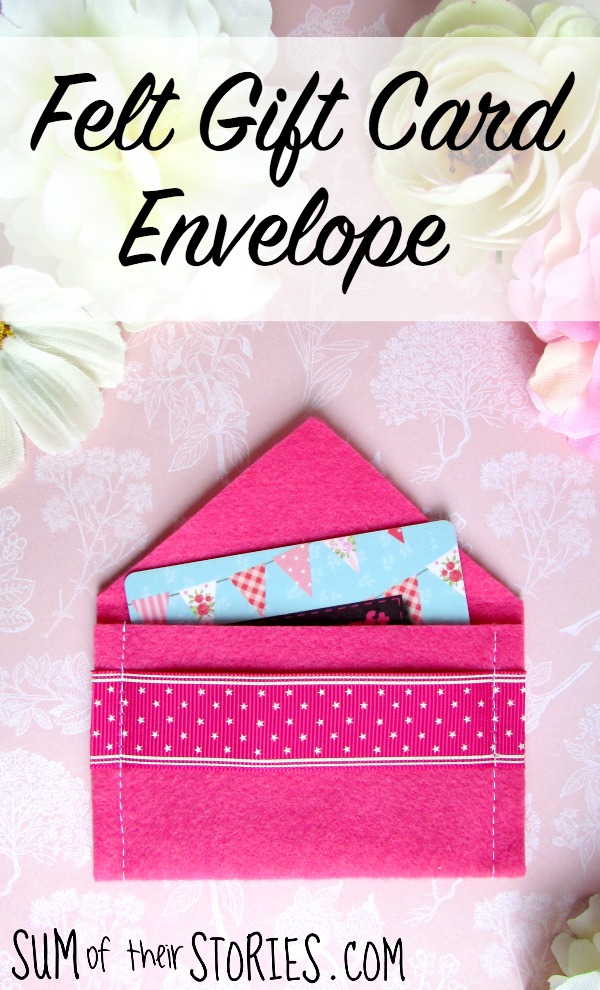
Felt Gift Card Envelope

Gift cards are such a useful gift idea but it's nice to make them a bit special by making them their own felt envelopes.
felt gift card envelope tutorial

This idea was one I originally shared over on The Pinning Mama a LONG time ago. Back then I had made Christmassy envelopes, so when I made a pink felt envelope for a birthday person I thought it was high time I shared it here with you.

To make a felt gift card envelope you will need:
  • Felt
  • Ribbon 
  • Thread (either matching or contrasting)
  • A Sewing Machine (you could glue or stitch by hand if you prefer though)
Cut the felt to a rectangle 11.5cm x 19.5cm (4.5" x 7.5") and cut a 13cm (5") length of ribbon
make an easy felt gift card envelope
Here in the UK gift cards are a pretty standard size - 8.5 x 5.5 cm. If yours are different it is easy to adjust these measurements to fit. Use the photo above to guide you.
Fold your felt in half, length ways, measure 5cm (2″) from one end, mark with a pin, then cut from the folded corner to the pin.make an easy felt gift card envelope
Remove the pin and open the felt out.
Fold the bottom edge up to just below the place the pin was. Position the ribbon across about 1.5cm from the top edge as shown holding in place with pins.
make an easy felt gift card envelope
Stitch in a straight line on both side seams, using a 1cm seam allowance. If you don't have a sewing machine you could stitch this by hand with a running stitch, or try a fabric glue.
easy felt gift card envelope tutorial
That's it! So quick and easy - you'll probably want to make loads! 
easy felt gift card envelope tutorial
You could make these any size. I imagine they would work for any reasonably flat gift , maybe a special photo or book, vouchers or tickets or even just cash.

I must really like making fancy gift cards holders as I've realised I have shared several over the years.
These made from old sheet music: 
sheet music gift card envelope
This origami folded envelope: 
origami envelope

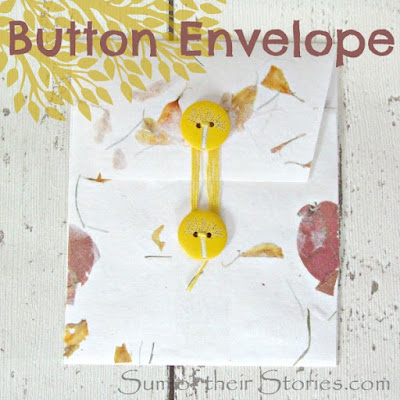
And this little paper envelope with a cute button fastening:
button fastened envelope

read more

Sunday, 6 August 2017

Handmade Monday #37

Hello, welcome to another Handmade Monday link up, it's so good to have you join us this week. 
Handmade Monday is where we share our makes, bakes and other handmade craft ideas and find some new inspiration.
Before we go any further I want to give a shout out to the lovely Vicky who hosted Handmade Monday for over a year before it moved here. Vicky has now closed her craft business and blog.
(I had to be formal here as I only have 1 K!)
All the best for the future Vicky, whatever you decide to do now, I'm sure some sort of making will be part of your life - enjoy! Thank you for all the hard work you put in to Handmade Monday. 

I've been busy busy in every spare moment working on my crochet from the 'Tea on the Green' crochet along. The third block was released (makes it sound like a wild animal) on Friday so we have 3 to be working on now.

Each block has stitches that are new to me so it's been so much fun trying them out and getting to grips with them.
The facebook group is uber friendly too, so many people sharing their advice and support. 

Now on to the features from last week's Handmade Monday:
I love a good handmade birthday card and I love a good fabric stash buster. Kathy from Sparkles, Sprinkles and Everyday Crap (what a great blog name!) shared some lovely stitched fabric cards she made for special people.

'Waste not - want not' my nan always said. Wise woman. So she would have approved of these emergency candles that Laurie from My Husband Has Too Many Hobbies made from the kids old wax crayons. They are beautifully packaged up to turn them into great gifts too. 


Congratulations to both of you, here is a "Yay! I was featured" button for your blog.


Instructions: Select all code above, copy it and paste it inside your blog post as HTML

Handmade Monday is all about building a craft community, please so take a few minutes to visit some of the other links, leave a comment, and maybe share your favourites on the social media of your choice if you can.
We have a facebook group where we share useful or interesting things so send a request if you'd like to join us. 

The rules for Handmade Monday are simple:
  • Did you make it? Yes - hooray, we'd love to see it!
  • Add the link to a specific blog post, not your main site URL.
  • Link up to 3 posts each week.
  • Mingle - visit some of the other links - comment - share - let's support one another and grow our craft community.
If you're not sure on anything, more information can be found here.


read more

Wednesday, 2 August 2017

Glitter Hand Lettered Greetings

Make easy sparkly greeting cards for family & friends with simple hand lettering.
Glitter Hand lettered Greeting Cards
This post contains a review of products I received free of charge and contains my honest review.

As I've mentioned before, back in July when I attended the Stitching, Sewing & Hobbycrafts Show and the bloggers workshop I was given a goody bag with some lovely crafty goodies in it.
Tonic Studios products
In the bag was a great selection of products from Tonic Studios, several packs of cards, glitter, glues and Crystal Drops.
Jewel Tonic Studio product lids
First can we just talk about how pretty these products are? The lids are jewels - isn't that lovely? I think they would make great gifts for a craft loving friend.
I've been practicing hand letter again recently, not anywhere near as much as I should but still, practice makes progress. So I thought it might be fun to try making some simple hand lettered greeting cards.

The NUVO Deluxe Adhesive glue and the NUVO Crystal Drops both have a fine nozzle so it was fairly easy to just write with them.
  • Write a word lightly in pencil on the Craft Perfect Jet Black card and then go over it with the NUVO Deluxe Adhesive.
  • Sprinkle liberally with the NUVO Pure Sheen Glitter and then tap the excess away onto scrap paper.
Glitter Hand lettered Greeting Cards
The spare glitter can be tipped back into the pot ready to use again.
The glue needs 24 hours to dry throughly then it can be mounted onto a card blank.
Glitter Hand lettered Greeting Cards
The glitter sheds a little bit once the glue is dry but not too much at all. 

As my hand letter is still quite beginner-y I tried using a lovely font printed on the computer next.
I printed a selection of words in Bromello font (downloaded from DaFont) at font size 100.
  • Lay the printed word over a piece of Craft Perfect Electric Purple High Gloss card, positioning it centrally.
  • Trace over the word with pencil, pressing quite hard.
  • You'll be left with an indent which is fairly easy to see on the shiny surface. Easier to see in real life than on these photographs that's for sure!
  • Go over the word with the NUVO Crystal Drops and then set aside to dry for 24 hours.
Glitter Hand lettered Greeting Cards

I also had a NUVO Glue Pen in my goody bag and as it has a chisel nib I thought it might work for hand lettering too.
Glitter Hand lettered Greeting Cards
I made this card in exactly the same way as the ones using other adhesive glue. It's easier to write with the glue pen but the glitter sheds from this one A LOT more. Picture that trail of glitter everywhere....
The glue pen was perfect for mounting the card to the card blanks. I think I'll keep it for that from now on.

Lastly I tried using a cute hello stamp from papermania. I stamped it onto patterned paper, went over the stamped image with the NUVO Deluxe Adhesive then sprinkled then with glitter as before.
Glitter Hand lettered Greeting Cards
Glitter Hand lettered Greeting Card
So in summary, these products are high quality and the packaging is lovely.
Glitter in a loose format like this does end up spreading itself around the house, that's just how it is! The Deluxe Adhesive holds it in place pretty well though.
The Crystal Drop product is meant for making tiny little jewel like drops on papercraft projects. This means when you write with it, the letters have a lovely depth to them. They really stand up from the card. I'm not sure if the photos here really show that off properly, or if they show just how glittery the glitter is. I did a little video on Instagram to try to show that shimmer.
Glitter Hand lettered Greeting Cards
You don't have to just use this idea for cards either. I used the 'thank you' on black card with the adhesive and glitter as a postcard and just wrote a message on the back. It might be nice to make gift tags too or even write straight onto gift wrap with the adhesive or crystal drop. Just allow time for it to dry before handing it over! 

read more

Sunday, 30 July 2017

Handmade Monday #36

Hello, welcome to another Handmade Monday link up, it's so good to have you join us this week. 
Handmade Monday is where we share our makes, bakes and other handmade craft ideas and find some new inspiration.

This week I joined a CAL. A Crochet Along. I've done CAL projects before but never 'live' so to speak. I've always found the patterns long after they've finished and just tried them in my own time. This time I actually found the 'Tea on the Green' CAL on the day it started.
It's a large blanket with a new block pattern released each Friday for 8 weeks. Block A is HUGE (well it's 12" so maybe HUGE is overstating it a little) and had a few stitches I've never tried before so it's been really fun to learn new things. 
There is a super supportive facebook group which runs alongside and brilliant video tutorials for each row. It's on the Hobbycraft blog (Hobbycraft is a major craft shop chain here in the UK) and the pattern is by a talented duo Lynda's Craft Room and The Wee House of Crochet.
I'm totally behind already, I have no expectations about finishing in 8 weeks but it is a lovely pattern if you want something a little bit challenging but achievable.

Now, enough about me, here are the features from last weeks link up:
Wendy from My French Twist has covered the top of an old table with pennies and resin. I've seen this done on whole floors and old bowling balls for garden ornaments but I love the manageability of something like a table top. Isn't it cool? 

Claire from Pillar Box Blue has turned a pallet into this beautiful planter using paint & stencils. I think it is just beautiful. 

Congratulations to both of you, here is a "Yay! I was featured" button for your blog.


Instructions: Select all code above, copy it and paste it inside your blog post as HTML

Handmade Monday is all about building a craft community, please so take a few minutes to visit some of the other links, leave a comment, and maybe share your favourites on the social media of your choice if you can.
We have a facebook group where we share useful or interesting things so send a request if you'd like to join us. 

The rules for Handmade Monday are simple:
  • Did you make it? Yes - hooray, we'd love to see it!
  • Add the link to a specific blog post, not your main site URL.
  • Link up to 3 posts each week.
  • Mingle - visit some of the other links - comment - share - let's support one another and grow our craft community.
If you're not sure on anything, more information can be found here.

Don't forget to ask for an invite to our group pinterest board too. Just follow the board then message me letting me know the email address you use for pinterest. 

read more

Wednesday, 26 July 2017

Delicates Wash bag

Keep your delicates safe in the washing machine using a little net bag.
Make your own Delicates wash bag
I'm going to start with a bit of a long background story today. If you have no interest in the 'why' and only want the 'how' just scroll on down!

I have had a very lengthy (ie: all my life) love/hate relationship with sockies, invisible socks, sockettes, shoe liners, call them what you will.
I love how they look ie: you can't see them
I love how they help stop your shoes stinking
I hate how they don't stay on my feet
It is just like when we were kids and our socks would always 'go to sleep' in our welly boots.
Here's a facebook post of mine from last year:
my issues with sockettes
Well I'm happy to say I have found a solution. PEDS Liners. I saw a review online (I can't remember where now, sorry) and thought they were worth a try. 
Whoop whoop, they are great. They stay on my feet all day. It's the little rubbery grippy bits on the heel that make all the difference. 
So once this problem was finally solved I had a new problem. 
How do I stop these delicate and fairly tiny things getting swallowed up inside the washing machine? They are on the expensive side so I want them to last, and getting caught up in the machine somewhere is not good for the machine either.
The solution - a net delicates bag to wash them in.

These delicates bags are available in the shops and they are not expensive. 
You might decide to go and buy one right now and that would be great.
If however, like me, you have a bit of old net curtain and an old zip (mine was rescued from an old cushion cover) then you can make one "FOR FREEEE" (Bedtime Stories anyone?) and in about 10 minutes.
Cut a piece of net curtain about 50cm x 18cm (20" x 7")
Delicates wash bag from net curtain
  • Pin one short side of the net to one side of the zip and stitch.
  • Pin and sew the other short side of the net to the other side of the zip.
  • Trim the zip.
  • Open the zip a little - this is important!
  • You've basically made a tube so shuffle the bag round, until the zip is about 1 inch down from the edge.
  • Stitch down each side seam, I went back and forth over the zip a few times just to make sure it was secure.
  • Turn right side out through the open zip.
Make your own Delicates wash bag
We leave this in the laundry basket so both our daughter and I can add our PEDS liners to the bag as we go along. Then whoever is putting the washing on can just bung the whole bag in with the rest without having to think about it too much.
Delicates wash bag
Delicates wash bag from an old net curtain
I believe other little sockette things with the grippy heel are available, but PEDS Liners are the only one I've tried. This post isn't sponsored by the PEDS people, I just really like them!
These are affiliate links, if you make a purchase when clicking through from here Sum of their Stories will receive a small commission. The cost to you is the same.
Shop UK:
Shop USA:


read more