Friday, 15 November 2013

Plastic Tubs to Pretty PlantersTutorial

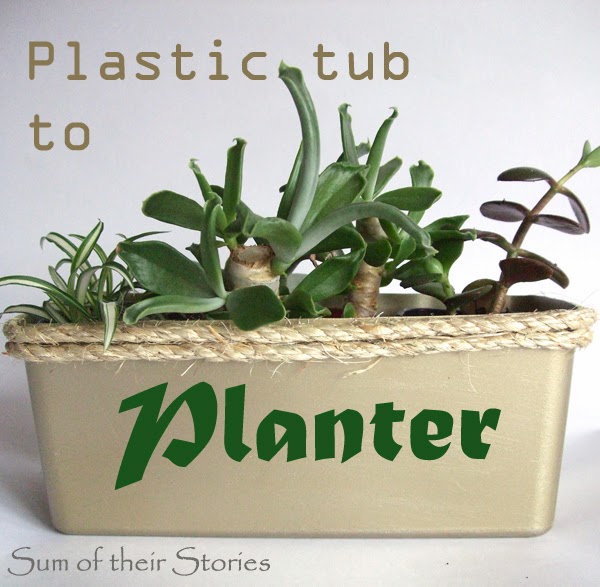
Plastic tub to Pretty Planter

I seem to collect these like they are going out of fashion!
I use them for storing all sorts of things, but there is a limit to how many plastic tubs with lids I actually need. 

I needed to find a new use for them! We have a couple of fairly narrow windowsill at work which could use a plant or two on them, so I had a go at making planters.

First I washed them and attempted to remove the labels. One came off easy (as you can see) the other was stuck with goodness only knows and wasn't shifting no matter what I tried.*

I measured my plant pots (the ones that are going inside these, I'm not planting directly into them, they would get waterlogged) They were 8cm high so I measured 8.5cm up from the base of the tub and marked with a sharpie.

Then I joined the marks with a line and cut along it with scissors.

Next I lightly sanded the tubs. You only need to do this to smooth the top, I sanded the whole thing as I thought spray paint wouldn't stick but I think it would have been fine and my sanding just left annoying little scratches **

Then I spray painted them gold. They had 2 coats of Rust-oleum Metallic gold Elegant Finish (mainly because that's what I had - it is pretty good stuff though)
This is the high tech equipment I use for spray painting smallish things:
I just put them in the box! If it's not actually raining I take it out into the garden, I did one of these coats indoors and my youngest thought there was a gas leak :-/

From this point I did 2 different planters, so Planter 1:

I glued 6mm sisal rope round the top in two rows using B & Q Solvent free All purpose glue. It's always hard to know what glue to use for a project, especially one with plastic. What sold me on this one was that it said on the packet "Wipe any spills immediately, once set this glue can only be removed with force" It was pretty slow to set which made it a bit messy but gave me plenty of time for adjusting the rope. 
I held them in place with clothes pegs till the glue dried (I gave it 24 hours) This was in fact the main reason why there are two rounds of rope - that's how far the clothes pegs would reach!

**You can see the scratches on this picture where I sanded it. I'm trying to convince myself that they add texture!

Plastic tub to Pretty Planter
It cost 78p per metre for the rope, everything else I already had - bargain!
I've just noticed that it looks a little bit wonky in this picture :-( 
Must be the photo because in real life it's straight!

Planter 2:

You nearly didn't get to see this one. Half way through I thought it wasn't working at all but I gave it a second chance and in the end it came out ok. Not as elegant as the other one but not awful either.

(what can go wrong) I spread glue all over the tub then took a strip of left over voile and kind of crunched/pleated it to the tub. It was quite messy, glue went all over my fingers, and nothing seemed to be sticking. I used clothes pegs again to hold everything in place at the top and an elastic band to hold the pleats lower down. 


Once the glue dried I trimmed the top level with the tub and folded the fabric round the bottom under added a load more glue and secured it with a piece of card. I recommend cutting your card first, drawing round your tub before you start any decorating. I didn't and had to wing it with the shape, which is why it's a bit wonky. 


I left this to dry overnight by placing it the right way up on some scrap card with some heavy bottles in it to press the base/fabric/card layers.

A little bit of cord tied round finished it off nicely.


Plastic tub to Pretty Planter

On reflection a silver paint under this fabric would have been better, next time maybe!


* to remove the labels I tried my normally trusty bottle of  "sticky stuff remover", peanut butter and soaking in hot soapy water. Anyone got any more ideas?

You might also be interested in:

Phone Charger Holder
Pretty Garden Planters
Taking succulent cuttings
Bracelet to Necklace Repurpose
Bracelet to Necklace repurpose
I'll be linking up at all these great link parties, why not check them out!

read more

Monday, 11 November 2013

Crocheted Owl Brooch

Before I start I just want to make it very clear - this is not my pattern, it comes from Repeat Crafter Me. I have just used their pattern in a different way, which you might like to try.

I found and pinned this owl granny square crochet pattern from Repeat Crafter Me a while ago on my "Things I want to make one day" board. Its just SOOOO Cute. 
I'm in the middle of making a cushion cover using the pattern. I was finding picking up the stitches on the back of the Owl a bit fiddly, so I was using a much smaller hook, which worked a treat. But then I got distracted - I was holding the smaller hook and looking at the pattern and next thing I knew I'd made this little cutie! 

Do you want to make one? (why wouldn't you - he's so cute)
Follow Sarah's pattern from Repeat Crafter Me from here until you've made the Owl but use a hook that's much too small. My wool is DK (worsted) and hook 3mm.
Once I had sewed the eyes on (I used beads for middles as I didn't have buttons small enough) and embroidered the beak & feet, the back was looking a bit messy.

I followed the pattern again, in one colour up the the point where you would start the ears. So I had a little circle the same size as my owl.

I just stitched the two pieces together  making sure all the messy ends were tucked in. I only caught the back of the edge stitches from the actual owl so I wouldn't spoil the look of the front and made my stitches as little and neat as I could.
To finish I stitched on a pin. I happened to have this one in my sewing box (I think it dropped off something else, have I mentioned that I never throw anything away!) A regular safety pin would work just as well.


You might also be interested in:
Granny Squarre Scarf Tutorial
Granny Square Scarf Tutorial
Diamond Stitch crochet baby blanket
Diamond stitch crochet baby blanket
Harry Potter Scarf Pattern
Owl Granny Square Cushion Cover
I'll be linking up to all these great link parties, why not go and have a look!

read more

Friday, 8 November 2013

Lace Top Refashion/Upcycle

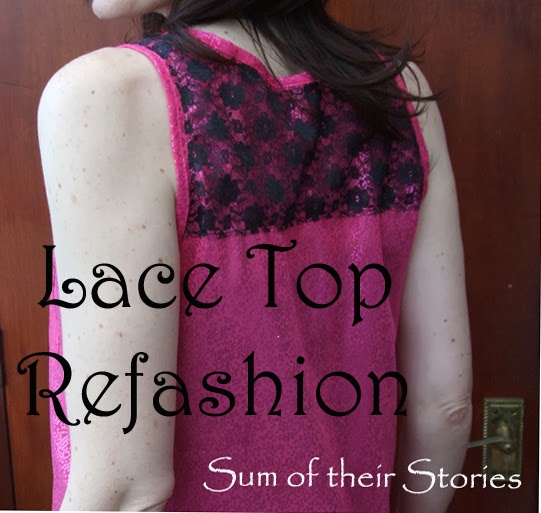
Adding a little lace can give an old top a whole new look, here's how I gave one sleeveless shirt a new lease of life (twice actually!)

Lace top Refashion

I have a very inexpensive little sparkly top which I bought from Tesco in the sale a few years ago. I wore it just as it was a few times then gave it a little refashion inspired by Sweet Verbena's Pretty T Shirt by adding a strip of lace to the front. 
lace top refashion

I wore it quite a few more times, then saw myself wearing it one to many times on my friends Facebook photos and decided it needed refresh.

I still like the black lace and bright pink combo so stuck with that.


First I removed the old lace strip: I had been pretty good - look I had even undone the binding at the neck to make it all neat!

neat neck edge to lace refashion

Once it was back to how it was (and I'm really wishing I had photographed that so you could see it all plain. Unfortunately I was such a busy bee I missed that step) I decided to try some detail over the shoulders this time.

I laid the top on a piece of lace and just cut round roughly, leaving a good inch all round.

Then I measured the back from the top of the shoulder to make sure the lace was straight and pinned. I pinned all round the neck and arm hole edges of the top, just in from the binding, using loads of pins and smoothing everything as I went. I also pinned across the bottom of the lace. Use loads of pins if your fabric is slippery like this was.
I found that it helps to put a magazine inside your top, that way you can pin just the layers you want to much more easily.

Then I just started to trim the excess lace, using my lovely sharp dressmaking scissors and taking my time. Slowly, slowly I just cut all round, level with the edge of the binding round the neck and arm holes.

At the front, the lace was now slightly at an angle because of how it came over the shoulders. I thought about leaving it like that but in the end thought it would look better straight so I CAREFULLY chopped it off and pinned, pinned, pinned.

Next I just fired up the sewing machine and stitched all round with black thread. Again - slowly and carefully. I had to have a pretty loose tension on this to prevent puckering as the fabrics were so fine and floppy. 
I also stitched the neck binding back up where I had undone it to remove the old lace, this time with pink thread.

Ta Dah!
 I'm really please with the results, and see how nicely it goes with my recycled necklace !

Once again we had fun and games taking photos, it was much to cold to go out in such a silly little top so we found a nice light bright spot inside. Unfortunately, the messiest room in the house, so I've done some serious cropping! I don't like this last photo at all, my phone is in my pocket and is making a weird lump and my hair is covering the lace, however you can see the full length which I thought might be helpful!


You might also be interested in:

Infinity Loop Scarf
Infinity Loop Scarf
Easy to Sew Cushion Cover
Tea Towel Tote Tutorial
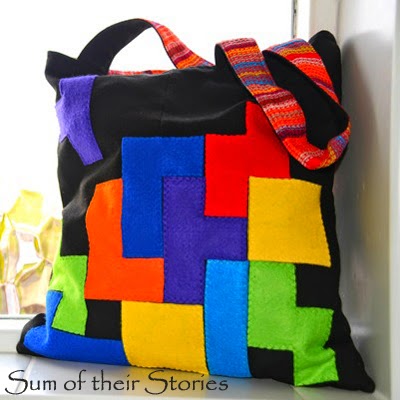
Tetris Tote Bag
Tetris Tote Bag
I'll be linking up at all these great link parties, you should pop over and check them out!

read more

Sunday, 3 November 2013

Granny Square Scarf Tutorial

Granny Squares are so easy to crochet, great for beginners, and can make a super cheerful cosy scarf.

Turn granny squares into a cheerful scarf
I LOVE my new scarf because:
a) It's beautiful
b) It costs nothing (as its a stash buster only made with wool I already had)
c) It only took 2 weeks
d) It's really pretty...

Originally I was going to do a real sampler of all different granny square patterns but then I realised I couldn't possibly find enough different squares that would all be the same size so half of the squares are the most traditional pattern I know, the rest are a mixture of different ones.


Do you want to make one? Here's how:

You need:

  • DK Wool (worsted) - whatever colours you like, I had 7 different bright colours and plenty of at least 1 more colour for edging (mine is black) 
  • Crochet hook, mine was 5mm

My scarf measures 23cm/9" x 224cm/87" 

Make 38 granny squares.
I mostly used patterns* from Little Tin Bird (her tutorials are so clear) using basic granny square, circles in squares, a tweaked version of bullseye squares where I only did 2 rounds then in my 3rd round just grouped the stitches I had so I would end up 12 "bunches" with a couple of chain in each corner, and a few I just made up as I went along.

As long as they come out the same size you can do whatever patterns you like. There are hundreds out there on 'tinternet (and even in books - remember them! )

*Just remember the patterns from Little Tin Bird are UK terminology, if you are in the US then where it says Treble you do Double. I print out patterns and write all over them if they are not UK versions so I don't forget what I'm doing half way through.


I did each square with 3 multicoloured rounds then joined them all together at the end with this joining technique from Make My Day Creative using black wool. I strongly advise saving this job for the daylight if you use a dark colour - If I ever make anything with dark colours at night I see all my mistakes in the cold light of day!
Once all the squares were joined I went round the whole thing with DC (SC in US terms) in black, doing 3 stitches in the same stitch on the corners. Then another round in pink, then a last black round. It curls a little bit but I don't care!
On reflection I think it would be better if I'd turned the work over and done the pink row from the other side, I have a feeling that would stop the slight curling.

Have fun, make your favourite granny squares or try a load of new ones. 

If you don't crochet already then this is a great way to start, it's quick and easy, and you could make your scarf half as long if you get fed up - it will still be lovely!


My hilarious son took the outside pictures, I said "take some close up so people can see the scarf" so he did:


You might also be interested in:


Earphone Wire tidy
Earphone wire tidy
Pom Pom scarf refashion
Bakers Twine Effect Edging
Crochet Loveliness
Crochet Loveliness
I'll be linking up at all these great link parties, do check them out!

read more