Wednesday, 27 July 2016

Globe Makeover

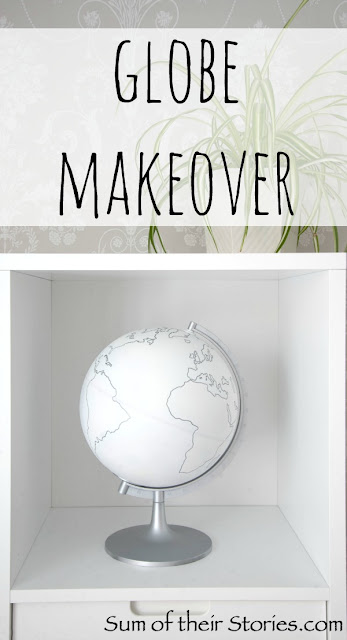
Take an old kid's globe and give it a classy makeover with white spray paint and silver sharpie.
White and Silver globe makeover
I'm so pleased with this simple makeover. It started life as a charity shop purchase by our daughter for a uni project and it was just about to make it's way back to the charity shop when I thought it might be worth attempting a makeover. 
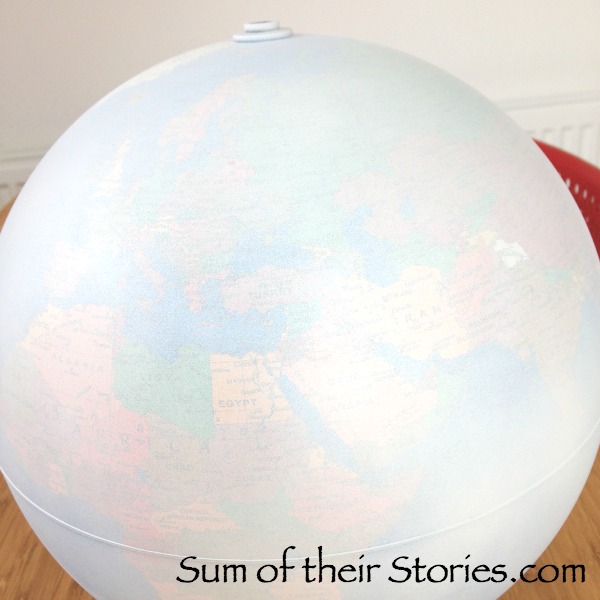
old globe ready for a makeover
I did a little looking around on pinterest for some inspiration (even made a globe board & pinned some Star Wars Death Stars just because!) and settled on trying something involving painting it white with some silver accents. This was an "evolve as it went along" project with no pressure because the globe had been on it's way out the door anyway.

To make one you need:
A old kid's globe
White matt spray paint
Silver spray paint
A silver sharpie
A fine black sharpie

Take the globe out of the stand.
Give it a coat of white matt spray paint. I just did this in stages, one side at a time.
White and Silver globe makeover

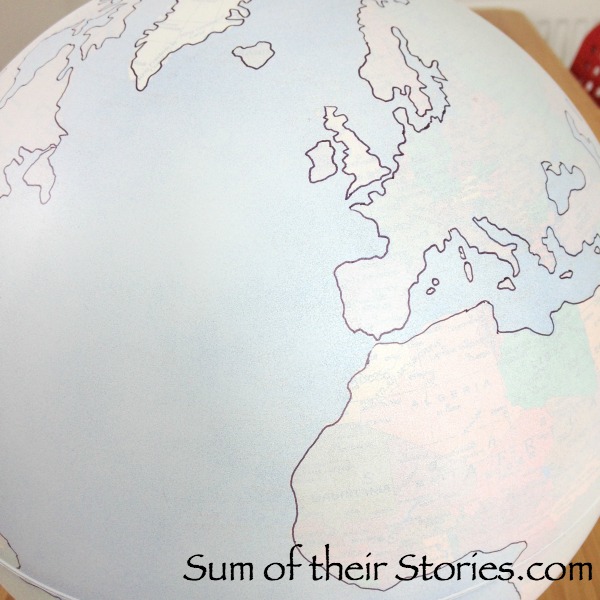
Whilst you can still make out the landmasses go over their outline using the black sharpie.
White and Silver globe makeover

Give it another couple of coats of white spray paint until it's evenly coated.
White and Silver globe makeover

At this point the bright colours should be all gone but you still should be able to make out the black sharpie lines faintly.
Now go over those landmass outline with your silver sharpie.
White and Silver globe makeover
Spray the stand silver and reassemble. Do this carefully so you don't scratch your nice new paint job.
White and Silver globe makeover
I'm loving this classy looking new globe, complete transformation!
Before and after globe makeover
The landmasses have become an approximation as some detail gets lost in the thickness of the pen. Some islands may have disappeared on mine, after the first coat of paint some areas were a little hard to make out. I apologise to Greece, Canada, Thailand and the Philippines as I know quite a lot of their little islands are missing on my globe now!
White and Silver globe makeover
This would work with any colour scheme I think, gold or bronze would look amazing. You could try spraying the whole globe with a metallic paint but I imagine only if you are not bothered about drawing in the land masses, I can't imagine that showing through the paint at all.
I did think about colouring in all the landmasses with the silver, I may still do that one day. Or maybe cover them in paper flowers, or glitter, or sequins....
All the top quality photos in this post were taken by our daughter, you can find her website here
You might also be interested in:
Tiny Yellow Table Makeover
Tray Desk Tidy
Tray Desk Tidy
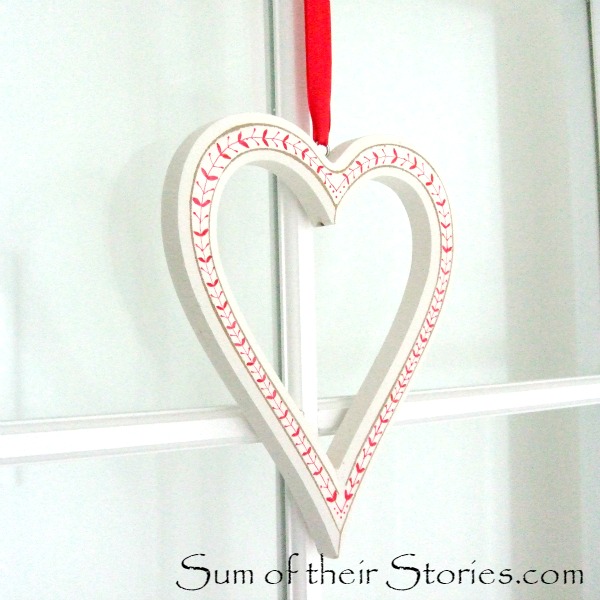
Red and White Heart Decoration
Flower Collage Canvas
I'll be linking up this project at some of these lovely link parties

read more

Tuesday, 19 July 2016

Fuller Scarf Trick

Here's a simple trick to turn a thin and slightly limp scarf into something much fuller and easier to wear.
Turn an old thin scarf to fuller infinity scarf
I love this scarf, I love polka dots and I love bright colours.
With all those colours it goes with pretty much everything and it was a gift from one of the kids.
It's a really fine fabric though and over time it's just got a bit straggly and limp.
fine scarf before refashion
It's also a bit short to do any knots or clever wrapping round that I see on pinterest but rarely do. 

First I tried just joining the short ends to turn it into an infinity scarf, but the fineness of the fabric meant it just didn't work.
Turning an existing scarf into an infinity scarf is not a new idea, I even did a tutorial here in 2013 in my 2nd month of blogging. This was pretty much the same, with just a minor joining the ends difference.
Technically this counts as another Sewing my Stash project as I found the off cuts from some IKEA sheer cotton curtains in my stash. I just happened to have a long thin length which was perfect.
I pressed my lovely spotty scarf with the iron, just so I could measure how big it is, then cut a piece of sheer fabric exactly the same size.

I whizzed round 3 sides on the sewing machine, leaving a short side open, then turned it right side out.
I gave the seams a gently press with the iron just to flatten it a bit.
At this point you could fold the raw edges on that final short side under, stitch and you would be good to go with a fuller scarf.
Because of this one being that in-betweeny length I decided to join the short ends and make it an infinity scarf. 
I turned those raw edges under then pinned them on top of the other short edge.
That way when I stitched along that edge I was hemming the open end and joining the scarf with just one line of stitching.
Turn an old thin scarf to fuller infinity scarf
And here it is, much easier to just bung on and MUCH fuller. I've actually had people say "love your scarf" since I did this - bonus! I wore this as part of Me Made May 2016 too so if you follow on Instagram you will have seen this already a few months ago.
fuller scarf quick sew trick
It's perfect for the cooler summer days that we seem to have a lot of here in the UK. We are still waiting for the proper summer to start!
P.S. I should comment on the weather more often, since I wrote that last sentence summer began in ernest here - we've had a couple of scorchers and I'm quite happy to not need my nice full scarf for a few days after all! 
You might also be interested in:
Infinity Loop Scarf
Infinity Loop Scarf
Check and Lace Shirt Refashion
Tea Towel Tote Tutorial
Too tight at the hem top fix
I'll be linking up at some of these great link parties.

read more

Friday, 8 July 2016

Easy Bead Necklace

A super easy to make bead necklace. Honestly it takes longer to get everything out and then put it away afterwards than it does to actually make this necklace!
Easy to make bead necklace

I was inspired when I saw this lovely necklace from Pastels and Macaroons a few weeks ago.
It's just so pretty! This one is wooden beads painted with nail varnish but seeing it made me remember some fairly large beads in my bead box from various old broken bracelets and bag charms.
beads
I can be a bit of a hoarder someone who likes to reuse things, so it's nice when a plan comes together and I am able to make something new from something old. 
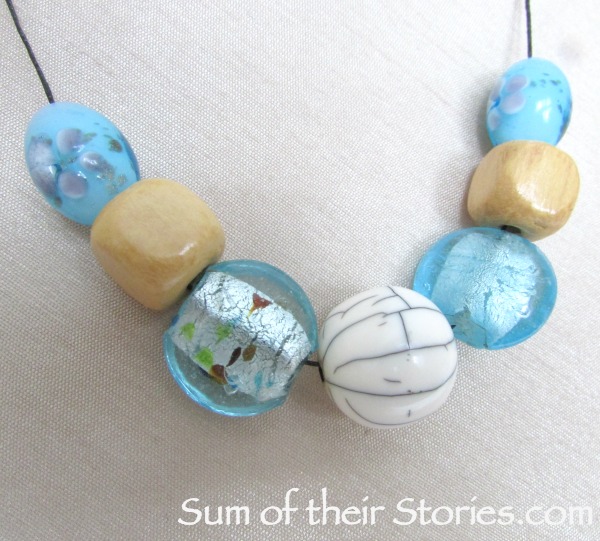
To make my necklace I used just 7 large beads and some waxed thread. 
waxed thread

I've had this waxed thread for years, I bought it originally to rethread a seaglass necklace I had which had broken. I really like using waxed thread for jewellery making as it is quite substantial, and when you tie a knot in it, the knot stay, none if that springing undone like you can get with elastics.

I cut a length of the waxed thread long enough to go over my head plus a bit more for the knot, so it was 28" (72cm) in total. Check yours is long enough, making sure you allow a few inches for the knot and ends before you cut!
I threaded on some of my favourite beads
Easy to make bead necklace
then tied the thread in a knot.
simpele knot for bead necklace
Done!
Easy to make bead necklace

You can make yours longer of course, but if you want it shorter you will need to add some sort of fastening, rather then knotting it.
Easy to make bead necklace
This is how low mine hangs to give you an idea, and it can slip off my head without pulling my ears off! It goes rather nicely with my new Summery Top made from an old Men's Shirt which you can find more about here.

Incidentally, with normal use, the waxed thread last of ages before it snaps or wears thin. My sea glass necklace snapped just last week and I've got to remake it, but I've worn it 4 or 5 times a month for at least 5 years so I would say it's pretty tough stuff.

If you don't already have a stash of beads saved from old broken jewellery (I understand not everyone keeps everything like me) then a charity shop or thrift store might be a great place to pick up some for next to nothing.
Or Amazon in the UK have some similar products to those I used which you can find through these affiliate links:

Do you have any old beads or broken jewellery lying at the bottom of your jewellery box just waiting to be made into something new?
You might also be interested in:
Marbled Clay Jewellery
Cluster Drop necklace
Cluster Drop Necklace
Old Bracelet to New Statement Necklace
Old bracelet to new statement necklace
Fabric Twine Bracelet
I'll be linking up at these great link parties,

read more