It's easy to buy beautiful necklaces nowadays but it's not too expensive or difficult to make your own completely unique pieces with just a few materials and tools.
Some of the materials used to make this necklace were provided for me by Pandahall.com
I love red. (I know - shocker!) It's so bright and warm. I wear quite a lot of red, I have a pinterest board dedicated to beautiful red things and I love these cute little red teardrop beads. They are acrylic and really inexpensive but as soon as I saw them I knew I "needed" a cluster of them on a necklace of some sort.
This project really came together as I went along, I didn't do masses of planning, I just played about until I had something I was happy with. I took some photos of the process and I've drawn a little diagram too so hopefully this will all make sense in case you want to try making your own.
To make this Cluster Drop Necklace you will need:
Acrylic Beads (Mine are these transparent drop pendants from Pandahall)
A Selection of Jewellery Finding:
Silver coloured chain (mine is from our local craft store)
Small round jump rings (mine are these 4mm from Pandahall)
Larger jump ring (mine are 7mm oval, from my stash)
1 lobster clasp (mine is this one from Pandahall)
You'll also need to use:
Jewellery making or small pointy pliers
First set out your beads in a design you like. This was what I started with.
Attach an oval jump ring to the top of each bead.
Then working from this diagram attach more jump rings to the beads to form chains - which will make them drop lower on the necklace.
Add a small round jump ring to the top of each "chain".
The 3 centre sections have 2 chains attached to the same small round jump ring.
Mine looked like this when I'd finished:
Cut your necklace chain to the length you want. Mine is 45cm (17.5"), I'd err on the generous side if you are not sure, you can always make it shorter once the beads are attached and you can see how it falls on you.
Start in the middle and using another little 4mm jump ring attach the middle cluster to the chain.
Working your way out from the centre, add the next cluster in the same way to the 5th link along on the chain. This one is a little shorter, so dangles down a little less. Continue adding the chains, with the beads on the ends following the diagram as a guide. Leave 5 chain links between each one so it's all nice a even.
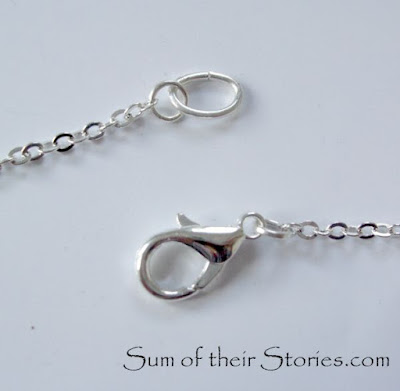
Check you are happy with the length and the beads cluster in the right place for you. Then add the lobster clasp to one end of the chain using a jump ring and a larger oval jump ring at the other end.
Your necklace is ready to wear.
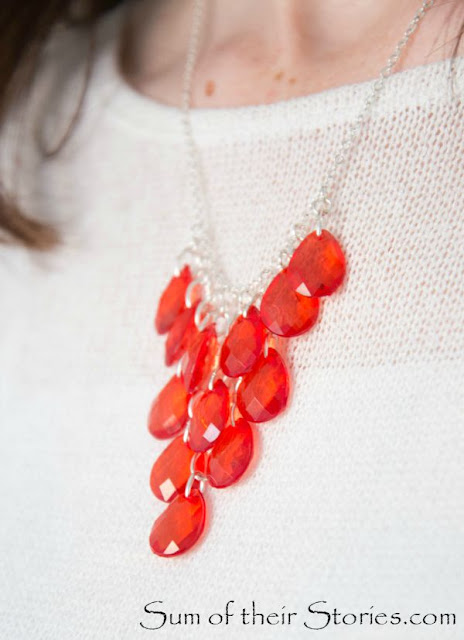
When it's on, the necklace falls in a lovely cluster.
I had my poor daughter take dozens of photos until I was happy, I honestly think this looks way better in real life. It moves about when you move. It's not a fixed "bib" style necklace, more a shimmery waterfall of beads.
You could adjust this idea and make any design you like, I think a rainbow of colours would look amazing, or you could use a thicker necklace chain and join everything with oval jump rings (I had to use the little ones as my chain was so fine the bigger jump rings wouldn't fit) Or you could spread the dangling chain out a bit, or bunch them up closer... Oooh I want to make another one now!
But for now I'm very happy with this one, see how the beads catch the light... and it's red. Did I mention that I like red?!


This is such a great idea and it looks very doable! I love the finished product, thanks for sharing!
ReplyDeleteThis is really a beautiful necklace you have created. And, the tutorial is very helpful, too. I love the way the beads drop and make a cascade design. Very pretty :)
ReplyDeleteLooks stunning and I can see 1 done in pale pink, so pretty
ReplyDeleteWhat a beautiful necklace, thanks for sharing how to make it too, the colour is so striking.
ReplyDeleteWow! This is really lovely! It falls so nicely with those beautiful little red stones!
ReplyDeleteHow pretty! I love red, too. What a great tutorial. Thanks for sharing on Snickerdoodle Sunday!
ReplyDeleteThis is sooooooo creative!! I really like this necklace, and would loooooooove to wear it :)
ReplyDeleteThat's so pretty, Julie. I adore the colour you've chosen.
ReplyDeleteSo creative, love this :)
ReplyDeleteThnaks for sharing at Creative Mondays, pinned!!
This totally looks like something I would want to buy if ran across it in a store! I love the length of it! Thanks for sharing with us at the #HomeMattersParty this week!
ReplyDeleteThis really is so pretty! I love the way it cascades just perfectly.
ReplyDeletehow beautiful- thanks for the tutorial :) really pretty and red is a brill colour :P x
ReplyDeleteThanks for sharing at the Inspiration Spotlight Party. Pinned & shared. Hope to see you again soon.
ReplyDeleteThanks so much for stopping by!!
ReplyDeleteWhat a pretty necklace!!
hugs,
Deb
So pretty! Love the red!
ReplyDelete