Friday, 29 May 2015

Divide and Conquer Drawers

When it comes to organising your drawers it seems divide and conquer is the way to go.
DIY drawer dividers

It's time for another pinterest challenge, where a bunch of creative bloggers all share something they've made that was inspired by a pin or two.
This month I chose one of the most pinned pins I've ever seen. SO many times I spotted this on someone organising ideas board. I think it's pinned so much as it is just a really good idea.
Simple, cheap drawer organisation - fab!

So let's get started! The pin that inspired me is here and the tutorial over at IHeart Organising is here.
This is not my first attempt at this idea. I'd done it at our old house where we had a large shallow top drawer to a built in wardrobe/dressing table. I brought the boxes with us and put them in one of the small but deep top drawers of our lovely new Ikea Hemnes chest of drawers, the one with the fancy new glass knobs.
As you can see, it didn't really work. The new drawer is twice the depth and everything just got piled up, I was finding it quite hard to find anything in this mess!
I didn't deviate from the tutorial at IHeart Organizing very much except for a few tweaks.
  • I used wallpaper samples to cover my boxes
  • I cut some of the boxes to fit my drawer in a way that I found to be dead easy.
First collect a load of boxes, cereal packets are ideal - you've already bought them full of cereal so no additional purchasing is necessary. 
Arrange them in your drawer, it's much easier if you take the drawer out if possible. Then using a pencil, draw along the sides at top of the drawer height.
I found it easier to flatten the box and cut straight across with scissors as I don't have a box cutter.
Remake the box and tape up the base.
I was able to get two dividers from each cereal box, one each end.
To make smaller boxes I just chopped the flattened box in half, slid one half into the other as necessary then taped it all up.
Once you are happy with your box arrangement you could just stop there. Perfectly serviceable, nothing wrong with that and at the end of the day how often to people go poking about in your drawers?

If you want your drawers to make you happy each time you open them though, then carry on and make them pretty.

Cover the boxes with paper following the easy to follow instructions on IHeart Organizing. That original tutorial used scrapbook paper - you could do that, there are load of beautiful papers about and anyone who does a lot of crafts might have some lying around.
I used wall paper samples that I had left over from another project. (all part of my "changing what we have to make it go nicely in the new house" plan) 
Some wallpapers are not easy to stick with tape but good enough for this purpose and they were free which is even better!
easy way to get your drawers in order

Once I was done I filled up my drawer dividers as neatly as I could. Much better!
Easy way to get your drawers organised

Apart from a couple of old receipts that I threw away everything that was in there before went back in and there is a load of space at the back - amazing eh! 
Easy to replace if they get damaged at all and the whole process took me about 2 hours start to finish. I took it all downstairs and did this whilst I watched tv.

Here are the other great pinspired projects for this month. 


read more

Wednesday, 27 May 2015

Ribbon and Bead Bracelet

It's not expensive or too difficult to make a pretty, delicate bracelet from ribbon and beads.
Make a delicate ribbon and bead bracelet
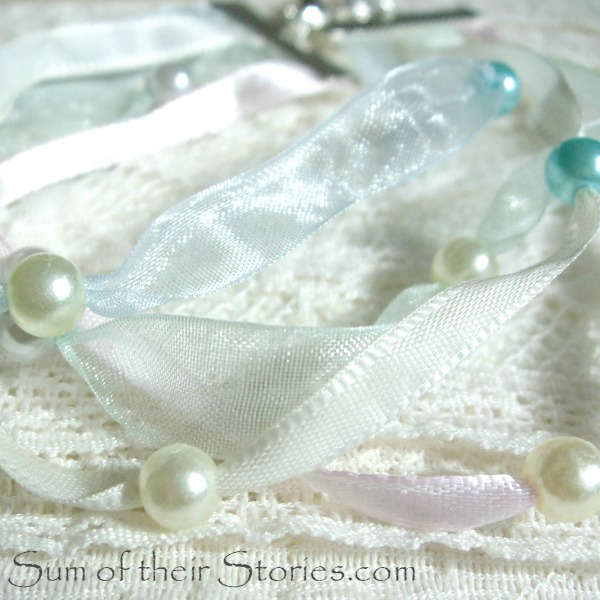
I've made this pretty ribbon and bead bracelet using pastel colours but you could really change the look completely with different types of ribbon, different colours and different beads. The options are virtually endless - I do love a project with lots of possible variations!
Some of the products I used to make this bracelet were provided by Pandahall.com
Ribbon and bead bracelet tutorial
(Love how the sun really catches the sheer ribbon and pearl quality of the beads)

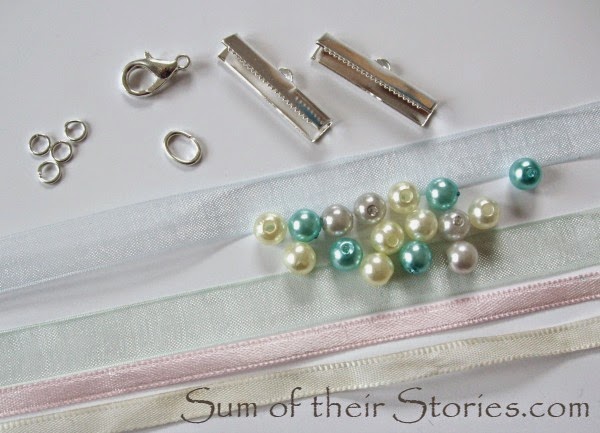
To make one you will need:
Ribbon (I used 4 from my stash, 2 sheer and 2 satin)
Acrylic Beads (Mine are these coloured pearl beads from Pandahall 
A Selection of Jewellery Finding:
2 Ribbon Ends (mine are these silver colour 6mm ones from Pandahall) 
2 small round jump rings (mine are these 4mm from Pandahall)
1 larger jump ring (mine is a 7mm oval, from my stash)
1 lobster clasp (mine is this one from Pandahall)
You'll also need to use:
A needle (a tapestry one is best)
Jewellery making or small pointy pliers
Washi or masking tape
Strong glue (I used Superglue)
What you need for a ribbon and bead bracelet
First you need to measure to see how long your bracelet needs to be. You could measure your wrist loosely but it's easier to find a bracelet that does fit nicely and measure that. Mine is 21cm when finished.
Now you need to work out how long to cut your ribbon lengths. I will make it as simple as I can.

Finished bracelet length - Clasp length + .5cm

So first you need to assemble the clasp end fixing, you'll need to know how long they are joined together.
As you can see in the photo above, there's a 4mm jump ring joining to larger oval jump ring on one Ribbon End and a 4mm jump ring joining to a lobster clasp on the other. *
Measure across from one Ribbon End edge to the other. Now you can work out how long your ribbon needs to be.

On mine the finished bracelet length is 21cm, the total clasp bit is 3.5cm so I cut my ribbon 18cm

* When opening and closing jump rings always do so with 2 pliers opening the ring forward and backward not out to the side. There are photos explaining what I mean in my button key ring post here.

Thread the ribbon through your needle and then thread a few beads onto each ribbon length. As many or as few as you like. I put 3 on each ribbon. You will, of course, have made sure you choose a needle that will go through the hole of your selected beads! I used a tapestry needle as they have a nice long eye but are not too fat. 
Take one end of each ribbon and tape together just to hold them in place.
Put a small dab of glue inside the Ribbon End and insert the ribbon. The glue is not essential but it hold everything in place and makes it a little bit less fiddly.
Using pliers squeeze the Ribbon End together to trap the ends of the ribbons in place. My pliers have ridges on them so I sandwiched the Ribbon End in a piece of kitchen roll to protect it from marks.
Repeat for the other end, then remove the tape.
That's it! You can play around sliding the beads along the ribbon until you are happy with the arrangement.
Bead and Ribbon Bracelet Tutorial
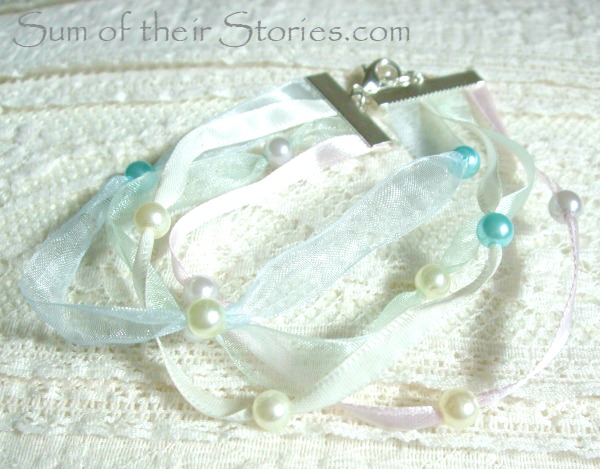
Using this sheer ribbon and pastel beads this bracelet is very light and delicate, lovely for summer with a lacy top.
Delicate ribbon and bead bracelet

I enjoyed making this so much and am so happy with the result that I have a few variations on this theme in my head at the moment. I'll be sharing the ones that work out nicely over the next few months.

read more

Saturday, 23 May 2015

Making Good - Coat repairs

I was invited by Agy of Green Issues to join her "Making Good" Blog train. Since the beginning of May a whole collection of bloggers have been sharing how they saved something from the bin and repaired it. The variety is amazing, people have been fixing all sorts of stuff! There is a full list at the bottom with links to them all if you want to take a look. 
 photo MakingGood_zpsizxmugcf.png
Yesterday was a pretty amazing repair from xoxoGrandma who fixed a wicker day bed. You need to check it out, she did such a good job you can't even see the repair at all.
I do a lot of simple sewing repairs as they are needed; hems coming undone, buttons falling off, holes in seams, that sort of thing. I never take photos of the process to blog about it so when Agy first asked I thought I'd have to say no. That same weekend my daughter came home with a hole in her coat! Bless her, I've never been more happy to see a potential repair!

This coat is quite a few years old now, these close up photos make it look a little bit bobbly. In real life it still looks ok though. It's usual problem is buttons pulling off. I think the top one takes a lot of strain with heavy bags on shoulders pulling on it as she lugs all her stuff about at uni. Those buttons have been sewn back on numerous times, but anyway, back to the current problem.
Luckily this is one of the easiest types of repairs. The hole is just where the seam is coming undone. All that was needed was to sew it back up by hand, with a simple slip stitch.
My thread was a good colour match and I kept my stitches as small as possible.
Ta Dah! Easy Peasy! Good as new! 

As that repair is almost embarrassing simple to share I will show another, slightly more complex repair I did a while back. Sadly this is one with out any step by step photos so normally wouldn't make it here on the blog. I'll explain what I did and hopefully it will make sense and maybe even inspire you to try something similar if the need ever arises.
Another of my daughters garments, this time a jacket. It's a fake leather jacket and was in fairly good condition all over except an issue on the shoulders/back. 
Where she carries heavy bags/tripods/camera bags (she's a photography student - you can see her blog here - little plug there sorry) the top layer had worn right off.
Not very attractive!
Mad though it sounds, black is very difficult to match in fabric. Our local fabric stall only had a small selection of pleather and the black was not a good match at all. So we went for a contrast instead with a soft cream plastic/fake leather.

Basically I just cut a shape from the pleather that was roughly the shape of the jacket back yoke/shoulder section, just a bit bigger all round. I just laid it on top of the jacket and cut round it - not technical at all. 
Once I had a piece of the cream fabric that was approximately the right size I turned a small hem and used masking tape to attach it to the jacket just outside of the original seam. I used tape as I didn't want to make pin holes. I just worked by way round, trimming as necessary until the whole yoke back section was covered.
Then I stitched it with the sewing machine. 
I won't lie - this was a bit tricky! I just went slowly and my stitching is far from perfect.
As the new seam is away from the original double seam in most places there wasn't too much bulk so my normal domestic 25 year old sewing machine did remarkably well. I did have problems when I needed to cross a thick seam but I just went slow and all was well.
 The last step was just to change the buttons on the front, just to tie in the contrast colour piece on the back.
It has made it last a little longer but I have just noticed that it is starting to go in another place now, so I may have another think about what to do next.
 photo MakingGood_zpsizxmugcf.png
2 May – Lisa http://www.cucicucicoo.com/      
3 May –  Millie www.2crochethooks.com
4 May – Stella www.purfylle.blogspot.sg
8 May – Christine http://rhinestic81.blogspot.com/
11 May – Lapis www.lapiswilliam.wordpress.com  
13 May – Brandi, www.supergirlsavings.com/
14 May – Carrie http://www.curlycraftymom.com/
15 May – Deborah http://urbannaturale.com/   
18 May Break
19 May Maegan http://makeandk.com
20 May – Judith http://juicygreenmom.ca/
23 May – Julia  www.sumoftheirstories.com
24 May – Amanda www.craftyfrugalmom.com
25 May – Diane www.VintageZest.com
26 May – Emily, www.theinnovativemama.com 
27 May – Emmy – www.emmymom2.com  
28 May -  Vanessa  - http://diy180site.blogspot.sg/
29 May - Jean Chua - https://jeanstitch.wordpress.com/ 
Have you ever managed to save something from the rubbish bin with a repair or do you send things to a charity shop/goodwill when they are past their best? Tomorrow's is the turn of Crafty Frugal Mom , I'm interested to see what she was able to repair. 

read more

Friday, 15 May 2015

Making Toys from a Child's Drawing

There are places you can send your kids drawings to and they will make them into actual cuddly toys. 
I saw this on line and thought it was just a lovely idea. They are complete one offs, hand made just for you so they are pretty pricey.

This was my thought process:

  • What a lovely idea
  • I have young nieces who love drawing and love cuddly toys who would love these
  • I can make things
  • I could make this myself
  • How hard can it be?

Ha ha ha, little did I know. The answer to that last question is "very!" I don't want to put you off if you want to have a go but this is not for the fainthearted - you have been warned!
Turn childrens drawings into toys
Obviously I can't do a tutorial for this as every kids drawing will be different, I'm just going to share a few things I learnt along the way in case it helps if you fancy having a go.

First I got my aforementioned nieces to do "Special drawings for Auntie Julie". I asked them to do something really special that they really loved. No point doing all this hard work for something they are not bothered about!
This is what they did for me:


And after a couple of weeks of messing about with them this is what I was able to produce.
making a child's drawing into a toy
making toys form kids drawings

For each toy I made a flat front and back, added as much detail as I could then sewed the sides together and stuffed them with toy stuffing.
Elfunt is white cotton sheet fabric with mostly embroidery for the design. Little Mermaid has a cream poly cotton sheet fabric body, face and arms and fabric from my stash for her tail.

What I learnt making Elfunt

  • You have to make what they have drawn, even if you, as an adult, think it's quite amusing. I think we all know what I'm saying here - let's move on!
  • That said, I did have to take some artistic licence. eg I moved the trunk to over the mouth as I just thought once it was a toy it's position would notice more. I also move the ears a bit and put them on each side of the head.
  • I counted the numbers of stripes on each bit pretty carefully. It turned out this was important. She counted to check!
  • The pattern is on both sides - way more work but totally worth it.
  • I used felt for the thick black lines as it was much quicker than filling it all in with embroidery.
  • Keep kids away from stamper pens, embroidering all that detail was a pain a tiny bit time consuming!
    childs drawing to toy

What I learnt making Little Mermaid

  • Watch the proportions in the drawing, forget what you know about proportions in real life. On my first attempt her head was tiny and I had to cut the body right down to make her head the right size. I had already embroidered the face and didn't want to do that again so I shrunk the body to fit the head. That's why the bow bit at her waist is a little bit too big.
  • Some things are easier to add on once they are stuffed. I added her clam shell bikini afterwards by hand. In attempt one I appliquéd it on with the machine but the fabric I chose was too thin and it was all pulled out of shape.
  • I gave her wool hair as I just thought it would be way more playable with than a solid piece of fabric. Again it turned out to be a good move. The little felt star in her hair is on a clip and she was having her hair styled within minutes of coming out of the wrapping paper! 
  • I cut lengths of wool, and stitched each one on separately. Kind of like you would when rug making. This was a weeny bit time consuming but I was watching tv so it was ok. It does give her a fabulous full head of hair with no horrible doll bald patches but there probably IS a quicker way that you should do!
    turn childrens pictures into toys
They are not perfect and certainly not as good as the ones the professionals make (just google "Toys from Kids Drawings" and you'll see what I mean) but they were a big hit last Christmas. Both girls declared them one of their favourite presents.

Would I do this again? Probably not!
Am I glad I had a go? Yes definitely!

I also took a copy of their original pictures, laminated them and included them with the toys, just in case they had forgotten what they had drawn. I get to keep the originals - they were "special pictures for Auntie Julie" after all!
You might also be interested in:
Embroidered Gloves
Embroidered Gloves
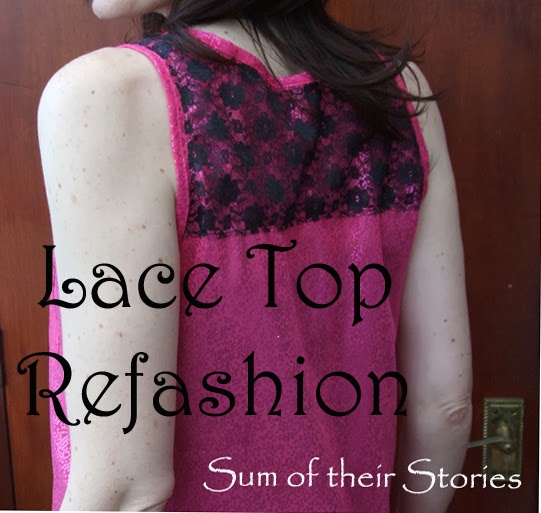
Lace Top Refashion
Lace Top Refashion
Simple Felt Needlecase
Camera Lens Cloth
Camera Lens Cloth
I'll be linking up at these great link parties.

read more

Tuesday, 12 May 2015

Popsicle Stick Pendant

It's so easy and cheap to make pendants from popsicle sticks.
I've back at The Pinning Mama Today sharing how to make these pretty pendants from "popsicle" sticks. It does pain me to call them that - to me they are lolly sticks - always have been, always will be! I even made an image with a Lolly Stick Pendant title - just for UK readers! 

But today I am a guest at The Pinning Mama and "when in Rome" and all that, so popsicle stick it is. 
Anyway, whatever you call them they are cheap as chips and you can make 2 pendants from each one with just a scrap of pretty paper and some glue.
They would be great for kids to decorate (you'll have to prepare them first) and would make great earrings or charms too.

So pop over here to see a full tutorial and a few different versions I tried out.
Just out of interest, what do you call them in your part of the world?

read more

Monday, 4 May 2015

Buying New v Using Old

Moving house is expensive! Most people can't afford to buy all new everything to decorate the new place. We've recently moved and can't (and wouldn't want to) buy all new for the new house straight away so I'm looking at ways to adapt things we already have.
gold spray paint bedroom accessories
A step by step tutorial to make this little gold heart pot can be found here
I've been mostly working on our bedroom in the last few weeks. In the old house it was natural colours (cream/beige/brown) with quite a lot of splashes of turquoise picked out from the wallpaper as an accent colour.
In the new house we have inherited cream painted walls with one wall a gold strip wallpaper and white woodwork, included built in wardrobe doors. We also have these beautiful glass light fittings left by the previous owners. 

A little while ago we visited Dubai and on that trip went to the Sheikh Zayed Grand Mosque at Abu Dhabi. It's VERY beautiful and I loved the white and gold colour scheme.

So in a spirit of using what we have and not redecorating a perfectly nicely decorated room (that's SO not going to happen around here) We're adapting some things to fit our new classy cream/white/gold look. Luckily a lot of our stuff already goes as the colours are not that different to what we had before, I've just been doing a little tweaking.

Remember how I made this earring holder with the pom pom trim. This was one of my first ever blog posts!
I pulled the pom pom trim off and left a bit off a mess.
Also, remember this trim I added to a little cardi to make it fancy for evenings out? I had a little bit left over.
I super glued the trim on to cover the damage and gave it all another spray of gold paint. 
I think I like it better than ever (though I do still love pom poms - I haven't completely lost my mind!)
DIY gold earring holder

We had a complete absence of drawer space in the new bedroom so I have splashed out and bought this IKEA Hemnes chest of drawers and matching bedside tables.
 
 
They are a great size with masses of storage but those black handles are not right with our new look, I like them but it just doesn't fit with the rest of the room. I can't decide if they give it a country look or an industrial look, maybe both? Industrial country chic?
It was so quick and easy to switch the handles for these pretty amber glass ones from Trinca-Ferro which they were kind enough to send me to review.
I love how a simple change like switching the handles can make a piece of furniture look so different.
changing in the knobs on a bedside table
I just unscrewed the black IKEA ones and the new ones screwed right in the same holes. They were a perfect fit and I didn't need to drill anything or make any other changes.
They are very pretty, classy (which is what I am aiming for here!) and really catch the light.
Trinca-Ferro have a website chockablock with beautiful cabinet and door knobs of all shapes, colours, materials and sizes and they ship internationally. Mine arrived in just a couple of days and were well packed so no chips or breaks even though they are glass.
gold accessories nightstand
On my bedside table I have an amber coloured bud vase that I inherited from my mum, it matches the new glass knobs perfectly. Flower arranging is not really my thing (though I do have a pinterest board where I collect advice and tips) but the white flower is pretty! 
I made the little ring dish from ThermoMorph, see the tutorial here and used to use the turquoise version - now I'm glad I tried a gold version too.
And such a cute photo of us all from about 13 years ago that used to be in the living room, now acquired for the bedroom.
new glass knobs on dresser
My wooden jewellery box is staying as it is - for now. It has little gold handles and key so it kind of goes, I may revisit this decision one day, who knows? 

I've got quite a few more things to share where I've just tweaked our old things for this room, but I'll share them in a part 2 another day as I think this post is quite long enough!

Do you like to use things you already have or do you prefer to buy new when you decorate or move? Or a mixture? Would you consider a simple knob or handle switch on a cupboard or drawers to give it a new look?
Disclosure: I received the glass knobs from Trinca-Ferro for free to review here on Sum of their Stories

You might also be interested in:
Adipose Cushion
Adipose Cushion
Easy Sew Cushion Cover
Plastic Tub Planter
Plastic Tub Planter
UK Coin Picture
UK Coin Picture
I'll be linking up to all these great link parties, why not go and have a look!

read more