

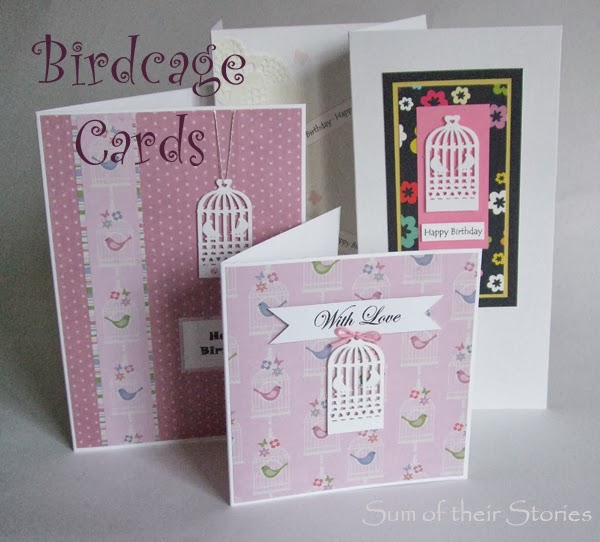
There was lots of beautiful paper to choose from, loads of lovely neon colours with stars and shapes and I had to exercise extreme self control to limit myself to just these three.
The paper is quite busy so I wanted the cards to be simple and modern - at least that is what I was aiming for.

- Card blank and envelope (mine are just regular little A6 cards)
- Lovely paper (scrapbook paper or thick matt wrapping paper is ideal)
- Glue (I used Pritt Stick)
- Computer - although you could just draw your speech bubble by hand
- Laminator & laminating pouch - again not essential but this is what I used
- Sticky foam pads
Open up word and make a new document, then click insert, picture, autoshapes then choose callout. There are a few different ones but I like these with the rounded corners.
You just click in the shape to start typing the words you want.
I played around with fonts and sizes (I only have the standard fonts the computer came with but I know you can downloads lovely ones from the internet)


You can also play around with where the triangle-y bit is pointing just by moving the yellow dot at the point. You can make it shorter or longer but it flips itself from side to side if you move to too far across.
When I was happy with them all I printed it on decent quality paper (120 g/ms).

If you don't have one you could just print your bubbles on card, but I like the shiny plastic effect laminating them gives.
Cut the bubbles out, roughly first...

Next cover the front of the card blank with patterned paper. I find this easiest to do if you cut the paper out a bit bigger than the card front, put a thin layer of glue all over the wrong side then lay the card front down onto it.

Then press it down firmly all over with a bone folder, (mine is the one from my header photo! If you don't have one, a clean wooden lolly stick works fine too) and trim the excess (with cheap Ikea scissors apparently!)


(the yellow butterfly and flower paper is some from my stash, which I thought might be nice for the cards for the little girls)
All you need to do now is attach the speech bubble to the card with foam pads to lift it off a bit.


The laminated speech bubbles are more shiny in real life than the photos show, which contrasts nicely with the matt of the paper.

|
|
|
|


Thank you for visiting our shop Julia! Your cards are lovely :)
ReplyDeleteOh Berylune, I love visiting your shop - the pleasure is all mine! I'm glad you like what I've done with your lovely papers, I've got loads left so now my mind is whirring with ideas for the rest of the rolls.
DeleteWhat a clever idea. I'll definitely be copying, hope you don't mind. :o) They look great.
ReplyDeleteOf course you can copy - that's the whole idea! (though I prefer "inspired by!") Glad you like the idea.
DeleteNot only are these cards ridiculously cute, they are so easy to make, even I could perhaps manage it!!! I love how the bubble POPS up off the card.... fun paper too!!!
ReplyDeleteVery cute! I've thought of using wrapping paper, but I couldn't think of how to make it work, since you can't write on it. Thanks for sharing with Countdown in Style.
ReplyDeleteThanks April. Just make sure your wrapping paper is good quality thick paper, not the flimsy stuff. That creases like mad and will never look good (yes I have tried, no I couldn't make it work!)
DeleteThese are great, so much better than buying a card. I bet the lucky recipients really loved them.
ReplyDeleteI love the personal touch on these! It takes a card that is done by a child to a new level. I have to say I've never seen a personal card made by an adult before and these look great! Thanks so much for sharing this creative idea with us at Countdown in Style! Don't forget to stop by Friday to see if you are featured :)
ReplyDeleteI often personalised cards, people seem to really like them! These are easy enough for a child to make to, my kids used to love feeding things through the laminator when they were little (supervised of course!) and who doesn't like cutting and sticking!
DeleteBeautiful cards, thanks for sharing
ReplyDelete