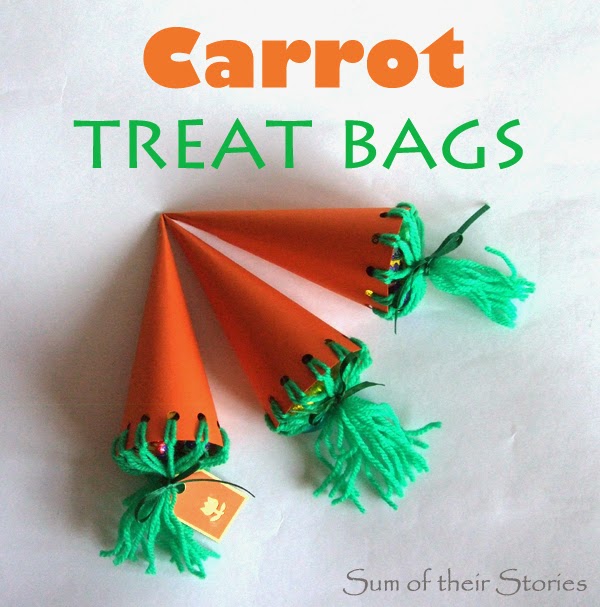
With all the Easter and Spring time projects around at the moment I've seen a couple of carrot shaped treat boxes & bags, they reminded me of these little cardboard treat bags that I remember making when I was little. I have no idea if this idea is from a book or magazine (it can't be the internet as I was little long before then) but here is my version from memory (and a few trial runs!)
You will need:
Thin orange card - I guess thick paper would work too
Green wool & a length of green ribbon
Hole punch, glue (I used Pritt stick), ruler, pencil and compass
Using the compass. mark two 1/4 circles in the corner of the card, one 14cm and one 13cm. I've done two here in the photo, one in each bottom corner.
Cut out along the outer line.
Mark 1.5cm in from the right hand side and cut a slither off the shape so it's a little less than a 1/4 circle now.
Along the compass line, mark dots at 1.5cm intervals, starting 1cm in from the edge. You should end up with 12 dots in all, evenly along the line.
Using a hole punch upside down (and with the base removed if it's not see through like mine) punch a hole where each dot is. Line the dot up in the middle of the hole carefully or the holes won't be straight and it will look a bit rubbish (guess what happened in my first attempt!)
Roll the paper shape up a bit to start it curling - this will make the glueing bit much easier.
Apply a little glue just along the edge then roll up and glue the edges together. The two edge holes will overlap and line up and you will only have 11 holes round your carrot top.
Press the seam firmly, I used a pencil to press down inside the carrot as far in as I could, then I added a teeny tiny bit of sellotape at the bottom on the outside to make sure it holds.
Now you need to cut 11 30cm lengths of green wool.
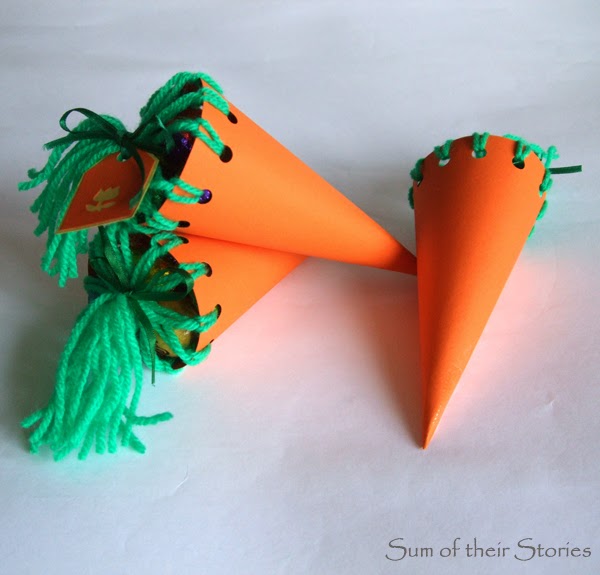
Fold each length in half and poke through the hole just a little way, poke the ends through the loop you've made then pull gently to secure.
Do this for all the holes, then fill with sweets, treats, whatever you like. I've used mini Easter eggs.
Finish off by drawing all the strands of wool together and tying with green ribbon. Trim the ends of the wool to level them off and Ta - dah, you're finished!
You can use more wool instead of ribbon like I did in this photo but then I was thinking it looks like it would be difficult to find the right end to undo the bow and get to the treats! So on reflection I'm thinking ribbon is better.
You could even add a little gift tag if you wanted to.
You might also be interested in:
 |
| Personalised Wedding Picture |
|
 |
| Spring Easter Wreath |
|
 |
| Washi Tape Berry Boxes |
|
 |
| Easter Decoupage Book Bunny |
|
I'll be linking up this project at all these lovely link parties, pop over for a look at loads of projects from other blogs


Oh my gosh these are ADORABLE!! I love it :)
ReplyDeleteThese are so cute!! - I love them!! I'm your newest google+ follower from the Countdown in Style blog hop.
ReplyDeleteThanks
Angie
godsgrowinggarden.com
Super cute project! I love it! Thanks for sharing tutorial!
ReplyDeleteHope you’re having a great weekend:)
Hugs from Portugal,
Ana Love Craft
www.lovecraft2012.blogspot.com
Thanks Ana, I love the way the internet means we can share ideas all over the world!
DeleteCute idea to use yarn at the top for the greens and to tie up the treat bag. Pinned. Seen on Link It or Lump It.
ReplyDeleteGlad you like it Erlene. I love Dream a little Bigger and the Link it Lump it party.
DeleteThese are so adorable and creative! Wow! I would never have thought about that. I'm pinning it . Your carrots are awesome!
ReplyDeleteKim ~ This ole Mom
Thanks Kim, no one has ever told me my carrots are awesome before!
DeleteOh these are just so cute!! Thanks so much for the tutorial, my daughter will have fun making these! Stopping by from Handmade Monday. Sarah
ReplyDeleteThanks Sarah, I'm sure your daughter will enjoy making them, like I said I remember making them when I was little and being really please with how they came out.(probably a little bit different to this as it was a while ago, but the overall effect is the same)
DeleteThese are absolutely genius! I saw these on pinterest the other day but didn't realise they were yours! x
ReplyDeleteVery cute, and so easy to make too.
ReplyDeleteThese are very cute. I love the look of your blog, your doing a great job. http://craftwithcartwright.blogspot.co.uk
ReplyDeleteHello Ruth, what a lovely thing to say, thank you. That means a lot.
DeleteThese are so cute! Thanks for sharing with us at Your Designs This Time!
ReplyDeleteEmily @ elizabethjoandesigns.com
Love them, they are so cute, congratulations Julia your owl cushion was the most clicked link in the February stash link party. :)
ReplyDeletehttp://lindacraftycorner.blogspot.co.uk/2014/04/april-challenge-your-february.html
Thanks Linda, and what lovely news. I love the whole stash party idea and am working on some more stash busting projects right now.
DeleteVery cute... going to pin them now! :)
ReplyDeleteADORABLE - Thanks for sharing!
ReplyDeleteSo cute and fun! Pinning!
ReplyDeleteReally interesting and creative packaging idea. I love it.!
ReplyDeleteThis is absolutely adorable! I think I can make a bunch for those at church! I won't make promises, but I'd sure like to try! Thanks for sharing with Countdown in Style! Come back Friday to see if you were featured!
ReplyDeleteHa ha, add it to your "to do list"! They're not too difficult and lots of fun to make - good luck!
DeleteOh these are so cute. What a wonderful and fun idea!
ReplyDeleteI love how you laced the top of the carrots together! So cute and clever. Thank you for sharing at our link it or lump it party!
ReplyDeleteAmy @ Delineate Your Dwelling
Happy SITS Day!! Great post. Love your illustrations you do a good job showing how to make them
ReplyDeleteThanks, I try to take lots of photos as sometimes it's hard to explain what you mean in words!
DeleteHappy SITS Day! These are adorable. Great illustrations on how to make them
ReplyDeleteHi Julie, these treat bags are so adorable! How fun would these be to make for my daughters' Easter baskets. I'm adding them to my list (which means I might get to them by next Easter, that list just grows and grows, lol) What a fun idea, thanks for sharing. And, Happy SITS day too! :)
ReplyDeleteWhat a cute idea & it's just in time for Easter! Thank you for sharing this at the Frugal Crafty Home Blog Hop!
ReplyDeleteHappy SITS Day! These are so cute. A perfect craft to do with the little one for Easter. I might do them myself and add them to his basket. Thank you for the inspiration. Also, love the graphics and illustrations on your blog. Adorable!
ReplyDeleteThese are so cute and easy! Thanks for sharing!
ReplyDeleteOh my gosh, these are adorable!
ReplyDeleteThis is a a really sweet and original project. You have some great crafting ideas!
ReplyDeleteLove and Luck,
Laurali Star
http://www.thesecretsurprisinista.com
Hi! Visiting from SITS - this might be a craft I can actually do! The instructions are very good and it would be perfect for holding some treats in my toddlers Easter baskets - very sweet!
ReplyDeleteThank you so much for sharing your beautiful project on The Inspiration Board at homework. You were featured in the spotlight!
ReplyDeleteHave a wonderful weekend.
carolyn ~ homework
Thank you so much Carolyn, I'll pop over and have a look right now.
DeleteThese are adorable and so simple! Love it
ReplyDeleteThese are adorable! Love them! (pinning now!)
ReplyDeleteVery cool bags! Thanks for sharing at the Anything Goes linky at Bacon Time. Hope to see you again tomorrow.
ReplyDeleteWhat a great idea! They are just so cute. I would love for you to share this at my Friday T.G.I.F. linky party :) Have a great day!!
ReplyDeleteOh my goodness, these are just too cute!
ReplyDeleteWhat fun little treat boxes!! I can see doing these with pretty paper and ribbons too! Very clever and cute!
ReplyDeleteThanks so much for sharing them with us at Project Inspire{d}!
Hey Girl! It’s Deonna from the Child at Heart blog. I was just stopping by to say hello! Very creative and simple to make. Pinning! I am doing a great spring necklace giveaway and would love for you to come by and enter to win :) Have a joyful week!
ReplyDeletehttp://www.thechildatheartblog.com/2014/04/spring-statement-necklaces-from.html
Great idea! They look fantastic too. Good project to make with children.
ReplyDeleteInsanely cute!
ReplyDeleteI would love for you to share your tutorial with our Thursday Link Up Party- Idea box:
http://milaslittlethings.com/2015/03/idea-box-thursday-link-party.html
xx
Mila
milaslittlethings.com
milawayable@gmail.com
wow! too easy and too cute! perfect to tuck a little something extra into a Easter basket or just as a little hand me out gift. Love the carrot treat bag! Thanks for sharing with Snickerdoodle Sunday!
ReplyDeletesaw this on Snickerdoodle Sunday and had to come over to pin it.
ReplyDeleteHello!
ReplyDeleteI had to smile at this craft as it brought up memories of making a similar one with my wee ones.
Tho mine was completely edible.
You'll need
Sheets of dried fruit
Dried fruit strings or licorice strings
Frosting
Hole punch. Scissors. Ruler. Patience
Assemble as you did. Punch holes along sides as well. Save all hole punches. Frosting the sides together as if glue. Use strings to hold together if coming apart. Place a malted milk ball at bottom of cone. Fill with jellies and etc unwrapped. Add the key punched holes. String up the top. Add graham cracker decorated with writing icing as card. Refrigerate for about an hour. Voila. Totally edible.
Ps carrots originally came in red yellow white and purple. Do have fun using those colors. I always told mine.. this was a gift from the woodland bunnies so to always kind to them
Blue
I love them! Thank you for sharing at The Really Crafty Link Party this week! Pinned!
ReplyDeleteThis is so cute! My daughter would love a carrot full of candy!
ReplyDeleteThat is really creative! Thanks for sharing at #HomeMattersParty
ReplyDeleteJulia this is such a cute idea. It would be great to give to the kids for a party too. Pinning!
ReplyDelete