

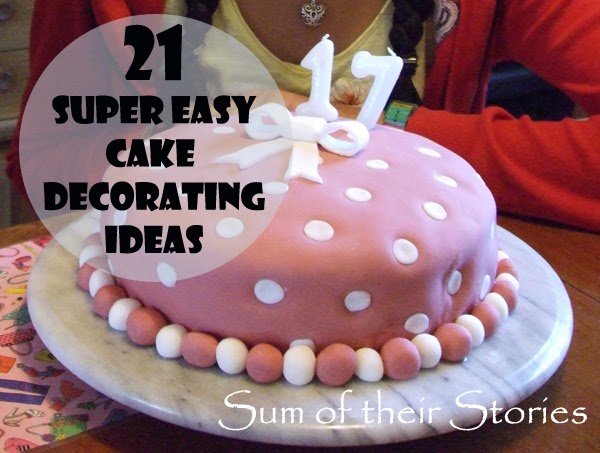
Since I posted my cake decorating ideas I've been promising to produce a simple, step by step guide to making cakes.
My Mum taught me how to bake, she would let me sit up on the counter and "help" when I was really tiny. She liked instructions and doing things properly so from her I learnt the "right way" to do things. I have to confess to being a bit more happy-go-lucky about things so use a few short cuts.
I know a lot of people use packet cake mix. My Nan, Pearl, would quite literally spin in her grave if I ever used cake mix (also if I bought ready prepared bagged salad, but that's another story!) To be fair, I've never used them but from what I understand you have to add 3 ingredients to the mix. You only need 4 ingredients to make basic cake anyway and this way you know exactly what's in it.
When your baking, some things matter and will make the difference between a delicious spongy cake and a rock hard biscuit. Some things don't seem to matter at all - so I don't do them. Here the recipe is in bold and in red is me, standing next to you giving a helping hand - just like my Mum did for me.
So here we go: (you can view a "no frills" version for printing here)
Part 1 - Basic Sponge Cake Mixture
(Also called Victoria Sponge I believe)
We are going to start with fairy cakes (or cup cakes if you like)
The basic recipe is 4 4 4 2 so it's easy to remember
(my scales are imperial so that's how I work, but I've looked up some conversions for you all)
Makes 12 small cakes (use little paper cases, not big muffin ones, you get more cakes and people can always have a second one)
4oz butter or baking margarine (115g or 1/2 cup)
4oz caster sugar (115g or 1/2 cup)
4oz self raising flour (115g or 1 cup)
2 eggs
You also need: A mixing bowl, a mixer or hand mixer or wooden spoon, a large metal spoon, paper cases and a patty tin - some people call them cup cake tins/muffins tins)
1) Take the butter/margarine and the eggs out of the fridge, try to do this 15 minutes or so before you start so the fat can soften up a bit and the eggs are not too cold.
2) Wash your hands, put on an apron, remove any baking trays and roasting dishes from the oven, put the oven on to 180 c/350 f/gas 4
3) Prepare your tin now so put your paper cases in the little sections. This is because once the flour gets wet you want it in the oven as quickly as possible.
3) Cream the butter/margarine and sugar. This means to beat it together till it goes all fluffy and light looking. I use my hand whisk for this (If you have a fancy mixer use that, if you have neither - use a wooden spoon) If you chop the butter/marg into smaller lumps it's easier to get started.

You can stop when it looks like this:

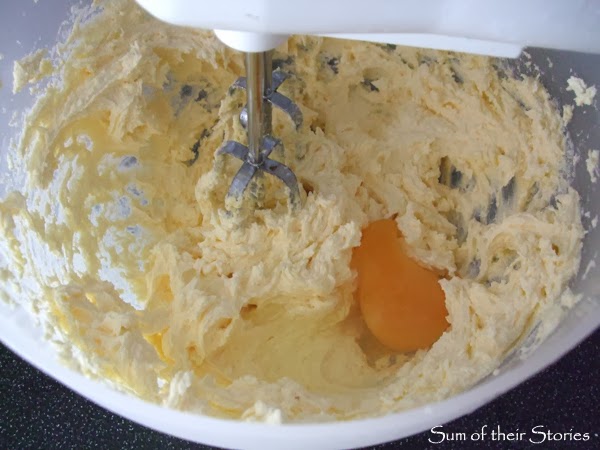
5) Fold in the flour. Technically you are supposed to sieve the flour, I don't bother, it's fine to just tip it straight in. What you must do is stir it in GENTLY with a metal spoon.

Stop when you can't see the flour any more.
6) Spoon into the papercases. Use a teaspoon and your finger. See how much mixture is in each one below. That's what you are aiming for. You should get 12 from this mix, be as quick as you can but if you spill on the tray wipe it straight away. Once that's burnt on it will be really hard to clean.

Does the bowl look empty to you?

Get yourself one of these flexible scrappers, believe it or not there was enough mix there for another whole cake. (my son calls this the instrument of torture because it leaves less for licking the bowl afterwards!)

8) Place on a rack to cool. Don't ice them until the are completely cool or your icing will melt.

Eat them as they are, or decorate however you like. Next in the series One day I promise I will rustle up some icing recipes and decorating ideas. Then some ways to adapt this recipe to make all sorts of cakes...

You might also be interest in:
|
|
|
|


Great post :) I will have to try this. I love all of your pictures and instructions!
ReplyDeleteHope they all help, turns out I have a lot to say when it comes to cake making, it was hard not to waffle on too much!
DeleteThey look delicious! Thanks for sharing the tips alongside the recipe.
ReplyDeleteGreat tutorial. The ones on the cake stand look delicious, lovely decorations.
ReplyDeleteAli xxx
How to turn these basic cakes into iced beauties (like the ones on the stand) is coming next. I just need to work out some proper quantities as I normally do things like that by eye/taste! I can't really do a recipe that says "pop in as much margarine as you think" can I?
DeleteVery clear instructions! I love baking - definitely feel like making some cakes now :)
ReplyDeleteGreat tips! I'm excited to see the rest of the series since I noticed that this is part 1. :)
ReplyDeleteCan I just say I *love* reading recipes in British English! They just sound so much more fun!! :)
ReplyDeleteHi Rabia, I feel a little bit old fashioned as I still use ounces, but my scales are the old ones with the little brass weights. I have a conversion chart taped inside the cupboard door for when I need it. I guess it's just what you are used to, but I like to think baking is always fun - eating the results definitely is!
Delete