Ever since my nice bright pink bracelet broke and I made it into a necklace, I have been short a bright pink bracelet. So I've been experimenting and tried out a few DIY bracelet ideas.
I found this lovely bright pink cord in B&Q (the hardware shop)
I love this cord, it's really strong and the colour is amazing. The ends unravel like mad though so I popped a dab of nail varnish on the cut ends to help seal them whilst I was working with it. It helped a bit, you'll see in the photos below.
Update June 2014: I used this cord again for my Chain & Thread Bracelet and melted the end of the cord (just carefully in the gas flame of the cooker hob) It worked SO much better than nail varnish
I also had these old bangles to play around with. They are the kind that make your wrist go green so they already had a coat of nail varnish on the inside to help stop that.
Wrapped Cord Bangle 1:
First I took the wider bangle and the cord, tied it in a tight knot then started knotting it round, pushing the cord up to itself as I went along.
When I got back to the beginning I just tied the cord as tightly as possible on the inside then glued the ends on the inside with a little dab of Superglue.
Crochet I-Cord Bracelet:
Oh my giddy aunt, I am so excited about this one. I found a tutorial on how to crochet an I-cord!!!! You can see it here at Planet June.
For my first attempt I used a 5mm hook and it came out a bit uneven and lumpy. Take 2 was with a old UK size 12 (2.5mm) hook and was much better.
The cords are in reverse in the photo above with cord 2 (size 12 hook) at the top and the lumpier first attempt at the bottom.
I just crocheted the cord until it was long enough to fit really snugly round my wrist.
Then pulled the cord through all three loops on the hook to finish off: (I took these photos in the evening, hence the terrible quality - sorry)
Made a loop as big as my chosen button:
Threaded the cord onto a large sewing needle and made a knot
then "lost" the end by weaving it into the I-cord:
I Superglued the knot and the ends just to be sure they don't unravel.
The other end already has a handy thread which I used to sew the button on, again using a dab of glue over the knot and cord ends.
Knotted Parachute Cord Bracelet:
I followed some instructions on YouTube for how to make this. These instructions were great, really clear and straightforward. I thought I had pinned them so I could find them again easily - apparently not! I have found alternative instructions from here which is the same method but be warned, this Guy takes ages to get to the point (I went and made a cup of tea, came back and he still hadn't started the actual weaving/knots bit!)
Still, stick with it, he does tell you everything you need to know (eventually) However you don't need a jig or fancy equipment, I stuck a pencil between my knees and looped it end of the bracelet over that!
I followed the instruction until the bracelet was long enough for my wrist. If you are using a button like this, make it a bit on the short side, I found my loop and button added another cm or so. This is really adjustable though, so when I found my bracelet was a fraction too long, I could just move the end knot up a bit to shorten (once you've got a finished bracelet in front of you that sentence will make way more sense)
I sewed a big button on the end and glued the end of the cord with Superglue rather than setting fire to them like the guy on YouTube.
Once the glue was dry I trimmed the ends off.
I like them all, but I think the I-cord is the one I will definitely be trying out again, with some different wools and threads.
I do like to stack bracelets up a bit and I like the bright pink with other bright colours:
I also like it with black:
I really like it with natural colours:
You might also be interested in:
 |
| Embroidered Gloves |
|
 |
| Earrings organised Update |
|
 |
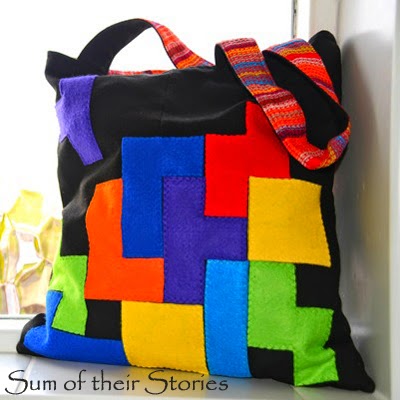
| Tetris Tote Bag |
|
 |
| Crocheted Owl Brooch |
|
I'll be linking up at these great link parties,
I also linked these bold colour projects to the Bold Project Bold Link Party


That's a cute idea. I may try the one that is wrapped over the bracelet. I've got a few of those that aren't that pretty and could use some covering. I have tried the paracord ones, but I just can't get the hang of burning them properly. Actually, I can't get the hang of working the childproof lighter, truth be told. I hadn't thought of using superglue. Doesn't that rub on the inside of your wrist? I'd think it might be a little rough. #SITSSharefest
ReplyDeleteI've not found the superglue too rough, I did only use a little tiny dob though. I can confess now that I did try this with a PVA based glue first which appeared to work great until I washed my hands whilst wearing the bangle and got it wet - I had a glupy bit on the inside of my wrist - not a good look. I had to start again, and found the superglue a much better alternative.
DeleteI didn't even try with the lighter idea, way to scary for me, I can imagine setting fire to the whole thing! .
I think this is so creative. And I love pink so this one looks so adorable to me! Thanks for sharing :)
ReplyDeleteThe I-Cord is my favorite I think :) They all turned out very cute!
ReplyDeleteSo creative! I love the wrapped bangle the most :).
ReplyDeleteI seriously need to learn how to crochet. Very inspired!
Lovely bracelets and interesting to see the 3 different techniques. I think the pink is a fabulous and very vibrant colour.
ReplyDeleteIt really is vibrant, I'm pretty sure the magazines would call this "a pop of colour" I love it for accessories but I don't think even I would wear it head to toe!
DeleteThese are just like those expensive bracelets you see people buying in the stores. I guess this is a trend in hollywood? I would totally love to try to make the crochet one! These are so nice! Thank you for sharing with us at Countdown in Style! Don't forget to stop by Friday to see if you are featured :)
ReplyDeleteWhat a fantastic idea. I have loads of old bangles lying around so I'm going to give the wrapped bangle a try.
ReplyDeleteAli xx
It's really easy, and If you glue the cord to itself instead of the bangle I guess it would be easy to cut it off and start again if you want a new look. Almost endless possibilities!
DeleteWhat a pretty shade. My favorite is the corded bangle.
ReplyDeleteso cute. My daughters would love these
ReplyDeleteI'm going to send one to my daughter (she's off at uni at the moment) I think it would be greedy to keep them all for myself!
DeleteCute and what a great tutorial!! Thanks for sharing this on DIY Sunday Showcase! I pinned this to our talent board!
ReplyDeleteShelly
minettesmaze.blogspot.com
Thanks Shelly, what an honour.
DeleteBeautiful bracelets. I had not considered trying multiple ways to put it together, but I can see the difference in using the same supplies, and producing cool different results. I liked the wrapped bracelet the best. Thanks for sharing with Countdown in Style.
ReplyDeleteCute bracelets. Wish I could knit and crochet. Nice to have you on Countdown In Style.
ReplyDeleteWow my daughter would love the crochet bracelet! My mother wants to learn to crochet so I might see if she can make one. If she gets on ok I'll ask her to teach me!
ReplyDeletenice blog
ReplyDelete