Friday, 9 September 2016

Simple Cross Stitch Mural

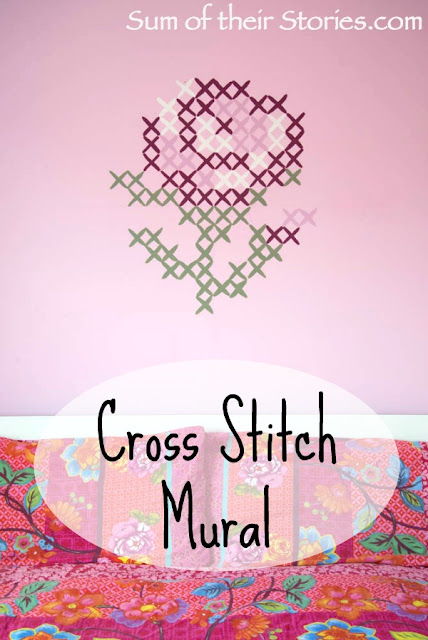
A simple cross stitch design painted on the wall as a mural.
Cross stitch mural
Whoop whoop - saw it, pinned it, did it! 
Like a million other people I pinned an absolutely beautiful cross stitch mural from the uber talented Eline Pellinkhof .
I found the pin from a feature in Country Living, it gets a little bit complicated from there, the Country living feature takes me to Eline's blog but from there I can't find anything on the mural, I think it is featured in her 1st book. She has done 3 books apparently and they look amazing. But it's all in Dutch so I'm not absolutely sure. 
So to cut a long story short, I pinned this idea a couple of years ago and last weekend our daughter and I created our own very simplified version for her room. This is the before:

Warning, we were so excited to do this project there are only a few slightly rubbish phone photos of the process (and it was a very grey rainy day, so the light was awful!)

To do the same you will need:
Tester pots of paint - emulsion/regular paint for walls
A meter/yarn stick and spirit level
a pencil and rubber
paint brush - we used size 10
scrap paper
A simple cross stitch design

Choosing a design:
First you need to be sure your design will fit.
All our crosses were 2 inch square, that seems like a good size for this kind of thing to me, it's bold but not to huge. Count how many squares your chosen design takes, both up and across then times by 2. This is approximately how many inches of wall space your design will take up.
I sketched a couple of different designs and our daughter chose the one she wanted.


You can use these (just right click on the image then save so you can print it), design your own or just go online, there are hundreds of lovely cross stitch designs out there.
Our chosen design was 12 squares x 13 squares so the finished design is just over 24" x 26". 

To mark it on the wall:
It was going centrally over her bed so we measured the half way point, then drew a pencil line straight up using a spirit level.
We then drew a horizontal line, again in pencil, centrally on the wall space above the bed.
So basically there was a big cross, nice and straight, centrally over the bed. Keep the pencil lines faint, that way they are easier to rub out afterwards.

I marked the middle lines on the cross stitch design too, in bold (you can see that in the image above of the cross stitch chart)

Originally I thought we could just do the crosses free hand, along the centre lines, then just building the design up and out from there. When it came to it though that just seemed to be leaving too much to chance so we decided to mark it out a little more thoroughly. I didn't fancy drawing dozens of straight lines to make a full grid - that would be a lot of rubbing out afterwards. We considered decorating tape, but didn't have any so instead I made a template.
As we had decided each cross should be about 2 inches square, I took a bit of scrap paper, folded it in half and half again, then cut a 1 inch square from the corner, when opened up this gave me a 2 inch square "window".
Cross stitch mural tutorial
I simply held the window up to the lines and drew a cross, then moved it along. That way I only marked the crosses we needed for the design.
Just work your way out from those centre lines, count, count and count again. How many crosses in each row, horizontally and vertically? Just keep counting and checking.

Painting:
These were the paints we used, just inexpensive tester pots of emulsion.

It was just a case of filling in the crosses, using the chart. Again - count, count and count again.
Cross stitch mural tutorial
Keep checking the chart, count each cross from the centre, from the edge, from the crosses you have already painted. I think it would be hard to go over the darker colours with light ones if you made a mistake. Best not to make a mistake, then you don't have to worry about it!
Cross stitch mural tutorial
It was easiest to do the main colours first, they were mostly around the edge and right along those central lines so counting them was easy.
We actually bought a green, dark pink and light pink paint tester pots. We already had white paint. The light pink was way to light and we had to mix it with the darker paint to get a good medium shade. On reflection we could probably got away with just mixing the dark pink with white paint and saved £1.49 but never mind.
Cross stitch mural tutorial
It was pretty easy to do in the end, took us about 3 hours start to finish. I think a more complicated design would look amazing, but take much longer to do and have much more room for error. I'm glad we kept it simple.
Cross stitch mural tutorial
Some of the crosses had a 2nd coat of paint then we left it to dry for 24 hours before rubbing out the pencil lines with a good quality soft eraser.

This project was quite a long time in the "yes, yes, we'll do that mural one day" stage but now it is finished we keep high fiving each other - I'd call that a rainy day well spent!
Cross stitch mural tutorial

You might also be interested in:
Floating Photo Frame
Floating photo frame
IKEA Cactus Gift Wrap
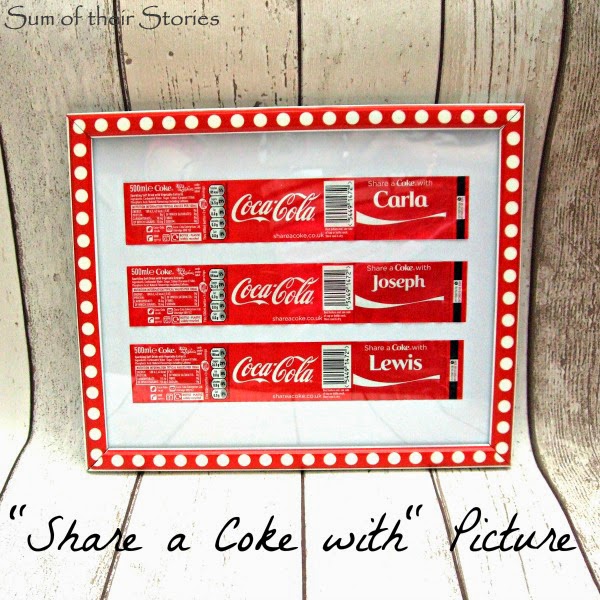
Share a Coke With Picture
Gold Heart Pot
Gold Heart Pot
I'll be sharing this project at these link parties

read more

Wednesday, 31 August 2016

Framed Scrabble Tile Quote

Turn old scrabble tiles into a piece of art by spelling out a favourite quote.
Framed scrabble Tile quote wedding gift idea
I have another wedding gift from our summer of weddings to share with you today. I nearly called this "Another Scrabble Tile Picture" as making things with Scrabble tiles is something I've shared before. I always buy Scrabble games when I see them in charity shops but that has led to my discovery that the type of tiles they make has changed over the years. I now have a right old assortment but try not to mix the different tiles in any one project.
scrabble tiles
Basically that means I spend ages sitting with a heap of tiles trying to see what words and phrases I can make! 
This gift was for a lovely couple who like handmade and homemade (the bride made her own invitations) and their home decor is warm, cosy, country so I chose a wooden box frame and a pretty floral paper for the background.
Together is a beautiful place to be
To make something similar you need:
A box frame
Scrapbook paper
Old scrabble tiles*
Strong Glue - I used a hot glue gun
Scrap card, a pencil and masking or washi tape
A suitable quote

This whole thing is super easy to make, basically you are just glueing the Scrabble tiles onto your fancy scrapbook paper to spell out your chosen quote and popping it into a box frame - easy!

The only slightly tricky thing is getting the words central and straight.
DON'T draw pencil marks onto your pretty paper, once those tiles are glued on you just won't be able to get to them properly to rub them out.

This is what worked for me:
  • Cut your pretty scrapbook paper to the size of your box frame first then play around with the tiles until you are happy with the arrangement of words on the paper.
  • Measure the gap top and bottom of your arrangement and cut a bit of scrap card to that width - that's the blue card in the photos below.
  • Push the tiles for the top row together (it's SO much easier to keep things straight if you don't leave gaps between each tile) and mark either end on the scrap card. Shown in big ol' black arrows on the photos.
  • Tape the scrap card to the top of the pretty paper, making the word gap you've marked central. 
  • Now it's easy to glue the tiles into place, as you can push them right up against the scrap card.
  • Just make sure you remove your scrap card straight away before it gets stuck down too!
Framed scrabble Tile quote wedding gift idea
  • Repeat on the bottom, obviously leave gaps between the words as I have here!
  • Once the top and bottom rows were firmly in place I measured the gap needed between the other 3 rows in my quote and cut a strip of scrap card the right width.
  • I actually didn't mark any more for these middle lines, I just used the top and bottom lines to help me centre everything by eye. You could measure if that's your thing. 
  • It was really useful to have the card to push the tiles up against to help to keep them straight.
Framed scrabble Tile quote wedding gift idea
*If you don't have access to any old scrabble sets at the right price, maybe you could get the same effect by printing them on card and mounting them with foam pads. A quick google search should find you free printable scrabble tiles.

We gave the couple their gift a week or so before their big day so I was so honoured when we arrived at the reception to find they have used this picture as part of their wedding decorations on the top table! 
Framed scrabble Tile quote wedding gift idea
Isn't their cake topper fab! As you can see they come from 2 different parts of the world which is why I chose this quote for them.
Framed scrabble Tile quote wedding gift idea
It's so lovely when you give a handmade gift and then discover they really do like it - for real!
I've been looking for the source of this quote but I've not been able to find it to properly attribute it, I just found it on Pinterest. Please let me know if you know where it comes from.
I'll be sharing over at these Link Parties
You might also be interested in:
Wedding Gift Wrap Nespresso Boxes
Crochet Flower Gift Wrap
Personalised Wedding Picture
Simple DIY Name Canvas

read more

Friday, 26 August 2016

3 Year Blogiversary

It's Sum of their Stories' 3 year Blogiversary this week!
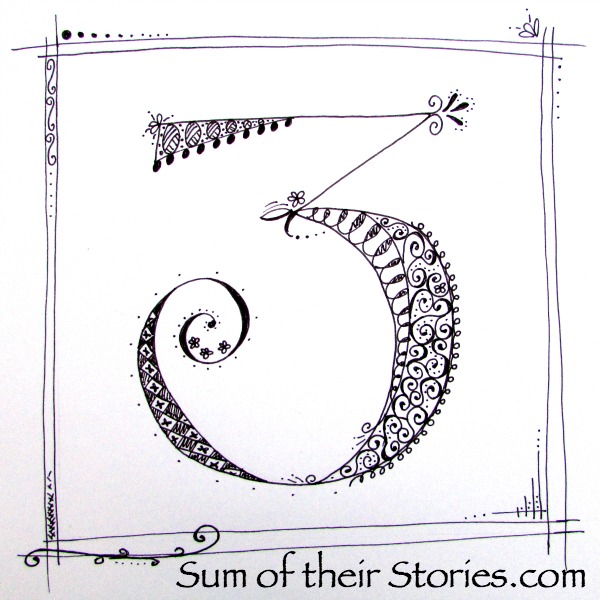
doodled number 3

Sometimes I feel "Wow, where has the time gone" & other times that I've been doing this forever! One thing is for certain, I still only know a tiny a fraction of all the things you can learn about blogging. 
It's hard to know how to celebrate a Blogiversary, different people do all sorts of different things. I know a giveaway is popular, lists - what you've learnt, advice for newbies, fascinating facts etc - are also lots of fun. I read a brilliant post from Pam at Threading My Way just the other day talking about her 5 years of experience with her blog and how things have changed.

During this last year I added something new to my long list of creative pastimes - hand-lettering.

I don't really have time for another hobby but it was all the fault of the lovely & super talented Dawn from By Dawn Nicole! This time last year we were both guest contributors over on The Pinning Mama and Dawn had started her Art & Hand-lettering Class on Facebook. If you fancy having a go this is such a great place to start. Dawn has free downloadable practice sheets, freebies by email every month if you sign up, advice on what supplies you might want to try and loads more. There are a couple of Facebook and Instagram Daily Prompt Challenges each month and a really lovely supportive bunch of participants of all different levels. I've dabbled in the Monthly prompts a couple of times but haven't actually managed every day yet...
number 3 in many fonts

I had an interest in hand lettering years ago, I had this book back in the late 90's. 

It's been so much fun to revive my interest and attempt some once again. The styles have changed a bit now and there is so much inspiration around - I'm looking at you Instagram!
One of the best things about it is you can start with stationery you already have and then build up to fancy pens and the like later. 
I don't share much here because I don't think I'm very good (yet) and don't practice everyday either, even though I know that's the way to improve.
doodled number 3

Another first this past year was my invite to the Bloggers Breakfast at the CHSI In Stitches Show. It was great to meet some lovely fellow bloggers and see all the new innovations in the crafting world.

I participated in Me Made May for the first time this year too. It's a pledge to wear things you've made and share on Instagram.
You set your own pledge so it can be as much or as little as you want. I pledged to wear everything "me made" that I still have and I almost managed it. The weather wasn't playing ball though and a couple of summer dresses just never made it. The whole thing was so inspiring and I found a whole load of amazing sewists to follow for year round motivation. The only downside is taking all those photos of yourself in the garden feeling just a little bit silly. 

Thanks for visiting, I hope your last 12 months was filled with as much time for being creative as you would have liked. Here's hoping for the same in the next 12!
I'll be sharing over at these Link Parties

read more

Sunday, 21 August 2016

Wedding Gift Wrap Nespresso Boxes

A fun wedding gift wrap idea for giving Nespresso capsules (or some other long thin boxes)
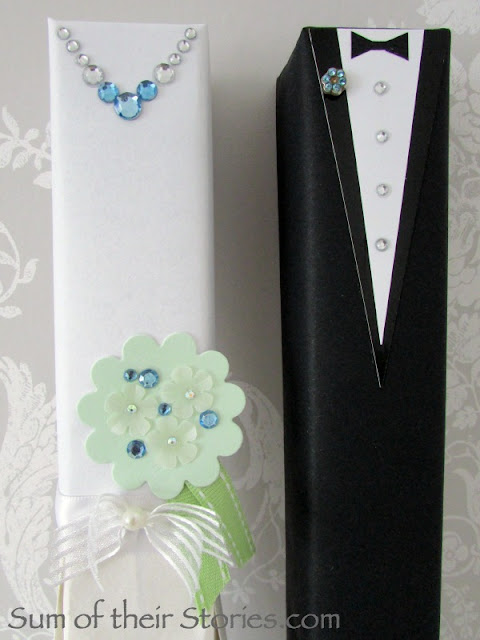
Bride and Groom gift wrap Nespresso boxes
I'm guessing that giving boxes of Nespresso capsules might be a really niche wedding gift. If you follow on Instagram you may have seen we are having a summer of weddings, we have 4 altogether, in a 7 week period! 
As you would expect I have a few wedding gift things to share. You can find a crochet flower gift wrap and romantic paper cut here, and today is quick gift wrap idea - just in case there is anyone else out there who is wanting to find a fun wedding way to gift wrap tall thin boxes.

I was inspired by something I found on Pinterest from a German Stampin' Up Demonstrators blog First Hand Emotion. They had made a Bride and Groom from tall thin boxes containing what I think is tall thin bottles of some sort of spirit. I have had to rely on Google Translate so I'm not entirely sure!
We needed to pack ours in a suitcase to take abroad so I simplified mine a little. You can check out their beautiful original idea here or pin it from here.

To make some like mine you will need:
  • white paper
  • black paper
  • scraps of white and glossy black card
  • 2 large paper doilies
  • a selection of papercrafting bits and pieces, gems, ribbon etc
Wrap your boxes, one in white paper and one in black. I only had white regular printer paper so my Nespresso box took 2 sheets to cover it.
If you are off to a traditional wedding, like we were, add details to make a traditional bride and groom as shown in the photos. But the beauty of this is that you can personalise these however you want to, so you can adapt the colour scheme, type of outfits, genders of the couple etc to suit.

The groom was pretty simple, I just cut a long thin triangle of shiny black card then added a slightly thinner triangle of white card on top. 
A teeny bowtie cut from black paper, some gem buttons and a gem flower from a broken earring finished him off.
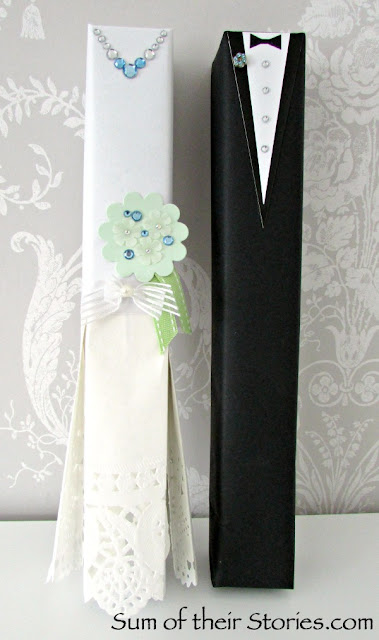
Bride and Groom gift wrap boxes
To make the doily skirt for the bride I cut 4 shapes from paper doilies, 3 times the width of the box and half the length. My doilies were dinner plate size and I was able to get 2 from each.
I folded them over the box, then creased the sides back on themselves. The photos show this better than I can explain.
Then I just glued them onto each side of the box and added a bit of ribbon and a bow to cover the join. 
A few gems round the neck make a necklace and I added a few little flowers and gems to a punched shape with more ribbon to make the bouquet.
Bride and Groom gift wrap boxes
As we had to travel with them, we just made sure the groom was on the right so the bouquet overlapped onto that box and didn't get damaged. We put them head first (so the doily skirt didn't get creased) into a wine gift bag to keep them together and so we could add a gift tag as I didn't know where to write on them.
Wedding gift wrap Nespresso boxes
The couple loved them, they are big coffee drinkers and get a lot of use from their Nespresso machine.
I just want to apologise for the poor quality of these photos, I made them a little bit last minute and once you've given someone a gift you can't have it back for a second photo shoot!
It has just occurred to me that you could always fill tall thin boxes with something else, making this idea a little less niche "for Nespresso machine owners only" and a little more suitable for anyone.
I'll be sharing over at these Link Parties
You might also be interested in:
Button Envelope
Button Envelope
Crochet Flower Gift Wrap
Personalised Wedding Picture
Papercut Quotes
Papercut quotes

read more