Friday, 30 September 2016

Clutch bag recycled from an old knit

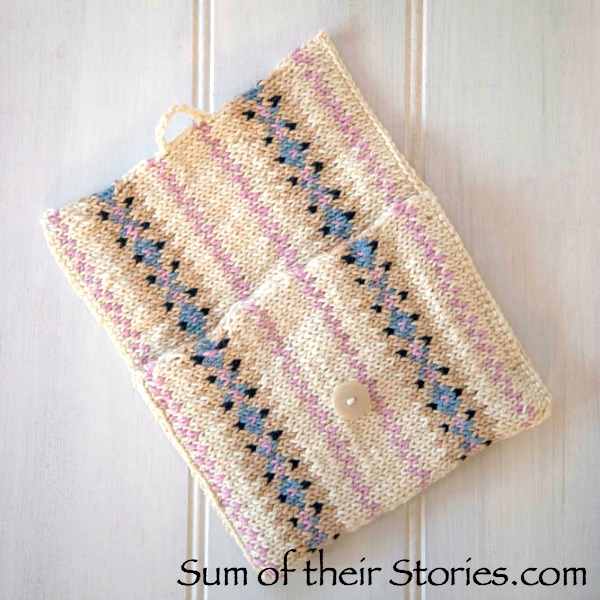
Saving an old piece of knitting and turning it into a little clutch was a bit of a fiddle but I think, well worth it.
Clutch recycled from an old knit
Photo Credit Carla Nyanyo
Today is a tutorial of sorts with a bit of a personal story attached. It's not a tutorial you could follow exactly as you are very unlikely to have exactly the same sort of knit that you want to recycle but hopefully you might be able to follow the steps and improvise to suit what you have.
I'd had this beautiful piece of hand knit for ages.
It was one of the things I had kept from my Mum's house when we cleared her house after she passed away.
I remember this project well, the pattern is from a book of mine that mum had borrowed, Great Knits for Kids by Debbie Bliss. It was going to be a cardigan for one of her granddaughters, my niece and it's a toddler size. Said niece is now 18 so this was made a LONG time ago. The yarn is a beautiful soft cotton, but no ball bands remain so I've no idea exactly what it is. I think it just got too difficult for mum to keep the Fair Isle pattern and do the decreases so it just got buried at the bottom of her knitting bag as an embarrassment/annoyance. When I found it I just couldn't throw it away but it took a while to decide what I could do with it. Not enough yarn remained to try to finish it and I knit to a different tension than my mum had anyway.

The piece measured approx 70cm (27") by 18cm (7") with just a little extra bit which I think would be one front. The cardigan pattern is one where the main bit is worked all in one and then it splits at the arm holes, that's why it's such a long thin piece.

To form it into a rectangle I undid the little extra bit and a couple more rows so I had a nice even row of loops.
Then chopped the moss stitch border from the bottom...

...and unpicked all the bitty bits to end up with another nice row of loops on the other long side.

So at this point I have a long thin piece of knitting that's all loops along both long edges.
I folded it in half, wrong sides together, so the long sides were basically doubled up. Then, starting from the unfolded edge, I crocheted the loops together using UK double crochet, that's single crochet in US terms. Hopefully the photos show it better than I can explain.
crocheting knit together
I had to be really careful not to pull the knit or it would unravel but other than that this was really simple. I then repeated along the other long side forming a long thin 'bag'.
Next I joined the open short sides together, closing the 'bag" using a simple slip stitch.
At this point I had a piece of knit, double sided, joined all the way round that was approx 35cm (14") x 20cm (8') and it seems I stopped taking photos at this point. I think you can work out from the finished photos how this bit went.
I folded one short edge up by just over 1/3 and then stitched up both side seams. 
Clutch bag recycled from an old knit
Photo Credit Carla Nyanyo
I added a button and a loop closure and that was it. The piece of precious knit was saved. Phew! I now confess as I chopped into the knitting with my scissors early on I did hope I was doing the right thing!
Clutch bag recycled from an old knit
Photo Credit Carla Nyanyo
I'm calling it a clutch, it is pretty small, so maybe more of a pouch. Anyway whatever it is I am happy that this little bit of knitting is no longer sitting in a paper bag. I'm sure mum would have been pleased all the hard work she did wasn't wasted either, I know the fact she gave up on it had frustrated her.

Just to finish the story, I gave this clutch/pouch to my niece, the same person the toddler cardigan had been intended for in the beginning. I think mum would have been really pleased about that.

As I said at the beginning this is a very specific tale of saving a specific piece of knitting but I think the idea of fashioning a bit of lovely knitting into something else is probably transferrable. Do you have any old knits that you could imagine saving in a similar way?
You might also be interested in:
Harry Potter Scarf Pattern
12 alternative uses for novelty yarns
Crochet Flower Garland
Doctor Who Scarf Bracelets
I'll be linking up at these great link parties

read more

Friday, 23 September 2016

Amigurumi Owl

What a fun way to use up left over scraps of yarn. If you know basic crochet stitches you can make a super cute amigurumi owl! 
Amigurumi crocheted owl

Back in June I shared my Owl Post, a collection of 18 different owl crafts by lots of very talented bloggers from all over the world.
I thought the amigurumi owl from Kristi Tullus was just so sweet and I finally got round to giving her pattern a go.
It was pretty simple to follow, Kristi's pattern is in US crochet terms so that's just something to watch if you are used to UK terminology.
I confess, I got a little lost with my increases on the main owl body, mainly because I was watching some very exciting TV at the time, so in the end I just winged it and aimed for something with the right sort of shape, using the number of stitches at the end of each row as a guide. Looking at the photos I think my owl maybe just a tiny bit taller than she is supposed to be.
Amigurumi crocheted owl

My little amigurumi owl is made from left overs from the crochet flower garland and gift wrapping from earlier this summer. I also used a little bit of the orange from the heart sachet back in June.

The yarn is DMC Natura Just Cotton Medium and I used a 3mm crochet hook for the owl. I also substituted the safety eye Kristi used for her owl for a small black button (just using what I have) but then I'm not giving this owl to a small child. If you were, then obviously the safety eye is a better choice.
Amigurumi crocheted owl
I find amigurumi is a bit more difficult than regular crochet, the stitches are simple but it's just smaller and tighter so a bit more fiddly. As I'm making something I'm thinking "never again" but then the results are just so darn cute that after a short break I am tempted to have another go! 
If you are tempted to have a go at this sweet little owl then pop on over to get the pattern here (and Kristi Tullus has lots more patterns both free and to buy on her site as well as some tutorials on how to crochet too so it's well worth a look around)
You might also be interested in:
Rainbow Heart Garland
12 Ideas for Novelty Yarns
12 ideas for novelty yarns
Mini Minion, Tiny Ted and Beautiful Bows
Grey and Bright Crochet Flowers
I'll be linking up at these great link parties

read more

Sunday, 18 September 2016

Crochet Flower Garland

Flowers and crochet, that magic combination again.
crocheted flower garland
Back in August I shared the gift wrap using crocheted flowers that I'd done for a wedding present for one of the weddings in our "Summer of Weddings" 
crochet flower gift wrap
Using the flowers for the gift wrap was a slight detour project as I was actually working on this flower garland from the lovely Anne Marie's HaakBlog and now finally I have found my way back to that and actually finished it.

These flowers are so quick and easy to make and best of all Annemarie has done photos for each step so you can see what you are aiming for, I love that!
crocheted flower garland
Anne Marie's site is in Dutch with an English translation, reading it again it appears she uses US terminology in her English translation so on reflection I made all my flowers with the wrong stitch * I used UK trebles instead of US trebles (in the UK we call them double trebles) The flowers are pretty so I'm not too bothered about that, I guess they would just be a little bit bigger if I had read all the instructions properly before I got stuck in!
  • My yarn is DMC's Natura Just cotton, medium

The orange was a gift from DMC when I went to the CHSI stitches show back in February. I used it for the flower on the Crochet Heart Sachet I made too & I've still got quite a bit left.
  • I used a 4mm crochet hook
  • My flowers have come out 5.5cm in diameter, that's just over 2" (but bear in mind I did use a smaller stitch by mistake see above*)
I made 4 flowers in each of 5 colours, so I had 20 altogether.
To join them AnneMarie used a very simple method and just threaded them onto yarn as you can see in her photo below.
Mine are on a chain, I just thought the whole thing would be more substantial this way, this is going to be a gift and I think this way will be easier for the recipient.
I chained about 30cm (12") then started joining the flowers.
crocheted flower garland
I just slip stitched through a stitch on the back of a petal, chain 2 then slip stitched the back of the next petal. I wasn't very scientific about this, hopefully this photo show what I mean.
crocheted flower garland
I did 8 chain between each flower then repeated. Once all the flowers were joined I finished with another 30cm (12") chain for hanging.
crocheted flower garland
My finished garland measures just under 2m or about 76" 
crocheted flower garland
You know what I learnt doing this? Long garlands are REALLY difficult to photograph!
crocheted flower garland
I guess I also learnt that you should check which version of crochet terminology your pattern is using before you start but as this turned out fine I'm not loosing any sleep over it!
crocheted flower garland
These lovely little flowers could become brooches or hair clips, be added to a wreath, mug cozy or scented sachet, top a birthday card .... have I tempted you into have a go? Remember the pattern is from Anne Marie's HaakBlog - Enjoy!
I'll be sharing over at these Link Parties
You might also be interested in:
Rainbow Heart Garland
12 Ideas for Novelty Yarns
12 ideas for novelty yarns
Bright and Grey Crochet Flowers
Bakers Twine Effect Crochet

read more

Wednesday, 14 September 2016

Fabric Trimmed Cardigan Refashion

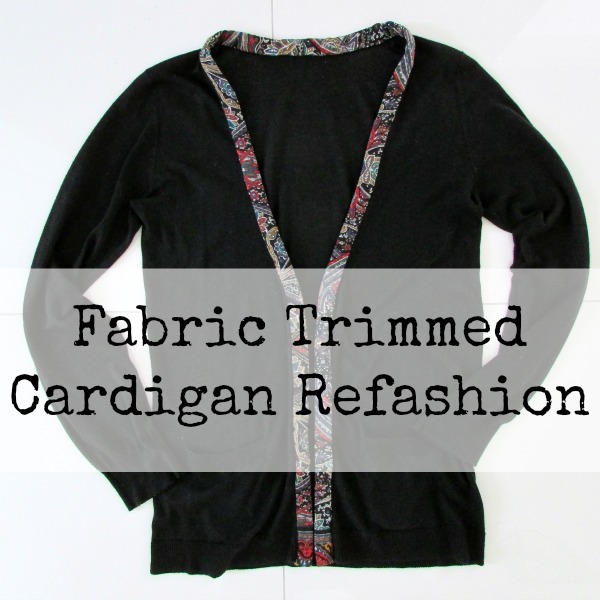
A really quick and easy way to give a plain cardigan a new look.
cardigan refashion fabric edge
This poor old plain black cardigan was a useful but boring staple of my wardrobe.
It looks a little bit grey here but that is just the light.
I saw a lovely jumper to cardigan refashion from Jo at Three Stories High back in March, a gorgeous mix of plain knit and pattered fabric edging and so I totally ripped of her idea was totally inspired by her to give my old cardie a new lease of life.
I found an old scarf in my rag bag, I used to wear this over my long woollen coat, shawl style back in the 80's (that was a thing then, honest!), it was a bit holey along one edge but the pattern is just lovely.

First I took the old buttons off the cardigan, it is a narrow fit so I never do it up anyway.

Next I cut 2 long strips of the scarf fabric from the non holey side both about 2" (5cm) wide.
I folded and pressed them in half, then half again, to make a fat bias binding.
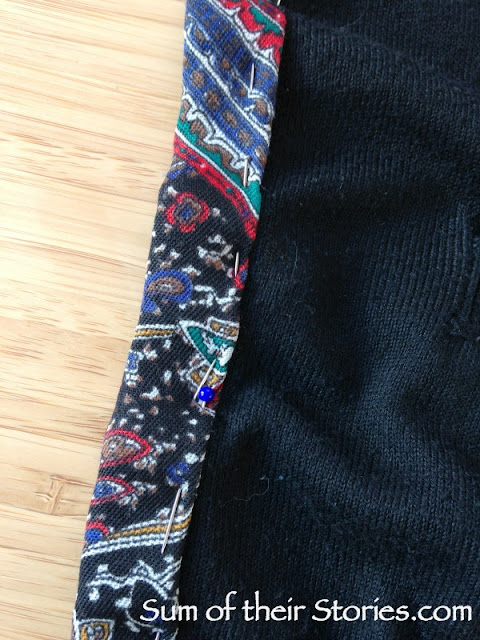
I pinned it in place over the button and button hole bands on the cardigan.
I used loads of pins as my scarf fabric is pretty floppy.
I stitched mine by hand using a fairly small slip stitch. I chose to hand stitch because my scarf fabric is so floppy and I didn't trust myself not to pull the knit edge out of shape, if you feel confident you could whizz this on the machine in no time.
Fabric trimmed cardigan refashion

Hand stitching did mean I stitched all the way round on the outside of the cardigan, then all the way round again on the inside. Twice as much stitching but I felt worth it, I feel sure I would have the front edge twisting if I had tried a short cut. 
I did this whilst watching TV and took about an hour.
I actually did this little refashion way back in the spring but by the time I was ready with photos etc the weather was warm and it seemed a bit unseasonal. There was a sneak peek of this on Instagram back in May: 
Fabric trimmed cardigan refashion
It was when I wore it for Me Made May. What I love most about my new look cardie is that it still goes with everything, the multi coloured scarf fabric means it is still a really useful wardrobe basic, just a tiny bit less boring now!
Fabric edged cardigan refashion

The weather here in the UK is always a bit unpredictable so a cardigan is an essential pretty much all year round. To be fair it's been pretty nice the last few weeks but I have a feeling cardigan weather will be with us again really soon!
Fabric trimmed cardigan refashion

You might also be interested in:
Another Lace Top Refashion
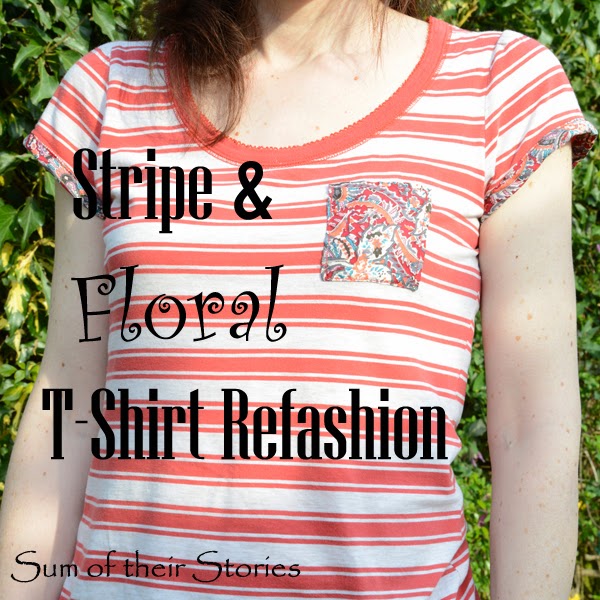
Stripe T Shirt with Floral Trim
Evening Cardigan Makeover
Evening Cardigan makeover
Too tight at the top hem fix
Too tight at the hem top fix
I'll be linking up to all these great link parties, why not go and have a look!

read more