It's really easy to collage over an old canvas and make a completely new piece of art work with just some pretty papers, glue, paint and a fine liner pen.
Here is a bit of a follow up post, sharing something else I've made with the contents of my Craft What Nots box. You can read full details about the subscription boxes and see the other things I've made from it here.
The floral papers I had were just SO pretty I thought they would make a lovely flower collage.
I started with this canvas I bought for 25p in a discount shop a few months ago. The plastic wrap had broken and somehow pen has got all over the corner so they were marked right down. I actually bought several so I guess you may see them again sometime.
If you think this is nicer than my flower collage please keep it to yourself! I started by painting over the bunny, puppy and pen marks. I just used white emulsion as that's what we had. This is what happened:
The pen just showed up more! I ended up giving it 3 coats and then gave up, you'll see in a minute.
Whilst I was waiting for the coats to dry on the canvas I cut out some petals from the floral paper. I just drew a template on scrap paper of a simple petal shape and then cut out 8 petals.
I used my 2" circle punch to make a flower centre too.
To give the petal shape some emphasis I doodled a wiggly border with a black sharpie.
Round once, then round again. The trick is to be decisive and not mess about too much. Practice on scrap paper first if you are not confident.
I also punched out a load of hearts and flowers to go with the die cuts from the Crafty What Nots box.
When the canvas was covered-ish and dry I started sticking a few flowers and hearts down with Mod Podge.
I had an idea of where the flower was going to go so I concentrated on the edges, the bits where I knew the petals wouldn't be so much. I also wanted to make sure the pen marks and cute little animals were all covered. (Can you see them still peeking through faintly!)
I wanted some of the flowers to go over the edges onto the sides of the canvas. I found it easier to crease these before applying them as the thicker papers made them a little bit resistant to my idea. They needed plenty of glue and some encouragement.
Feeling a bit inspired by the fact that the white paint had not covered very well, I thought I would create some layers by painting over this lot with just one more layer of white. I was hoping the floral paper would still show through a little, like the bunny/puppy who were refusing to go quietly. So I roughly painted another layer over the whole thing.
It balanced nicely on a jam jar when painted, so the edges didn't stick to the scrap card I put down.
I everso slightly panicked when it was wet....
but as it dried it faded a bit and all was well.
Next I Mod Podged the petals in place and added some more little flowers, hearts etc.
Some I poked under the petals before they stuck down firmly.
I just kept going until I thought there was enough.
Clearly at this point I decided it wasn't quite fussy, pretty, frilly enough so I added just a little bit more Sharpie doodle.
Just a twirl, swirl, flower, dot or heart here and there as took my fancy.
Lastly the whole thing got another coat of Mod Podge to seal.
Then it was finished - or was it?
I took one of the lovely little plywood Butterflies from the Crafty What Nots box and inked it with the blue ink pad.
I coloured the edges with a black felt pen and used the Sharpie to give it a few dotty details.
The idea was that it would add another layer and more texture to the canvas.
I don't know whether I prefer it with or without. What do you think?
You might also be interested in:
 |
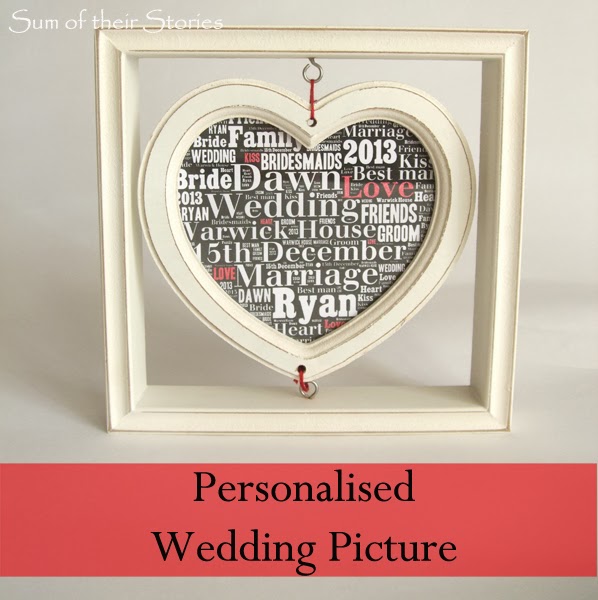
| Personalised Wedding Picture |
|
 |
| Dotty Card Tutorial |
|
 |
| Flowery Papercrafting |
|
 |
| Simple Speech Bubble Cards |
|
I'll be linking up this project at all these lovely link parties, pop over for a look at loads of projects from other blogs

Wow!!!! Stunning canvas and without a doubt better than the original! Love your use paint on the background xxxxx
ReplyDeleteThanks Jenny, you don'e prefer cute little bunny and puppies photos embellished with a little biro then? Phew!
DeleteIt looks pretty with and without!
ReplyDeleteBut for my bias for beautiful butterflies, I'd say put it on!
I do love butterflies too, and I liked how the inking effect turned out here too.
DeleteThat's 1 - 0 for the butterflies!
Lovely work, Julie! Love all about it!
ReplyDeleteHope you have a wonderful day!
Hugs from Portugal,
Ana Love Craft
www.lovecraft2012.blogspot.com
Very pretty, Julie! At first glance I thought you had sewn fabric, but now I know! So there was no need for mod podge?
ReplyDeleteIt would be lovely as a fabric piece with embroidery instead of doodles - great idea!
DeleteThis is gorgeous - you did a great job!
ReplyDeleteThanks for sharing at this week's #Pintorials
Wow what a creative fun idea. Thanks for sharing on Tuned in Thursday
ReplyDeletethis is very beautifull and so girly! first time here, stopping by from Lamberts Lately Creative Thursday
ReplyDeleteSo pretty!! Thanks for linking up!
ReplyDeleteThis looks great, I love the butterfly but prefer the canvas without. I too thought you had initially sewn it using fabric not paper - amazing!
ReplyDeleteAngela - Garden Tea Cakes and Me
I ended up giving this to my daughter with the butterfly separately, so she can decide.
DeleteI do think it would be do-able and lovely in fabric too - maybe one day!
Great look - love the idea. Can't wait to try it. Joining from Friday Features Link Party. Stop by and see my latest blog! https://awesomevacationideas.squarespace.com/blog/
ReplyDeleteThat's super cute! I wish I had the time to try crafts like that....well done!
ReplyDeleteYou did a great job and it's cool that you reused a canvas you already had. I love it. I like the light colors and the little butterfly.
ReplyDeleteHi Julie, thank you for stopping by to share this weekend on Fridays Feature Linky Party!!! So glad you did your canvas makeover turned out darling and I would imagine much cuter in person. Im following you on FB, Pinterest, Twitter and Bloglovin.
ReplyDeleteHope to see you again soon, have a great weekend, Karren
Such a lovely post! I'm visiting from Creative Style link up -
ReplyDeleteThanks for sharing
Angie
http://www.godsgrowinggarden.com/
Great idea! While I like your picture better than the dog and bunny, I never even considered using something like this as an art project! I'll be keeping a look-out for them from now on. Thanks!
ReplyDeleteThanks Kim, I can't take credit for the idea of reuseing an old canvas though, I saw it on pinterest (not surprisingly!)
DeleteWow, I originally thought this was done with fabric. It's really lovely and my lines are just as squiggly as yours! Lol xx
ReplyDeleteSo lovely and reminds me to think of making some wall art when I can't find exactly what I want. Thanks for linking to the Craftastic Monday party at Sew Can Do!
ReplyDeleteI think you did a great job! Thanks for the idea to paint over the scrapbook paper!
ReplyDeleteSo very pretty!!!
ReplyDeleteSo pretty! I love all the layers and your wiggly borders. Thanks so much for linking up at the Make it Monday Party! Hope to see you again next week.
ReplyDeleteThis is adorable! I love making my own canvas artwork for my home. Thanks for sharing this with Hump Day Happenings.
ReplyDeleteThanks Jenna, It is nice to have something unique and making your ouw aty doesn't have to be especially complicated. I have a pinterest board where I collect other peoples fab ideas too.
DeleteWow, that is so lovely! Very creative.
ReplyDeleteFound your blog through today's #SITSBlogging link-up. Glad that I did. Have a wonderful rest of the week! ;)
Thank you Michelle, I'm glad you did too!
DeleteA fabulous creation, and a huge improvement on the original!
ReplyDeleteThanks Lucy, it was only as I was putting this post together I did think - what if people actually prefer the original!!!
DeleteSo fun! Thanks so much for the great tutorial and linking up to The Wednesday Roundup!
ReplyDeleteWish I could find some deals on canvas like that! The puppy and bunny are adorable but I like your version better. The texture is awesome. Thanks for sharing on Merry Monday.
ReplyDeleteI just fell over then in a shop and thought it would be rude not to take them home - I actually got 3, all damaged like this, I just need to decide what I'm going to do with the other 2.
DeleteI love it. I prefer it without the butterfly, but maybe that's just me.
ReplyDeleteJust for future reference, the stain block paint you get in DIY shops is great for stopping pen marks coming through (tried and tested!).
Great tip Wendy, thanks, I'll have to remember that.
DeleteHi Julie, your mixed media project is fantastic. It's featured at the Merry Monday Link Party. http://mylittleshopoftreasures.blogspot.ca/2014/11/merry-monday-link-party-27.html#.VFeQzPnF9FI
ReplyDeleteThank you so much Darlene, I'll pop over right now to have a look,
DeleteGreat canvas! I love the added white layer over your first set of flowers. It adds so much depth!
ReplyDeleteIt's beautiful! What a fun way to salvage a damaged canvas. I like it better without the butterfly. I think the butterfly and large flower compete for attention when they're together. The flower is so pretty - it should be the star!
ReplyDeleteThanks for sharing. Happy Sharefest! I hope you have a lovely weekend.