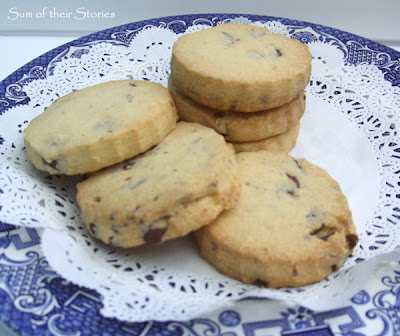
These biscuits are from my Nan, Pearl's favourite recipe. She called them Shortbread but I've seen traditional shortbread recipes and I don't think you make it like this!
When we were little, she and my Grandad would baby sit for us sometimes and she would always bring a tin full of these with her.
It's a really good basic recipe that you can add pretty much whatever you like to. On the day I made this batch I added Chocolate chips but you can have them plain, ice them, cover them with chocolate, add dried fruit, add dried fruit and chocolate - whatever takes your fancy!
So here's the recipe, and loads of photos so if you've not cooked much before you know what it should look like as you go along! You can view a "no frills" version for printing here.
Pearl's "Shortbread" Biscuits
Makes about 20 - 25 depending on how big you make them
8oz, 1 cup margarine (soft spreading marg or block baking marg) or butter
4oz, 3/4 cup icing sugar
8oz, 2 cups, self raising flour
4oz, 3/4 cup corn flour
Put the oven on to 180c, 350f, gas 4
Put your margarine/butter in a bowl and add the sugar.
Cream it by beating with either a wooden spoon, a hand whisk(as I have here) or a lovely food mixer if you have one.
You want it to look like this.
Add both types of flour
and give it a stir with a knife or spoon until it looks like this
If you want to add other ingredients like chocolate chips or raisins etc now is the time.
This next bit is a little bit messy, you have to squeeze the mixture together so just get stuck in, you can wash your hands afterwards!
Just keep squeezing handfuls until it starts to come together, stop when it looks like this (should take a couple of minutes)
Sprinkle a little flour on your worktop then just tip the mixture out
Knead lightly, a sort of gently rolling and pressing until it forms a ball
Give it a little pat (I don't know why but I HAVE to give it a pat)
From this point on the photos are of the chocolate chip version, it makes no difference to what you do. (I just fancied chocolate chip that day and had forgotten to add them at the proper place 5 photos back, so I just added them here and kneaded them in. See, this is a very forgiving recipe!)
Sprinkle a bit more flour on the workshop, you don't want it to stick, then roll out to about 1cm thick
You can do thicker or thinner if you want; thicker will take a little longer to cook, thinner will be a little bit quicker, its up to you (you are the boss of these biscuits, you decide)
Then cut them into whatever biscuit shapes you want. (more decisions!) I like to use a round fluted cutter because that's what my nan did, but over the years we have cut them into rectangle (just use a knife), made them fancy shapes with cookie cutters, all sorts really.
Pop them onto a greased baking tray and bake for about 15 minutes. They will smell lovely and look like this when they are ready
Just starting to brown round the edges but not too much
Take them out of the oven and leave them for just a minute or so on the baking tray to firm up a bit before moving them onto a cooling rack
You can keep them in a tin for 4 - 5 days I would think, its hard to say as they never last more than a day or 2 in our house so I can't be sure.
I've never tried freezing them, so no idea there either I'm afraid!
You could easily make double and keep half in the fridge for at least a week, just roll and bake them as you want them - uuumm lovely!
Perfect with a nice cup of tea!
You might also be interested in:
 |
| Chocolate Fudge Dip |
|
 |
| Easy Peasy Banana Muffins |
|
 |
| Easy Cake Decorating Ideas |
|
 |
| School Reunion Cake Toppers |
|
I'll be linking up at all these great link parties, check them out!


These look so good! I am pinning this recipe!
ReplyDeleteCathy
www.threekidsandafish.com
Thanks Cathy, it's definitely worth trying out, very easy, very versatile, very tasty!
DeleteYummy! These sound fabulous. I love shortbreadish cookies. One of my favorites. And hey, how can you go wrong with adding chocolate to pretty much anything.
ReplyDeleteI agree, Chocolate biscuit + a nice cup of tea = bliss. In the past the kids have even spread these biscuits with melted chocolate - that was pretty good too!
DeleteOh these look so good! Thank you for sharing your recipe. I definitely will be making a batch of these!
ReplyDeleteThese look so good! Thank you for sharing the recipe. I definitely will be making these.
ReplyDeleteOh they DO look good! If I didn't have Christmas weight to shift I'd be heading to the kitchen right now!
ReplyDeleteReally useful to have the photos to know how it should look at every stage! x
ReplyDeleteI always like cook books with photos, so I know what I aiming for! It's quite common that I get half way through something and think "It this right? looks a bit dry, maybe I'll add more liquid" (like I know better than the recipe!) A photo or two helps you know you are on the right track.
DeleteThey look lovely,
ReplyDeleteThey look delicious, particularly with the added chocolate chips, might have to try out this recipe with my little monster too - she loves to help and get messy too.
ReplyDeleteI've had my kids making these ever since they were tiny, it's pretty easy and because you can add whatever you like to the mix they have come up with all sorts of combinations over the years. Lots of people who know us have had a box of these as a present!
DeleteYum! These look good! Really good! I love shortbread! Thank you for linking up at the Blog Strut Blog Hop! I can't wait to see what you link up next week!
ReplyDeleteHave a terrific weekend!
Cathy
APeekIntoMyParadise.com
#blogstrutbloghop
Love Legacy Recipes! Your Nan would be proud! Great Post! Thanks for sharing them with us!
ReplyDeleteThanks Laurie, My nan was a great cook, messy but everything always tasted so good when she made it. I love using her recipes.
Delete