Monday, 14 September 2015

What to write in a card when you are stuck for words

My mother is law is brilliant with words, she always puts something beautiful and personal in cards. For our first anniversary she wrote an amazing letter to us where she went through all the things that we had done together as a family during the year. Me, I'm more of a "Best Wishes" or "lots of love" kind of gal! 
Today I'm welcoming a guest here at Sum of their Stories, Lesley from Decorque Cards who has some ideas for you if you are more like me and less like my mother in law!

What to Write in a Card When You Can't Find the Words


If you've ever opened up a blank card and been stumped for the right words, you’re not alone. We bet almost all of us have been there at least once, pen poised and at a complete loss for inspiration. Well, no more! We've put together some ideas for some of the biggest occasions in your card and gift-giving diary. Read on…

Anniversaries - You've been married years and feel like a simple ‘I Love You’ in a well-chosen anniversary card just won’t cut it. We don’t blame you! Why not think outside the box this year and consider writing something that will spark old memories and refuel your love for one another? A bit of nostalgia is often all you need to bring back a little romance, so start by sitting down and jotting down some ideas that might make good one-liners or fun anecdotes. If you’re still struggling, how about penning a lyric or two to the track you had enjoyed first dance as a married couple to? Failing that, simply jot down a verse from his or her favourite song? Simple yet thoughtful touches like this will go a long way.

Christmas – Now, we bet it’s not often you’re stuck for words when it comes to writing Christmas cards. If you have a mountain of cards to get through – for colleagues, neighbours and friends – it can be all too tempting to simply write ‘Merry Christmas’. But think of the 100s of cards your relatives and pals receive stating these simple words. True, it is what it is, but why not put a little thought into it as the festive season approaches? Try something slightly different like: ‘In the true spirit of the season, wishing you peace and joy’, or even ‘We hope your holidays are happy days’.

If someone’s recently lost a family member, however, it’s important to tread carefully. A simple ‘Our thoughts are with you this Christmas’ is appropriate, but think about following up a few days later with a friendly phone call. The festive season is a difficult time for those who are without their loved ones and a kind gesture like a thoughtful note or a quick call will let people though they’re in your thoughts.

Congratulations – If someone’s done a great job at something, let them know! It’s surprising how many good deeds or achievements go unnoticed, so think about treating them to a gorgeous handmade card containing a lovely note. A blank card is ideal, as it’ll give you plenty of space to get down everything you want to say. So often, a card ‘steals’ our very thoughts when it puts words into your mouth. After all, it can be difficult to know what else to write when the card’s verse says it for you. But again, think outside the box. Tell someone how proud you are of them, how you ‘knew they could do it’, and how you’re looking forward to celebrating their success with them soon. Instead, you could try something like ‘Kudos to you! You’ve earned this’, or ‘Just want to add my good wishes to those you’ve no doubt already received’. Don’t over think things; instead, just write as you might speak to the recipient face-to-face.

Retirement – When a colleague is leaving work, you’ll probably be asked to sign a card that inevitably lands on your desk. In this case, don’t be tempted to simply take a look at what everyone else has written; ‘All the Best’ and ‘Enjoy your retirement’ is all well and good but it’s not very original, is it? Think about how your colleague has helped you do your job and write a note of thanks referring to that. Or perhaps they’ve proved a real inspiration to you? There’s nothing wrong with saying it. So next time a card gets thrust into your hands at work, take a minute to think of something thoughtful to write.


Next time you’re stuck for the right words, simply take a look at this handy blog; we bet ‘All the best’, ‘Congratulations’ and ‘Well done’ will fast be omitted your card-writing dictionary!

Lesley makes and sells a range of Greeting Cards, visit her website Decorque Cards for more details.

read more

Wednesday, 9 September 2015

Ribbon Gift Tag / Card Topper

What do you do with little scraps of left over ribbon? I've been playing and made some gift tags and card toppers.

Some of the materials I used to make these were provided by Pandahall.com
I hate throwing away anything I think might "come in" for something and ribbon is no exception. I have a box full and try my best to keep it tidy and organised. I have my friends and work colleagues well trained and they save me those little ribbons that come on new tops once they have snipped them off, I use them mostly on cards and for making little bows. (I got very excited once about a very easy way to make tiny bows on a fork)

To make these gift tag/card toppers I used:
  • Ribbon - old and new (the wide ribbon with stars is from Pandahall.com, the rest is from my stash)
  • A greeting cut from an old greeting card
  • A little metal eyelet and eyelet setter
  • My good dressmaking scissors
 Trim the message from the old greeting card (or print or write your own on a piece of card) Don't use your good dressmaking scissors for this bit! This will decide the best lengths to trim the rest of your ribbons.
My words were 9cm (3.5") so I trimmed my ribbons just a little longer varying the lengths. If your ribbon is very fray-ee you could use some fray check liquid or a flame (BE VERY CAREFUL!) to seal the edges but I didn't. 
Punch a hole in the card message.
Cut a little hole in each ribbon towards one end - This is where you want to use your good sharp scissors - I just folded the ribbon over and snipped a tiny v shape. I tried to punch holes in the ribbon with the eyelet setter but it just didn't work for me.
Working from the front, insert the eyelet into the card then the lengths of ribbon and then use the eyelet setter to set the eyelet.

Use as a gift tag like this:
Or turn it into a card topper, I punched two holes in each card and set an eyelet in the higher hole.

I found I'd saved some printed ribbon that came with some birthday flowers (my lovely flowers did appear on instagram back in May)

I tried stamping onto ribbon which worked pretty well.

I quite like the ribbons without words too.
If you don't have an eyelet setter you could just make holes and thread thin ribbon through, or use split pins. Have fun, experiment! 
This is what I was working on the other week when I published this photo as my Silent Sunday picture, I was playing with these lovely ribbons as I thought about what I was going to make!

I've barely made a dent in my ribbon stash but now I'm thinking these might be cute in reds, greens and golds for Christmas gifts and cards. It's probably not to soon to start..... 
You might also be interested in:
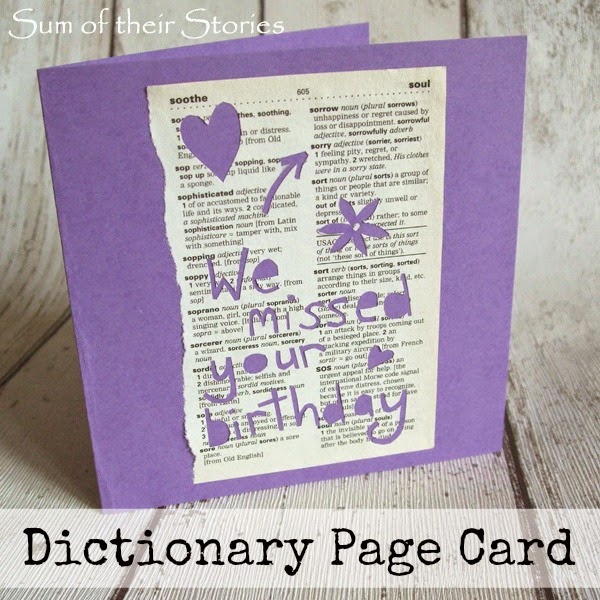
Dictionary Page Card
Circle Card Crazy
Circle card Crazy
Simple Speech Bubble Cards
Photo Earring Gift Card
I'll be linking up this project at these lovely link parties.

read more

Sunday, 6 September 2015

Sunday Photo 6th September 2015

I'm really enjoying participating in an Instagram lettering and doodle challenge this month. If you want to join in it's not too late, you can find details here 

OneDad3Girls
Sunday Snap

read more

Thursday, 3 September 2015

DIY Coasters including the fails!

I've over at The Pinning Mama today sharing a tutorial on how to make these Cut Out Coasters.

They are made from left over scraps of the pleather I used for a coat repair a little while ago. Remember this?

The cute, bright, "felt peeking out" Cut Out Coaster tutorial I'm sharing at The Pinning Mama was not my first coaster making attempt, it's been a process. This whole coaster making tale is a bit of a saga. 
Are you sitting comfortably? Then I'll begin...
If you saw my post a little while ago about the changes I've been making to our existing things to match the bedroom décor in our new house you may have seen this photo of my bedside table. 

It's very nice (and tidy!) but something very important is missing. A coaster for my cup of tea! Doh! I was using a scrappy bit of junk mail (NOT photographed!), then a really bright crocheted coaster. But I really needed to make something elegant.
The pleather I'd used for the coat repair is cream coloured so perfect for the bedroom, it's wipeable so perfect for a coaster - good so far.
I glued a piece of pleather to a piece of felt with Mod Podge, pressed it under a pile of books for a bit then let it dry thoroughly.
Next I cut out an octagonal shape using a card template (I just used a "Insert shape" option on the computer in word)

I had a perfectly serviceable shaped coaster.

I thought I could make it better, prettier, more classy. So I used a gold paint marker type pen to mark a simple jewel pattern.

I was really happy with this until I used it for my tea.
Oh dear, oh dear, oh dear! Somehow the gold paint pen never quite dried properly on the pleather. FAIL!

Not to be deterred I tried again. This time I used a gold spray paint and a doily.
Slightly better, I love how the coaster looks. BUT after a few uses I can see where the bottom of the mug lifts and smudges the paint a little. A BIT OF A FAIL!
I have still to find some thing I can paint onto this pleather with that can withstand a mug of hot tea, 'tis a quest...
What I did like though, was seeing the felt layer underneath the pleather from the side. That made me think maybe coloured felt and some sort of cut out to let the felt show through would be the way to go. 
NOT A FAIL AT ALL! HORRAY!
The bright colours don't really go in our soft neutral pallet bedroom so I will make some more with a gold felt bottom layer when I get a moment. I just couldn't resist making something with the brights, these have gone in the living room and are standing up to wear and tear very nicely. Pop over to The Pinning Mama for the full tutorial here.
I don't normally share all my fails, and they are not infrequent believe me. Everyone makes things that just don't work out sometimes, it's perfectly normal. As long as you don't stuff things up with a very expensive piece of material or equipment it's all good!
What do you do with your fails? Pop them in the rubbish bin quickly before anyone sees or leave them out to give everyone a good laugh?

read more

Wednesday, 2 September 2015

My Favourite Finds August 15

Here are some of my favourite things I've found on line during August.
My Favourite Finds August 2015

I think this bag is just gorgeous. Sarah from Everyday Bijoux has transformed a plain, ready made burlap bag by adding the most lovely bright felt flowers and trim.
On Pinterest I've saved a lot of similar (very expensive) bags and considered looking for a suitable patterned fabric to make my own, but I never thought to make my own patterned fabric! 

Colouring for Grown Ups has never been more popular and Dawn Nicole Designs has some really pretty free printables available.
I've featured Dawn's work before because it's just so darn lovely! Dawn has an instagram daily doodle and lettering challenge going too which I am joining in (some days - no way I'm going to manage every day!) if you fancy having a go at your own hand lettering and doodling.

How cute are these lemon macaroons? 

They are by Claire from The Simple Sweet Life and the lemon design is drawn on using food colouring pens. I've never tried making macaroons, people on the Great British Bake Off seem to whip up a batch in no time at all. At some point I think I must give them a try and these lemony ones are just so sweet.

read more