Showing posts with label jewellery. Show all posts

Wednesday, 11 January 2017

Marbled Clay Ring Keeper

Make a simple cone shaped ring keeper from marbled air hardening clay, with a touch of sparkle.
Marbled Clay Ring Keeper
This post contains affiliate links
If you like are like me and like to take your rings off when washing up, washing your delicates by hand or just at night when you go to bed, then you need a safe place to keep them. I've been using a little ring dish for the last few years but when I received some air hardening clay from Cass Art for their #BeInspired campaign, I thought I'd try making something new.I'd seen some ring cones in the shops a while ago and though this simple shape might be easy enough to make from clay for a beginner like me. It was! 
You can find details of the materials I was given by Cass Art here in my post about the Marbled Jewellery I made first.
To make a clay cone shaped ring keeper you will need:Clay - mine is DAS air hardening clayMarbling Mix - again mine is from DASA piece of scrap card to form a cone mouldA sharp knifeVarnish - mine is Vernidas from DASGlitter
  • Roll the scrap card into a cone and secure with tape. Ideally use card that is glossy and roll so the glossy side is inside.
  • Marble a lump of clay using the marbling mix.
  • Push the clay into the cone, really squishing it in there to get as many air pockets out as possible.
Marbled Clay Ring Keeper
  • Cut the tape and unwind the card from the clay.
  • Wet your fingers with a little water and smooth the cone, you can roll it gently as well to remove any creases and improve the shape.
  • Cut off the excess with a sharp knife making the bottom level.
  • Roll and smooth it again just to make sure you are happy with the shape.
  • Leave to dry and harden - this took about 2 days.
  • Varnish and leave to dry.
  • Apply another coat of varnish this time concentrating round the bottom of the cone, just dabbing a little varnish here and there as you go towards the point.
  • Holding the cone over a plastic container sprinkle with glitter.
  • Leave to dry again, I found it easiest to pop it in a cotton reel.
Make yourself a Marbled Clay Ring Keeper
  • Once dry, brush off any loose glitter and cover the whole cone with one last coat of varnish to seal and stop the glitter leaving a trail wherever it goes.
Make your own Marbled Clay Ring Keeper
Of course the glitter element is entirely optional. I just fancied a little sparkle. You could mask off part of the cone and spray paint a section, or real gold leaf just dabbed here and there would look fabulous. Or you could just leave the marbled effect of the clay, which is really pretty by itself.
Make your own Marbled Clay Ring Keeper
I've been using this for a few weeks now and I have to say it's actually easier that a little ring dish, you can pick your rings up in a stack and just pop them on the right fingers so quickly - I think I must be saving at least 2-3 seconds every day. At this rate I'll have an extra 15 minutes or so every year, what on earth will I do with all that extra time! 
You might also be interested in:
Special Date Coin Keyring
Cluster Drop necklace
Cluster Drop Necklace
Gold Heart Pot
Gold Heart Pot
Rings and things dishes
I'll be linking up at these great link parties,

read more

Thursday, 29 December 2016

Marbled Clay Jewellery

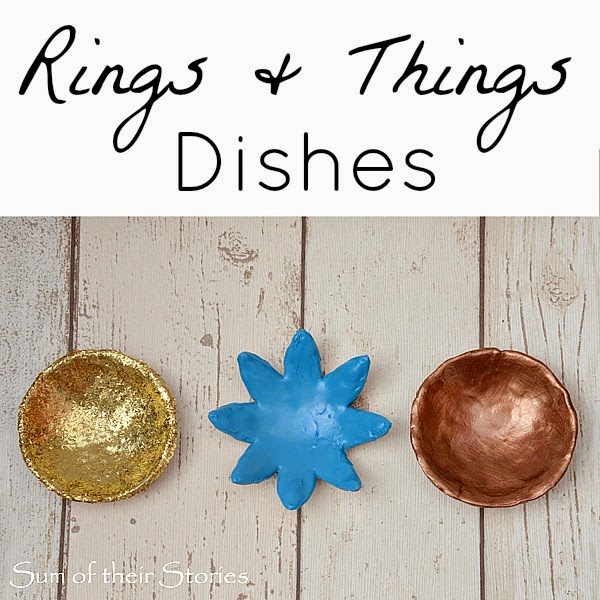
Air hardening clay makes it easy to make things from clay at home.
easy to make Marbled Jewellery with air hardening clay

This post contains affiliate links
Cass Art sent me some Air hardening clay and marbling medium to try out and review as part of their upcoming #BEINSPIRED campaign.
cass art #beinspired campaign
In the package I had pack of DAS air hardening clay, 2 packs of DAS Idea Mix marbling material in Verona Red and Sodalite Blue, a bottle of Vernidas Vitrifying Varnish and a DAS adjustable rolling pin, all in a lovely reusable Cass Art tote bag. The rolling pin has clever rubber rings so you can easily adjust the thickness of whatever you are rolling.
I've made a whole load of things from this 1kg pack of clay which I'll share over time, but I thought I'd start with this simple marbled jewellery.
Marbled Jewellery with air hardening clay
Before you begin get everything ready that you will need. This clay dries in the air, which means it starts to dry as soon as it comes out of the packet!
Have a little pot of water handy as you can damp your fingers to make the clay more workable. I wouldn't make it too wet though, I found it slippery and difficult to handle if I made it too wet.

Marbling the clay is pretty easy. You break off a big lump of the air hardening clay, knead it a little to soften it then add some smaller blobs of the marbling mix.
marbling air hardening clay
Just knead it and roll it, repeating a couple of times and a random marbled effect just appears. Don't knead and re roll too many times though or the effect starts to disappear and the clay turns a pale blue (or red, or whatever colour you are adding)
I tried out both the red and blue, you can see my photos here switch between the two.
Once your clay is marbled you are ready to begin making your jewellery shapes.
marbled clay

For the triangle pendant I rolled the clay out leaving the largest rubber ring on, that leaves the clay 5mm thick. 
easy to make Marbled Jewellery with air hardening clay
I made a paper template of a triangle 6cm(2.25'") x 6cm(2.25"), laid it on the clay and then cut round it. I tried my x-acto knife and just a regular kitchen knife. Both cut the clay just fine so either will work. I also tried just using my cutting mat or rolling out the clay on a piece of baking parchment. The baking parchment did make it easier to lift the clay shapes up, but it did make it a bit slippery to roll out so swings and roundabouts with that. Try it out, see which you prefer.
If your shapes have little rough bits like mine on the left, just wet your finger with a drop of water then smooth the clay down. You can pick the pieces up and handle them carefully, so you can smooth all the sides. Apparently you can sand this clay once it's dry but it seemed easier to me to smooth it at this stage.
Then make holes for the cord. I used a wooden kebab skewer. Poke the skewer in from the front and then again from the back, giving it a bit of a wiggle to make sure no little lumps of clay get stuck inside.

Now the difficult part, you just leave then for about 24 hours to dry and harden. (Oh and wash your knives, rolling pin, board etc now, hot soapy water works fine)
You can see here how the white clay lightens as it dries. The marbling mix colours stayed pretty much the same.
marbled blue pendant
It takes between 12 and 48 hours for everything to completely dry and harden, depending on the thickness. The mini bunting pieces dried really quickly, the fatter beads took longer. Once they are dry the pieces will feel much lighter too.

Then you can varnish to protect the clay and to give a glossy finish. The Vitrifying varnish gives an amazing high shine, it really is a glass like finish. Just brush it on one side at a time, giving it time to dry in between. I found any brush marks just smoothed themselves out so no need to fuss over them.
It's not a great photo but you can see the high gloss on the left v the matt look before varnish on the right.

marbled flattened bead pendant DIY
To make these flattened beads, just roll a lump of clay into a ball, poke your wooden kebab skewer through either in the centre or just a little above centre then flatten very lightly with the rolling pin.
making flattened marbled beads
Looking at this photo below of the finished blue pebble pendant I think I should have spent just a little longer smoothing the clay at the bottom before I left it to dry and harden. It's a little bit too creasy for my liking, although in nature pebbles to have cracks and crevices in them. Maybe subliminally I was going for a natural effect!
easy to make Marbled Jewellery with air hardening clay

This little bunting necklace was made in the same way as the triangle pendants but on a much smaller scale.
clay bunting necklace
The clay was rolled out to 3.5mm (the middle rubber ring on the rolling pin) and much smaller triangles cut out. I tried mixing a little of my marbled mix into a fresh lump of the red Idea Mix to give a reversed marble effect for some of the triangles.
The little holes for the jump rings I made with cocktail sticks.
Originally I thought I would join each piece of bunting with a single oval jump ring but they just didn't fit.

You can see what I mean on this page from my little note book (where I make notes and sketch ideas that may or may not ever happen) 
ideas note book
I ended up adding a little round 7mm jump ring to each side of the bunting triangles then joined them up with another jump ring.

This way the triangles lie flat, if I'd joined the triangles directly to one another the whole thing would twist.

easy to make Marbled Jewellery with air hardening clay
Part of Cass Art's #BEINSPIRED campaign is to share where inspiration comes from. Normally for me it's Pinterest, magazines, books, TV, looking out of the window..... anything really. With this marbled clay I originally set off thinking I was going to create clay pebbles to turn into beads. As the marbling effect starts to appear in the lump of clay it does feel like you are holding a large, cold, slightly wet pebble. But as I was experimenting I thought it would be fun to try geometric shapes, to contrast completely with the natural stone effect of the marbling. Triangles are such a simple shape to begin, but I would like to try the hexagon, or maybe the triangle split into 3 from my note book when I have time. 
easy to make Marbled Jewellery with air hardening clay
Have you ever tried using air hardening clay? It was much simpler to work with that I was expecting and the glossy varnish gives the pieces a lovely expensive finish. I've really enjoyed playing with it and have quite a few more projects to share with you later on.
You might also be interested in:
3 Pink Bracelets
3 Pink Bracelets
Cluster Drop necklace
Cluster Drop Necklace
Easy Bead Necklace
Easy Bead necklace
Fabric Twine Bracelet
I'll be linking up at these great link parties,

read more

Friday, 8 July 2016

Easy Bead Necklace

A super easy to make bead necklace. Honestly it takes longer to get everything out and then put it away afterwards than it does to actually make this necklace!
Easy to make bead necklace

I was inspired when I saw this lovely necklace from Pastels and Macaroons a few weeks ago.
It's just so pretty! This one is wooden beads painted with nail varnish but seeing it made me remember some fairly large beads in my bead box from various old broken bracelets and bag charms.
beads
I can be a bit of a hoarder someone who likes to reuse things, so it's nice when a plan comes together and I am able to make something new from something old. 
To make my necklace I used just 7 large beads and some waxed thread. 
waxed thread

I've had this waxed thread for years, I bought it originally to rethread a seaglass necklace I had which had broken. I really like using waxed thread for jewellery making as it is quite substantial, and when you tie a knot in it, the knot stay, none if that springing undone like you can get with elastics.

I cut a length of the waxed thread long enough to go over my head plus a bit more for the knot, so it was 28" (72cm) in total. Check yours is long enough, making sure you allow a few inches for the knot and ends before you cut!
I threaded on some of my favourite beads
Easy to make bead necklace
then tied the thread in a knot.
simpele knot for bead necklace
Done!
Easy to make bead necklace

You can make yours longer of course, but if you want it shorter you will need to add some sort of fastening, rather then knotting it.
Easy to make bead necklace
This is how low mine hangs to give you an idea, and it can slip off my head without pulling my ears off! It goes rather nicely with my new Summery Top made from an old Men's Shirt which you can find more about here.

Incidentally, with normal use, the waxed thread last of ages before it snaps or wears thin. My sea glass necklace snapped just last week and I've got to remake it, but I've worn it 4 or 5 times a month for at least 5 years so I would say it's pretty tough stuff.

If you don't already have a stash of beads saved from old broken jewellery (I understand not everyone keeps everything like me) then a charity shop or thrift store might be a great place to pick up some for next to nothing.
Or Amazon in the UK have some similar products to those I used which you can find through these affiliate links:

Do you have any old beads or broken jewellery lying at the bottom of your jewellery box just waiting to be made into something new?
You might also be interested in:
Marbled Clay Jewellery
Cluster Drop necklace
Cluster Drop Necklace
Old Bracelet to New Statement Necklace
Old bracelet to new statement necklace
Fabric Twine Bracelet
I'll be linking up at these great link parties,

read more